Mazda CX-5 Service & Repair Manual: Liftgate Latch And Lock Actuator Removal/Installation
1. Disconnect the negative battery cable..
2. Remove the following parts:
a. Liftgate upper trim.
b. Liftgate side trim.
c. Liftgate lower trim.
3. Disconnect the connector.
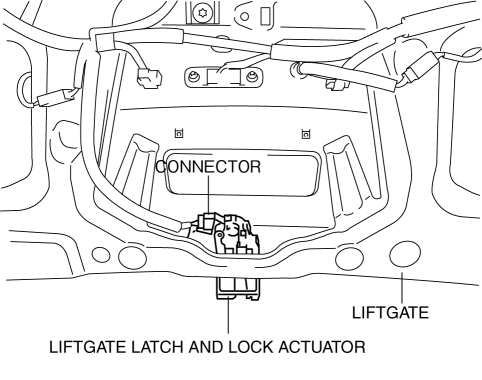
4. Remove the bolts.
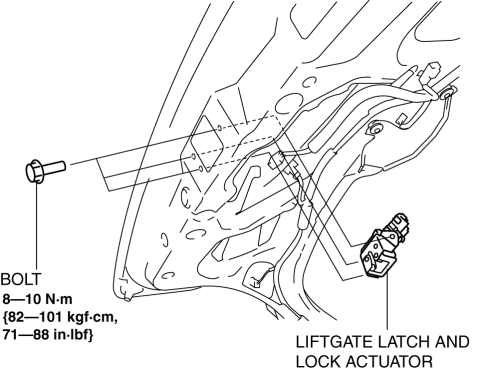
5. Remove the liftgate latch and lock actuator from the liftgate.
6. Install in the reverse order of removal.
 Liftgate Latch And Lock Actuator Inspection
The following actuator and switch are integrated with the liftgate latch
and lock actuator.
From the actuator/switch name and operation in the following table, select
the actua ...
 Liftgate Latch Switch
Purpose, Function
The switch turns on/off in conjunction with the rotation of the latch lever,
and it detects the open/closed condition of the liftgate by the voltage value
which is chang ...
Other materials:
Instrument Cluster Operation Record
Purpose
The instrument cluster operation record stores the record of the illumination
or flashing of the warning light.
Function
The operation record is stored by the instrument cluster and displayed using
the Mazda Modular Diagnostic System (M-MDS).
The instrument ...
Rear Stabilizer Removal/Installation [2 Wd]
WARNING:
Verify that the rear crossmember is securely supported by a jack. If the
rear crossmember falls off, it can cause serious injury or death, and damage
to the vehicle.
CAUTION:
Performing the following procedures without first removing the rear ABS wheel-spee ...
Audio Unit (With Color LCD)
NOTE:
“iPod” is a registered trademark of Apple Inc. in the United States and other
countries.
Purpose
The audio unit controls the CD, radio, exterior input devices (AUX/USB/iPod)
and the display.
Function
Records the following items which the user has set ...
