Mazda CX-5 Service & Repair Manual: Heater Hose Removal/Installation
With Water Temperature Sensor
1. Remove the battery..
2. Drain the engine coolant..
3. Remove the insulator.
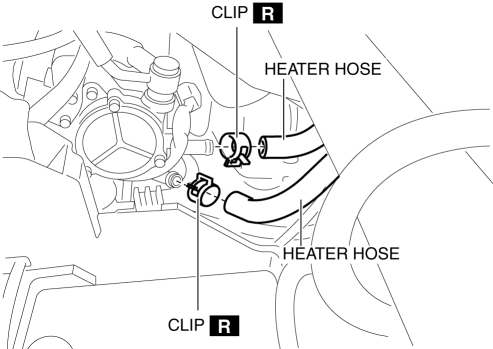
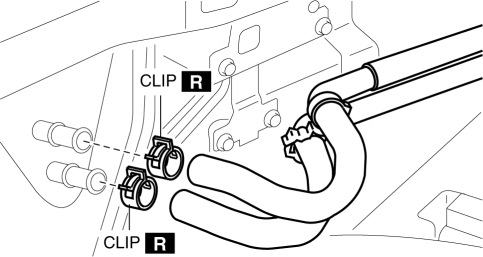
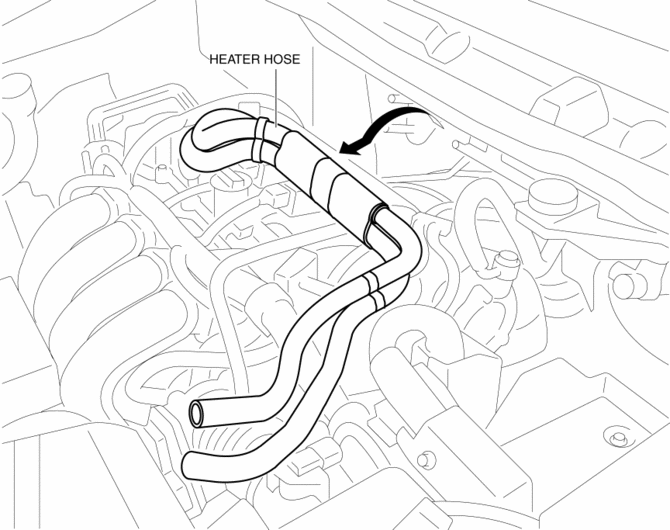
4. Remove the clips and remove the heater hose.

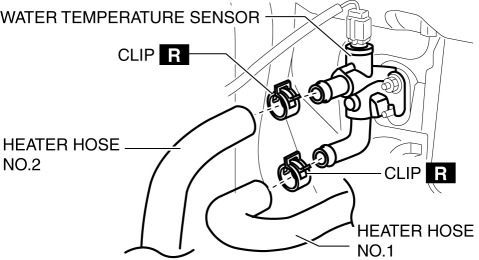
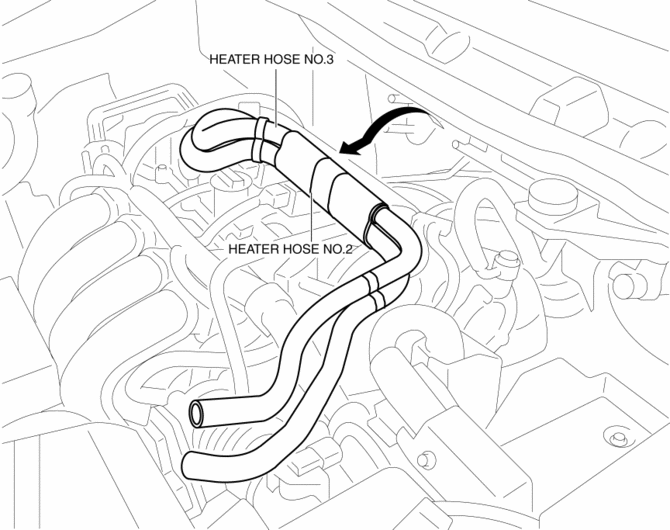
5. Remove the heater hose.
6. Install in the reverse order of the removal.
7. Inspect for engine coolant leakage..
Without Water Temperature Sensor
1. Remove the battery..
2. Drain the engine coolant..
3. Remove the insulator.
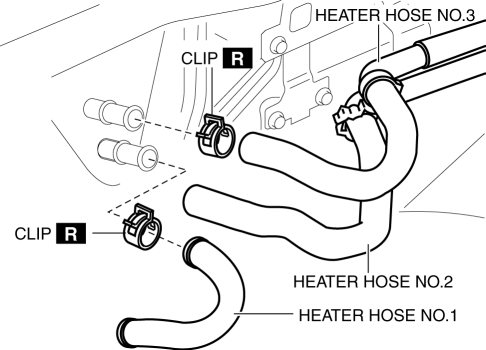
4. Remove the clips and remove the heater hose.
5. Install in the reverse order of the removal.
6. Inspect for engine coolant leakage..
 Heater Core Inspection
1. Inspect the heater core for damage, cracks, and water leakage.
If there is any malfunction, replace the heater core.
2. Visually inspect the fins for bending.
If there is any ...
 Rear Heat Duct Removal/Installation
1. Disconnect the negative battery cable..
2. Remove the following parts:
a. Decoration panel.
b. Shift lever knob (MTX).
c. Front console box.
d. Shift panel.
e. Upper panel.
f. Rear co ...
Other materials:
Air Intake Actuator Inspection [Full Auto Air Conditioner]
1. Connect battery positive voltage to air intake actuator terminal B (or C),
connect terminal C (or B) to ground, and then verify that the air intake actuator
operates as shown in the table.
If the operation condition is not normal, replace the air intake actuator.
...
Knee Bolster Removal/Installation
1. Disconnect the negative battery cable..
2. Remove the following parts:
a. Driver-side front scuff plate.
b. Driver-side front side trim.
c. Switch panel.
d. Decoration panel.
e. Shift lever knob (MTX).
f. Front console box.
g. Shift panel.
h. Upper panel.
i. Rear console.
j. ...
Climate Control Unit Disassembly/Assembly [Manual Air Conditioner]
1. Disassemble in the order indicated in the figure.
1
Dial
2
Airflow mode wire
(See Wire Removal Note.)
(See Wire Installation Note.)
3
Air mix wire
(See Wire Removal Note.)
(See Wire Installation Note ...
