Mazda CX-5 Service & Repair Manual: Headlight High Beam Indicator Light
Purpose
-
Notifies the user that the headlights (HI) are illuminated.
Function
-
Illuminates when the headlight (HI) or parking illumination conditions are met.
Construction
-
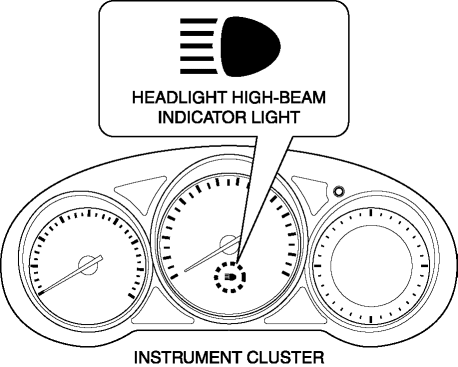
Displayed in the instrument cluster.
Operation
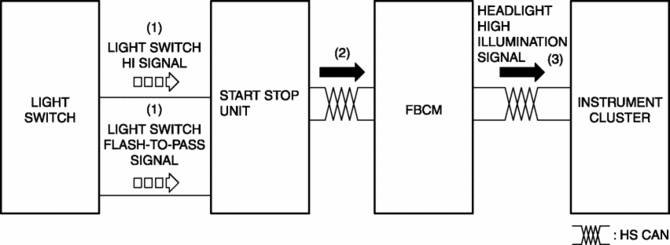
1. When the light switch is operated to the HI or parking position, a light switch HI or parking signal is input to the start stop unit.
2. The start stop unit sends the light switch HI or parking signal to the front body control module (FBCM).
3. The front body control module (FBCM) sends the light switch HI signal to the instrument cluster as a headlight HI illumination signal.
4. When the instrument cluster receives the headlight HI illumination signal, it illuminates the headlight high-beam indicator light.
Fail-safe
-
Function not equipped.
 Gear Position Indicator [Fw6 A EL, Fw6 Ax EL]
Purpose/Function
The gear position indicator illuminates while under manual shift control
and displays the gear number while driving.
Construction
The gear position indicator is ...
 Key Warning Light (Red)/Key Indicator Light (Green)
Purpose
KEY warning light (red)
The KEY warning indicator light (red) notifies the user that the engine cannot
be started, the remote transmitter is outside of the vehicle, or that there
...
Other materials:
Camshaft Position (CMP) Sensor Inspection
Intake CMP Sensor
Visual inspection
CAUTION:
When replacing the CMP sensor, make sure there is no foreign material on
it such as metal shavings. If it is installed with foreign material, the sensor
output signal will malfunction resulting from fluctuation in magnetic flux and
caus ...
Manifold Absolute Pressure (Map) Sensor
Purpose/Function
Detects the intake air pressure introduced into the cylinder as basic information
for mainly determining the fuel injection amount.
Detects the intake air pressure introduced into the cylinder and inputs it
to the PCM as an intake air pressure signal.
Cons ...
Refrigerant Pressure Sensor Inspection [Full Auto Air Conditioner]
1. Install the manifold gauge.
2. Verify the high-pressure side reading of the manifold gauge.
3. Measure the terminal voltage at PCM terminal 2BB, 2AX and 2AJ
4. Using the graph below, measure and verify the terminal voltages at 2AX.
5. Follow the PCM inspection when measuring the other te ...
