Mazda CX-5 Service & Repair Manual: Front Door Speaker Removal/Installation
Without Bose®
NOTE:
-
If the procedure is performed while holding the front door speaker cone, it could deform the cone causing a malfunction. Therefore, perform the procedure while holding any part other than the cone.
1. Disconnect the negative battery cable..
2. Remove the following parts:
a. Inner garnish.
b. Front door trim.
3. Disconnect the connector.

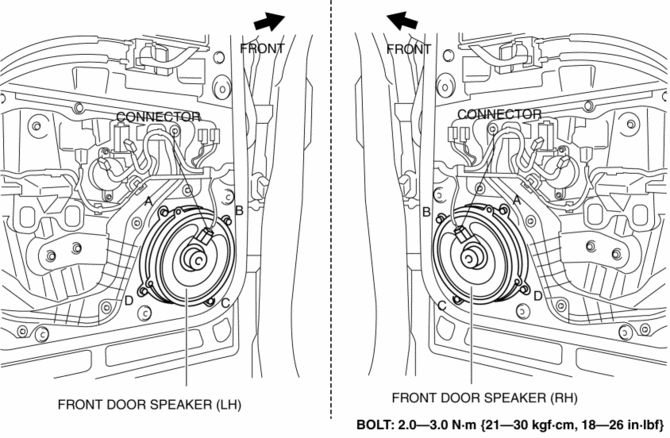
4. Remove the bolts in alphabetical order.
5. Pull the front door speaker in the direction of the arrow shown in the figure and remove it while detaching the pins.
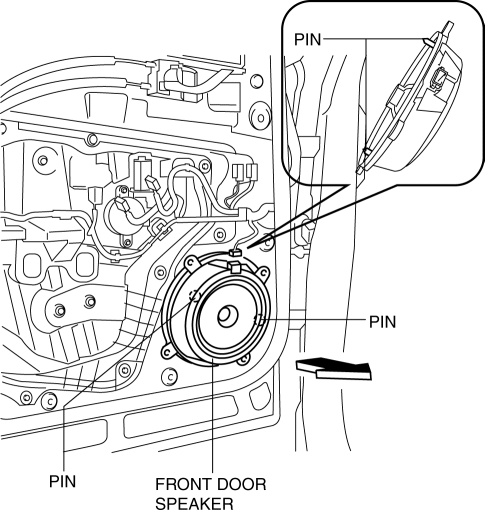
6. Install in the reverse order of removal.
With Bose®
1. Disconnect the negative battery cable..
2. Remove the following parts:
a. Inner garnish.
b. Front door trim.
3. Disconnect the connector.
4. Remove the bolts in alphabetical order.
5. Pull the front door speaker in the direction of the arrow shown in the figure and remove it while detaching the pins.
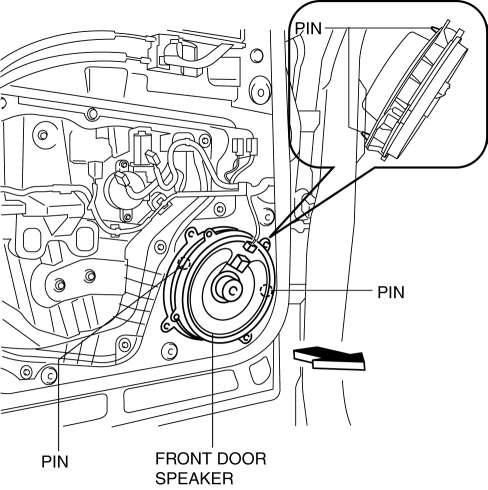
6. Remove the screws.
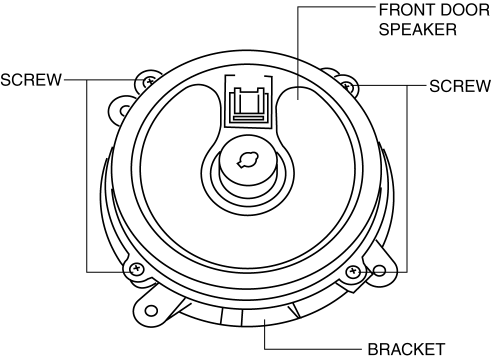
7. Remove the front door speaker from the bracket.
8. Install in the reverse order of removal.
 Front Door Speaker Inspection
1. Disconnect the negative battery cable..
2. Remove the following parts:
a. Inner garnish.
b. Front door trim.
3. Disconnect the front door speaker connector..
4. Verify that the resistance ...
 Glass Antenna
Purpose, Function
The RDS (Radio Data System) converts radio broadcast waves to electric signals
and sends the signals to the audio unit.
Construction
An antenna with excellent ...
Other materials:
Wheel Hub Component Inspection
Wheel Bearing Excessive Play Inspection
1. Install the magnetic base and dial gauge as shown in the figure and measure
the wheel bearing axial excessive play.
If it exceeds the maximum specification, replace the wheel hub component.
Rear wheel bearing maximum play
...
Tire Pressure Monitoring System
Tire Pressure Monitoring System
• The Tire Pressure Monitoring System (TPMS)
monitors the air pressure of all four wheels. If the air pressure of one or more
tires is too low, the system warns the driver by indicating the tire pressure monitoring
system warning light in the instrument clust ...
Liftgate
WARNING
Never allow a person to ride in the luggage compartment:
Allowing a person to ride in the luggage compartment is dangerous.
The person in the luggage compartment could be seriously injured or killed during
sudden braking or a collision.
Do not drive with the liftgate open:
Exhaust gas ...
