Mazda CX-5 Service & Repair Manual: Front Door Key Cylinder Removal/Installation
1. Disconnect the negative battery cable..
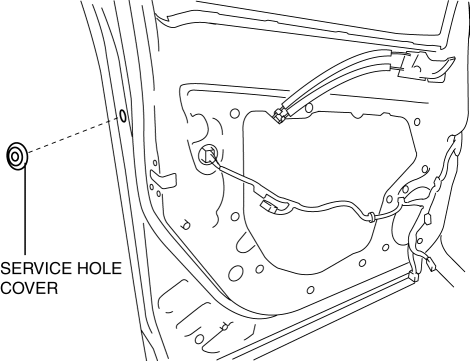
2. Remove the service hole cover.
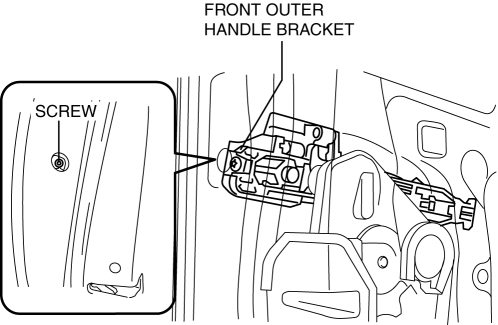
3. Detach the screw from the front door key cylinder.
NOTE:
-
The screw cannot be removed because the front outer handle bracket has a stopper which prevents the screw from falling.
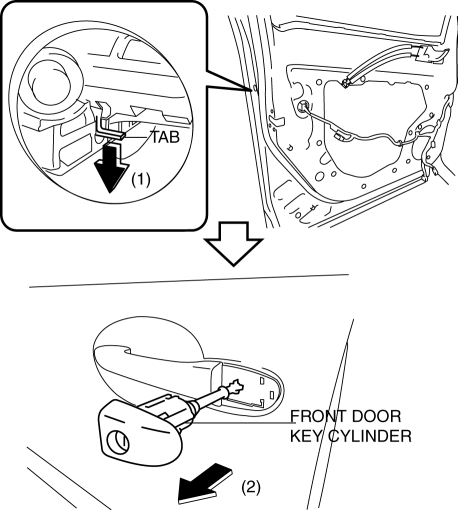
4. While pressing the outer handle bracket tab in the direction of arrow (1) shown in the figure, pull the front door key cylinder in the direction of arrow (2) to detach the outer handle bracket and the front door key cylinder.
5. Remove the front door key cylinder from the outer handle bracket.
6. Insert a tape-wrapped flathead screwdriver into the position shown in the figure.
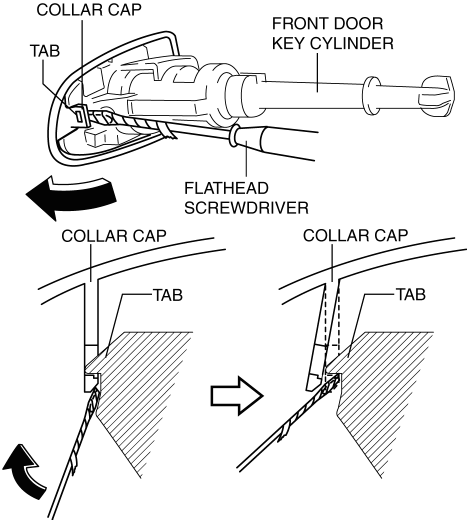
7. Move the tape-wrapped flathead screwdriver in the direction of the arrow shown in the figure to lift up the collar cap, and detach the collar cap from the front door key cylinder tab.
8. Remove the collar cap from the front door key cylinder.
9. Install in the reverse order of removal.

 Front Door Key Cylinder Switch Inspection
1. Perform the front door glass preparation..
2. Disconnect the negative battery cable..
3. Remove the following parts:
a. Inner garnish.
b. Front door trim.
c. Front door key cylinder.
d. ...
Other materials:
Differential Oil Temperature Sensor Inspection
WARNING:
Hot differential oil may cause severe burns. Do not perform maintenance while
differential oil is hot.
1. Disconnect the negative battery cable.
2. Disconnect the differential oil temperature sensor connector and remove the
differential oil temperature sensor.
3. Wrap ...
Radiator
Purpose, Function
The radiator disperses the engine coolant heat flowing internally by receiving
against the vehicle while it is driven or air flow produced by the cooling fan.
Construction
The radiator is installed to the front of the engine compartment.
Four mounting ...
Exterior Lighting Systems
Outline
Projector type headlights have been adopted to the front combination lights.
Auto-light system has been adopted in which TNS and headlights automatically
and optimally illuminate and turn off. (with auto light system)
An AFS system has been adopted which changes the ...
