Mazda CX-5 Service & Repair Manual: Floor Side Panel Installation [Panel Replacement]
Symbol Mark

Installation Procedure
1. When installing new parts, measure and adjust the body as necessary to conform with standard dimensions.
2. Drill holes for the plug welding before installing the new parts.
3. After temporarily installing new parts, make sure the related parts fit properly.
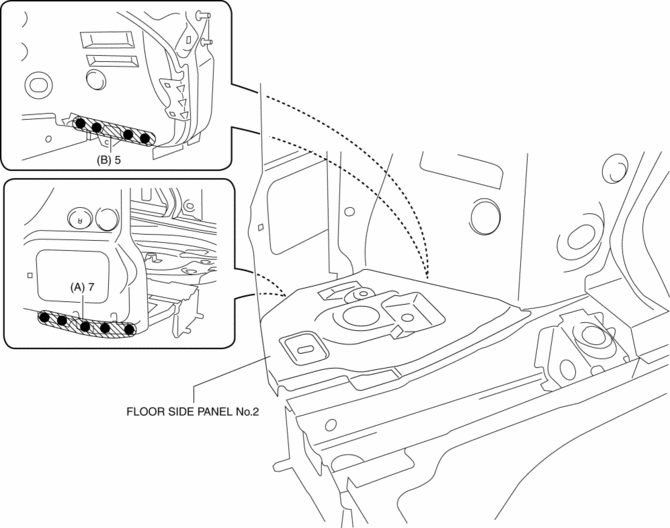
4. Spot weld the 7 locations indicated by (A) shown in the figure.
5. Spot weld the 5 locations indicated by (B) shown in the figure, then install the floor side panel No.2.

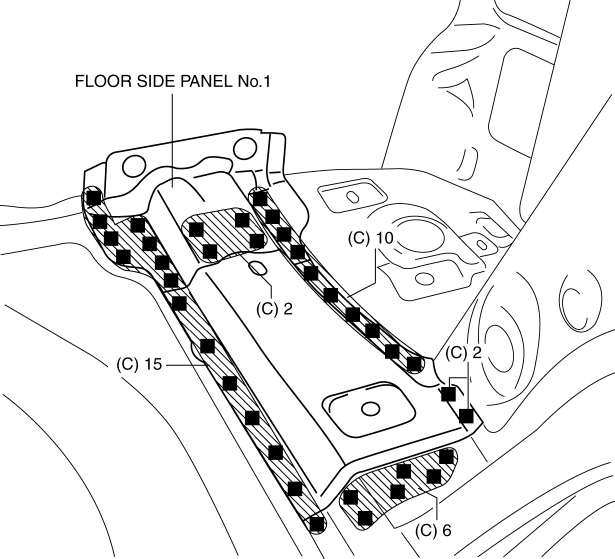
6. Plug weld the 35 locations indicated by (C) shown in the figure, then install the floor side panel No.1.

 Extractor Chamber Removal/Installation
1. Disconnect the negative battery cable..
2. Remove the following parts:
a. Rear splash shield.
b. Rear combination light.
c. Rear bumper.
3. Insert a tape-wrapped flathead screwdriver show ...
 Floor Side Panel Removal [Panel Replacement]
Symbol Mark
Removal Procedure
1. Drill the 35 locations indicated by (A) shown in the figure, then remove the
floor side panel No.1.
2. Drill the 5 locations indicated by (B) shown in th ...
Other materials:
Efficient Installation Of Body Panels
Checking Preweld Measurements And Watching
Align to the standard reference dimensions, based upon the body dimensions
illustration, so that new parts are installed in the correct position.
Welding Notes
For the number of weld points, welding should be performed in accord ...
Theft Deterrent Horn Inspection
1. Disconnect the negative battery cable..
2. Remove the following parts:
a. Trunk end trim.
b. Rear scuff plate (RH).
c. Trunk side trim (RH).
d. Theft-deterrent horn.
3. Apply battery positive voltage to horn terminal A, and connect the horn retaining
bolt to ground as shown in the f ...
Front Body Control Module (Fbcm) Removal/Installation
CAUTION:
If configuration is not performed when the front body control module (FBCM)
is replaced with a new one, the vehicle specification information is not stored
in the front body control module (FBCM) and the system will not operate normally.
When performing configuration, ...
