Mazda CX-5 Service & Repair Manual: Cowl Grille Removal/Installation
1. Remove the windshield wiper arm and blade..
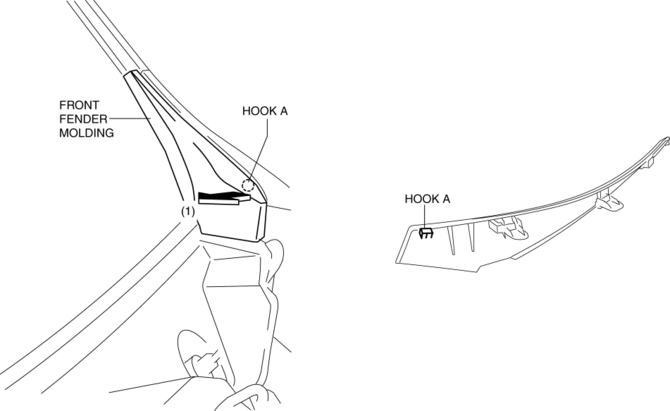
2. Pull the front fender molding in the direction of the arrow (1) while detaching hook A.
3. Pull the front fender molding in the direction of the arrow (2) while detaching hook B.

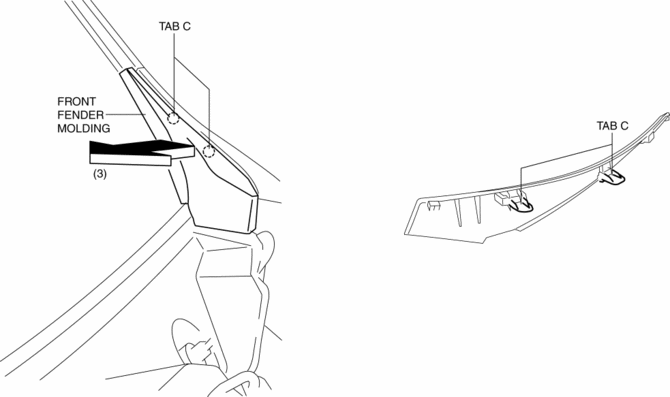
4. Pull the front fender molding in the direction of the arrow (3) and remove it while detaching tab C.
5. Remove fasteners D shown in the figure.
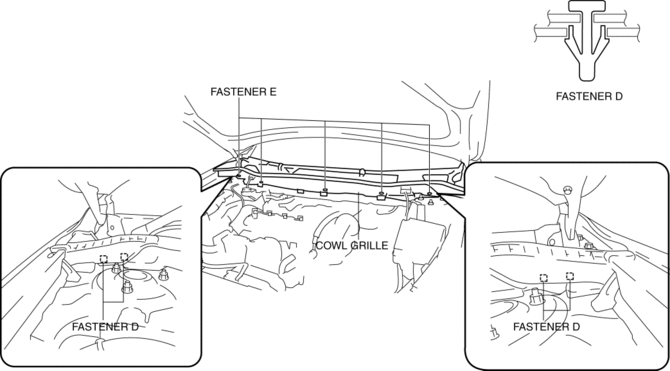
6. Remove fasteners E shown in the figure.
7. Disconnect the join pipe A of the windshield washer hose..
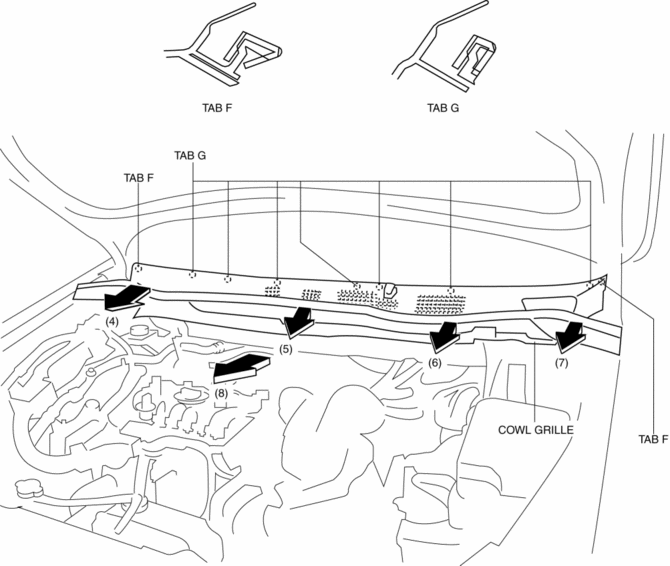
8. Pull the cowl grille in the direction of the arrow in the order of (4), (5), (6), (7), (8) and remove it while detaching tabs F, tabs G.
9. Install in the reverse order of removal.
 Center Under Cover Removal/Installation
1. Lift up the vehicle.
2. Remove the floor under cover..
3. Remove bolts.
2WD
AWD
4. Remove the center under cover.
5. Install in the reverse order of removal. ...
 Cowl Panel Removal/Installation
1. Disconnect the negative battery cable..
2. Remove the following parts:
a. Windshield wiper arm and blade.
b. Cowl grille.
c. Windshield wiper motor.
d. Keyless beeper.
3. Remove clips A ...
Other materials:
Oil Pressure Switch Removal/Installation [Fw6 A EL, Fw6 Ax EL]
WARNING:
A hot transaxle and ATF can cause severe burns. Turn off the engine and wait
until they are cool.
Always wear protective eye wear when using the air compressor. If the air
compressor is used, any particles of dirt or soiling could spatter and get into
the eyes.
...
Push-Starting
Do not push-start your Mazda.
WARNING
Never tow a vehicle to start it:
Towing a vehicle to start it is dangerous. The vehicle being towed could surge
forward when its engine starts, causing the two vehicles to collide. The occupants
could be injured.
CAUTION
Do not push-start a vehicle that ...
Power Steering Malfunction Indicator Light
Purpose
The power steering malfunction indicator light warns the driver that there
is a malfunction with the electric power steering (EPS) system.
Function
If there is a malfunction in the EPS system, the power steering malfunction
indicator light illuminates.
If th ...
