Mazda CX-5 Service & Repair Manual: Light Switch Inspection
Light Switch
1. Disconnect the negative battery cable..
2. Remove the column cover..
3. Remove the light switch..
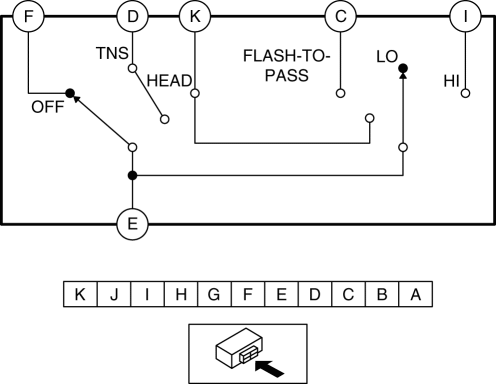
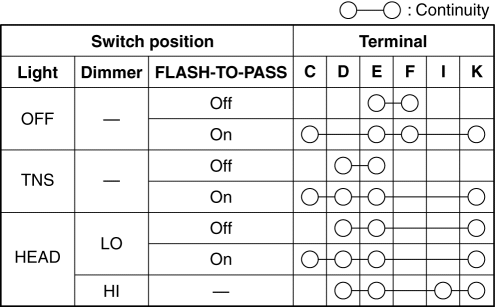
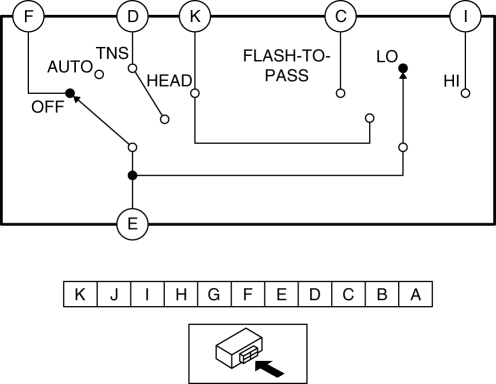
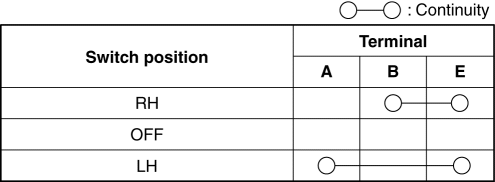
4. Verify that the continuity between the light switch terminals is as indicated in the table.
Vehicles without auto light system
Vehicles with auto light system

-
If not as indicated in the table, replace the light switch..
Turn Switch
1. Disconnect the negative battery cable..
2. Remove the column cover..
3. Remove the light switch..
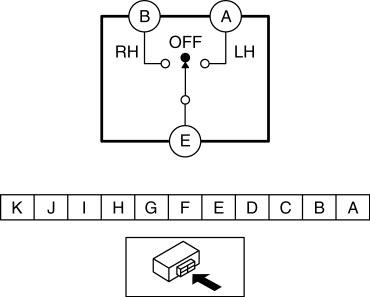
4. Verify that the continuity between the light switch terminals is as indicated in the table.
-
If not as indicated in the table, replace the light switch..

 Light Switch Removal/Installation
NOTE:
When removing the light switch, it is necessary to rotate the steering wheel.
If the ignition is switched off from ON (engine on) with the driver's door closed,
the steering wh ...
Other materials:
Throttle Body
Purpose, Function
Opens/closes the throttle valve to adjust the amount of air supplied to the
cylinder.
Opens/closes the throttle valve according to the control signal from the
PCM.
Construction
The throttle body is installed to the intake manifold.
Th ...
Rear Brake (Disc) Removal/Installation
1. Loosen the adjusting nut..
2. Remove in the order indicated in the table.
3. Install in the reverse order of removal.
4. After installation, add brake fluid, bleed the air, and inspect for fluid
leakage..
5. Pump the brake pedal a few times and inspect the following:
The disc pa ...
Caliper (Rear) Disassembly/Assembly
1. Disassemble in the order indicated in the table.
1
Bleeder cap
2
Bleeder screw
3
Piston
(See Piston Disassembly Note.)
(See Dust Seal, Piston Assembly Note.)
4
Dust seal
(See ...
