Mazda CX-5 Service & Repair Manual: Climate Control Unit Disassembly/Assembly [Manual Air Conditioner]
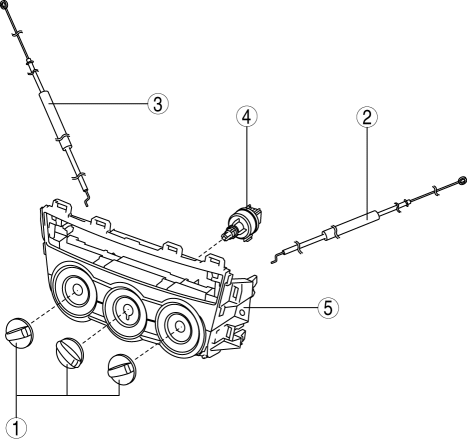
1. Disassemble in the order indicated in the figure.
|
1 |
Dial |
|
2 |
Airflow mode wire (See Wire Removal Note.) (See Wire Installation Note.) |
|
3 |
Air mix wire (See Wire Removal Note.) (See Wire Installation Note.) |
|
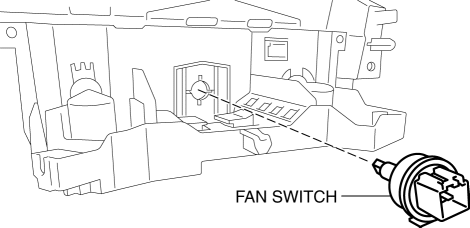
4 |
Fan switch (See Fan Switch Removal Note.) |
|
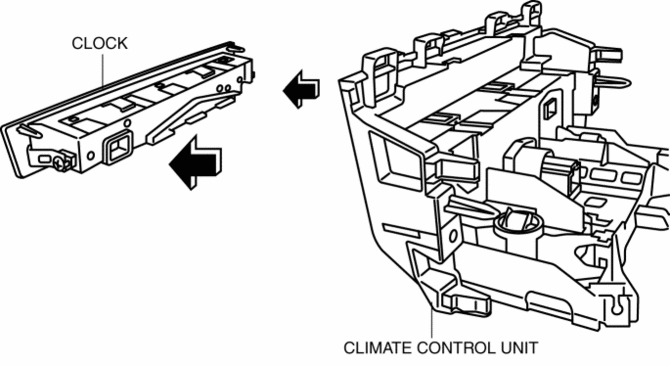
5 |
Climate control unit (See Clock Removal Note.) |
2. Assemble in the reverse order of disassembly.
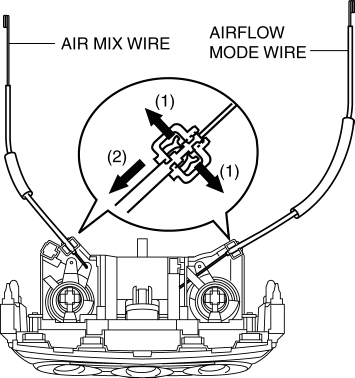
Wire Removal Note
1. Remove in the order indicated in the figure.
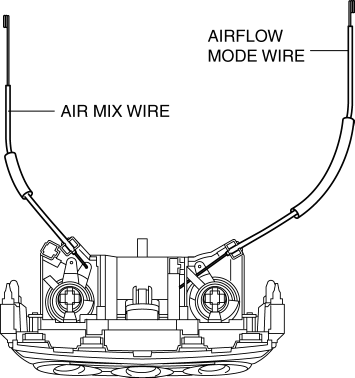
Wire Installation Note
1. Install as shown in the figure.
Fan Switch Removal Note
1. Remove the fan switch dial.
2. Press the tab as shown in the figure.
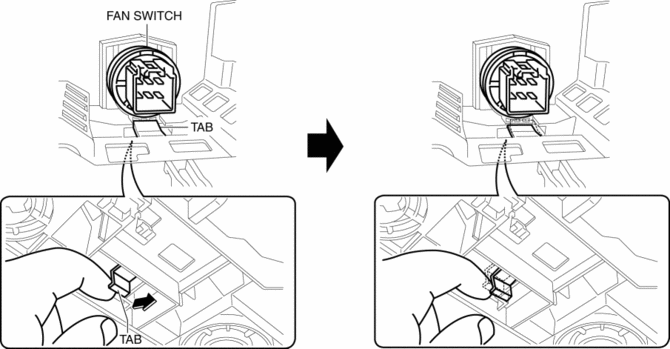
3. Pull the fan switch outward and remove it with the tab pressed.
Clock Removal Note
1. The clock can be removed from the climate control unit as shown in the figure. Refer to the clock removal/installation for the detailed procedure..
 Blower Motor [Manual Air Conditioner]
Purpose
The blower motor sends airflow into the cabin.
Function
The blower motor rotates the blower fan to create airflow and sends out the
airflow in the blower unit and A/C un ...
 Climate Control Unit Inspection [Full Auto Air Conditioner]
1. Remove the climate control unit with the connector connected..
2. Switch the ignition ON (engine off or on).
3. Connect the negative (-) lead of the tester to body ground.
4. By inserting the ...
Other materials:
Front Accessory Socket Removal/Installation
1. Disconnect the negative battery cable..
2. Remove the front console..
3. Insert a tape-wrapped flathead screwdriver into the gap between the cap tab
and socket.
4. Move the flathead screwdriver in the direction of the arrow (1) shown in the
figure, press the front accessory socket i ...
Rear Door Speaker Removal/Installation
Without Bose®
NOTE:
If the procedure is performed while holding the front door speaker cone,
it could deform the cone causing a malfunction. Therefore, perform the procedure
while holding any part other than the cone.
1. Disconnect the negative battery cable..
2. Remove the r ...
Magnetic Clutch Disassembly/Assembly [Full Auto Air Conditioner]
1. Disassemble in the order indicated in the table.
1
Bolt
(See Bolt Removal/Installation Note.)
2
Pressure plate
3
Shim
(See Shim Installation Note.)
4
Snap ring
(See Snap Ring ...
