Mazda CX-5 Service & Repair Manual: Center Panel Removal/Installation
1. Disconnect the negative battery cable..
2. Remove the decoration panel.
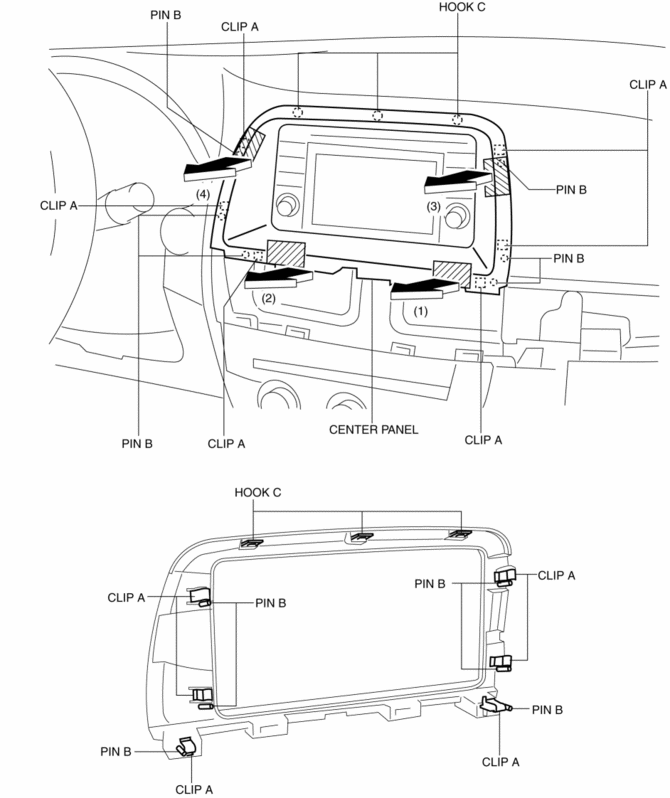
3. Take the shaded area shown in the figure, and pull the center panel in the direction of the arrow in the order of (1), (2), (3), (4) and remove it while detaching clips A, pins B and hooks C.
4. Install in the reverse order of removal.
 C Pillar Trim Removal/Installation
1. Disconnect the negative battery cable..
2. Remove the following parts:
a. Trunk board.
b. Trunk end trim.
c. Rear scuff plate.
d. Trunk side trim.
e. D-pillar trim.
3. Partially peel ...
 Column Cover Removal/Installation
1. Pull down the steering wheel.
2. Press the shaded area shown in the figure using your thumb, and lift the upper
column cover in the direction of arrow (1).
3. Pull the upper column cover ...
Other materials:
Cooling System Cap Inspection
WARNING:
Never remove the cooling system cap or loosen the radiator drain plug while
the engine is running, or when the engine and radiator are hot. Scalding engine
coolant and steam may shoot out and cause serious injury. It may also damage
the engine and cooling system.
Tu ...
Ambient Temperature Sensor [Full Auto Air Conditioner]
Purpose
The ambient temperature sensor detects the ambient temperature.
Function
The ambient temperature sensor converts the detected temperature to an electric
signal.
Construction
A thermistor-type ambient temperature sensor has been adopted.
The ambient ...
Suspension Abbreviations
AAS
Active Adaptive Shift
ABS
Antilock Brake System
ABDC
After Bottom Dead Center
ACC
Accessories
AFS
Adaptive Front Lighting System
ALC
...
