Mazda CX-5 Service & Repair Manual: Cargo Compartment Light Removal/Installation
1. Disconnect the negative battery cable..
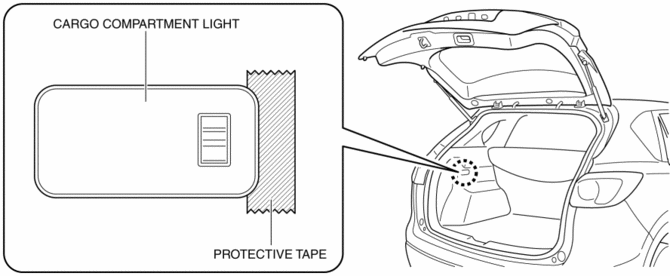
2. To prevent scratches or damage, affix protective tape to the position shown in the figure.
CAUTION:
-
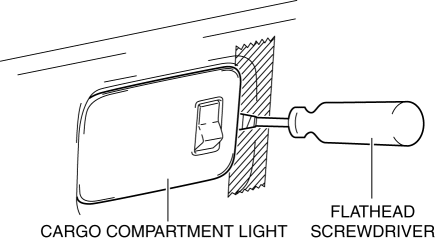
If a flathead screwdriver is inserted into the gap between the cargo compartment light and trunk side trim, the trunk side trim could interfere with the flathead screwdriver and be damaged. When removing the cargo compartment light from the trunk side trim, perform the procedure after affixing protective tape to the trunk side trim.
3. Insert a tape-wrapped flathead screwdriver into the gap between the cargo compartment light and trunk side trim shown in the figure.
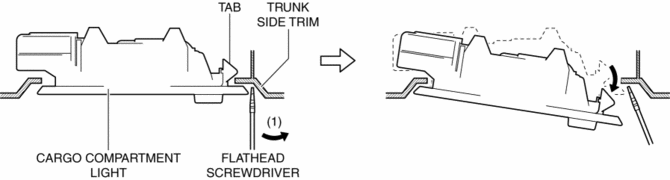
4. Move the flathead screwdriver in the direction of the arrow (1) shown in the figure, pull out the cargo compartment light from the trunk side trim, and detach the cargo compartment light tab and trunk side trim.
5. Remove the cargo compartment light.
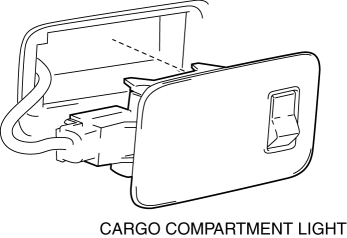
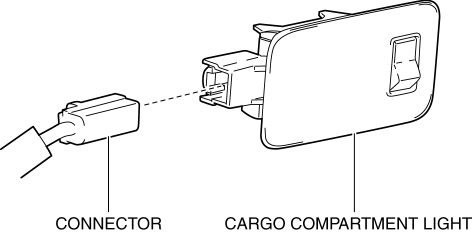
6. Disconnect the connector.
7. Install in the reverse order of removal.
 Cargo Compartment Light Inspection
1. Disconnect the negative battery cable..
2. Remove the cargo compartment light..
3. Verify that the continuity between the cargo compartment light terminals is
as indicated in the table.
...
 Lighting System Personalization
A personalization function has been adopted with which settings for each
function can be changed.
The following settings for the auto light system and interior light control
system ...
Other materials:
Airflow Temperature Control [Full Auto Air Conditioner]
Purpose
The airflow temperature control changes the airflow temperature according
to the vehicle conditions.
Function
The air mix actuator is driven and the air mix door position is changed according
to the set temperature and the vehicle environment.
The climate co ...
Crankshaft Pulley
Purpose, Function
The crankshaft pulley transmits the drive force to the auxiliary parts via
the drive belt.
The crankshaft pulley suppresses torsional vibration of the crankshaft.
Construction
The crankshaft pulley is installed to the front of the crankshaft.
...
Throttle Body
Purpose, Function
Opens/closes the throttle valve to adjust the amount of air supplied to the
cylinder.
Opens/closes the throttle valve according to the control signal from the
PCM.
Construction
The throttle body is installed to the intake manifold.
Th ...
