Mazda CX-5 Service & Repair Manual: Vanity Mirror Illumination Bulb Removal/Installation
1. Disconnect the negative battery cable..
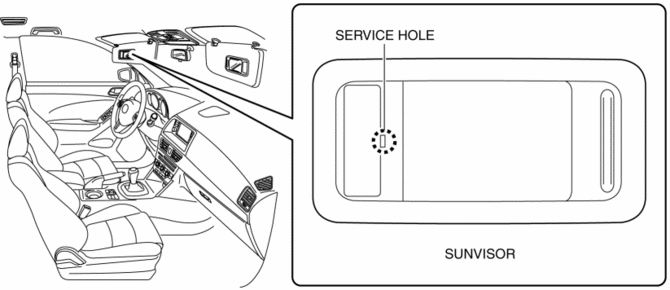
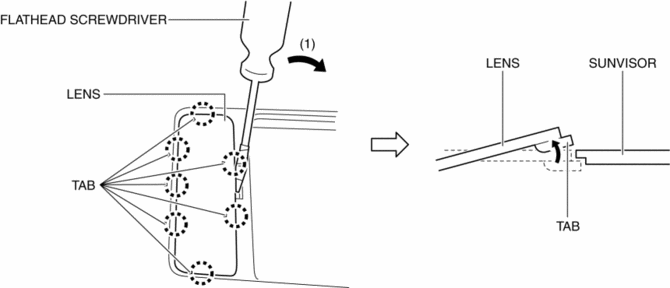
2. Insert a tape-wrapped flathead screwdriver into the service hole in the position shown in the figure.
3. Move a flathead screwdriver in the direction of the arrow (1) shown in the figure and detach the lens tab and sunvisor.
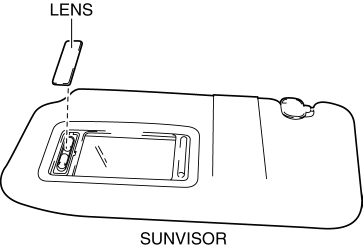
4. Detach all the lens tab and sunvisor and remove the lens from the sunvisor.
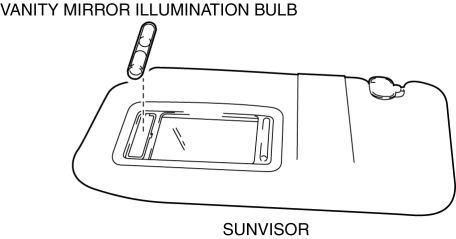
5. Remove the vanity mirror illumination bulb.
6. Install in the reverse order of removal.
 Room Light Control System
Outline
The room light control system changes the illumination condition and illumination
level of the interior lights (door position) according to whether the doors
are opened/closed and ...
 Mirrors
...
Other materials:
Refrigerant Pressure Sensor Removal/Installation [Full Auto Air Conditioner]
1. Disconnect the negative battery cable..
2. Discharge the refrigerant..
3. Disconnect the refrigerant pressure sensor connector.
CAUTION:
If moisture or foreign material enters the refrigeration cycle, cooling ability
will be lowered and abnormal noise will occur. Always immediate ...
Transaxle Fluid Temperature (Tft) Sensor [Fw6 A EL, Fw6 Ax EL]
Purpose/Function
The transaxle fluid temperature (TFT) sensor detects the ATF temperature
in the oil pan.
The transaxle fluid temperature (TFT) sensor signal is used for automatic
shift control, TCC control, line pressure control, direct electric shift control,
learning contr ...
Door Lock Switch Inspection
Driver's Side
1. Disconnect the negative battery cable..
2. Remove the door lock switch..
3. Verify that the continuity is as indicated in the table.
If the continuity is not as indicated in the table, replace the door lock
switch.
Passenger's Side
1. Disconnec ...
