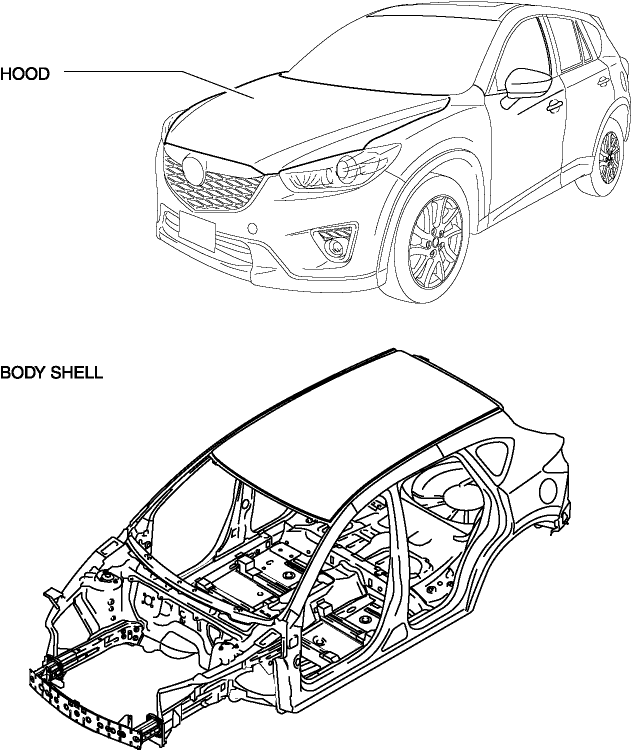
Mazda CX-5 Service & Repair Manual: Body Panel
Outline
-
The multi-load path and triple H-shaped structure of distributing the power absorbed at the collision were used for the body shell.
-
A ring structure has been adopted for the triple H structure, realizing top-level crash safety performance.
-
Crushable structure from which an engine mounting bracket and suspension crossmember are made to secede at the collision is used for the body frame of an engine room.
-
The energy absorption space between a hood and engine was secured.
Structure View
Construction
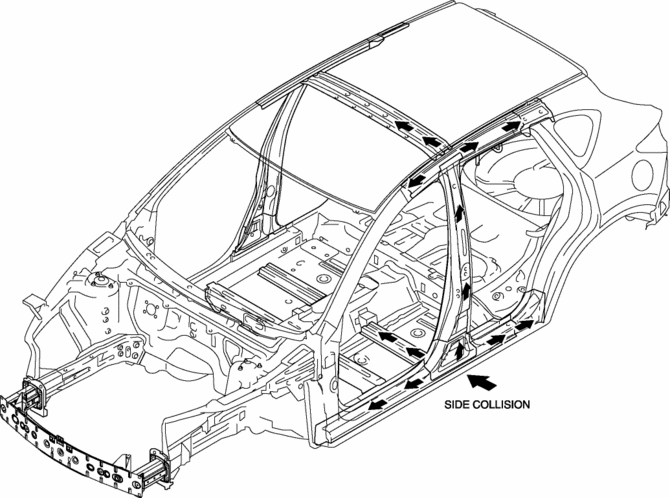
Triple H-shaped structure
-
An H-shaped structure has been adopted in which reinforcements are equipped in the floor, side frame, and roof, and each connection area is strengthened.
-
The combination of these three structural areas provide the strong triple H-shaped structure.
-
Triple H structure distributes the impulse force at the side collision to reinforcement of the roof, cabin side frame, and floor.
-
Triple H-shaped structure controls the twisting of the cabin while driving.
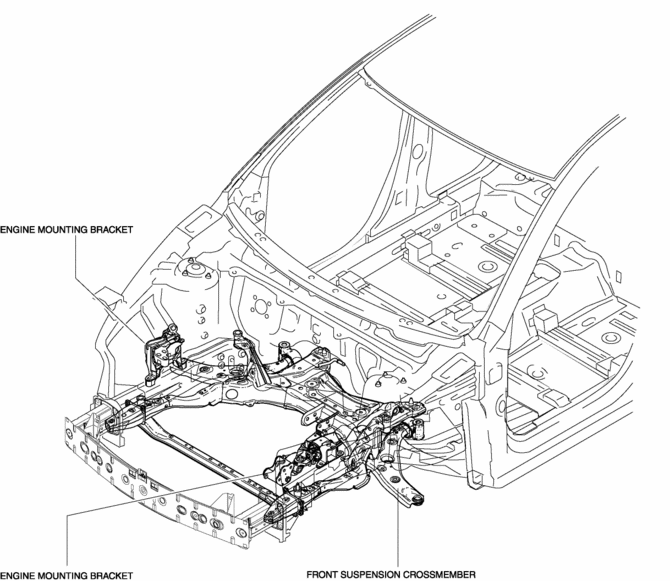
Crushable structure
-
Engine mounting brackets and front suspension crossmember are made to break away during a collision.
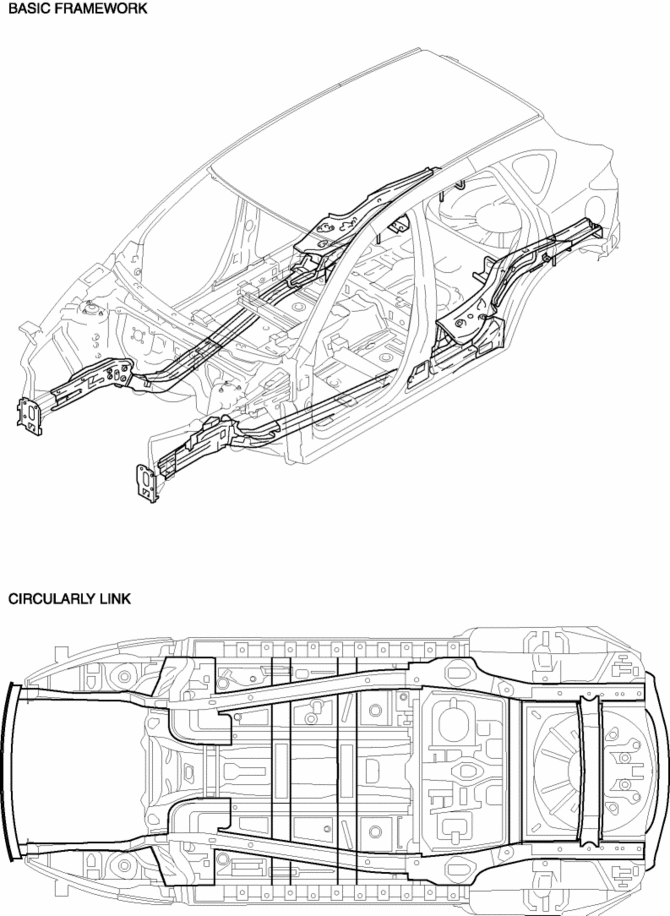
Ring structure
-
For the ring structure, the basic framework is thoroughly straightened.
-
For the ring structure, the frames are circularly linked.
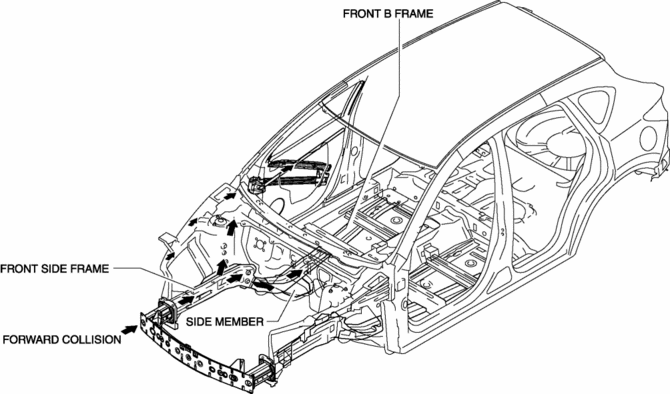
Multi-load path
-
The multi-load path is stabilized during a collision, and has set the load distribution load path which carries out energy absorption.
-
The front side frame, front B frame and rear side frame are made into straight forms.

-
The front side frame is supported by the side sill, front B frame and side member.
Fail-safe
-
Function not equipped.
 Aerodynamic
Purpose/Function
For improved aerodynamics, under covers are installed to the under-surface
of the vehicle.
Construction
The vehicle is equipped with the following (3) under cov ...
 Bumper Bracket Installation [Panel Replacement]
Symbol Mark
Installation Procedure
1. When installing new parts, measure and adjust the body as necessary to conform
with standard dimensions.
2. Drill holes for the plug welding 6 locations ...
Other materials:
Power Supply Switching
Outline
By pressing the push button start, switching of the power supply is performed.
Function
The start stop unit switches the power supply according to the vehicle conditions
such as the selector lever (ATX)/shift lever (MTX) position and the pedal depression/release
whe ...
Front Seat Rail Guide Cover Removal/Installation
WARNING:
Handling a side air bag improperly can accidentally operate (deploy) the
air bag, which may seriously injure you. Read the service warnings/cautions
in the Workshop Manual before handling the front seat (side air bag integrated)..
If the sliding mechanisms on both side ...
Energy Absorbing Form Removal/Installation
1. Disconnect the negative battery cable..
2. Remove the seal board upper..
3. Remove the front bumper..
4. Insert the flathead screwdriver shown in the figure, push fasteners A for
back side of front bumper reinforcement arrow shown in the figure.
5. Pull the energy-absorbing form in ...
