Mazda CX-5 Service & Repair Manual: Battery Removal/Installation [Skyactiv G 2.0]
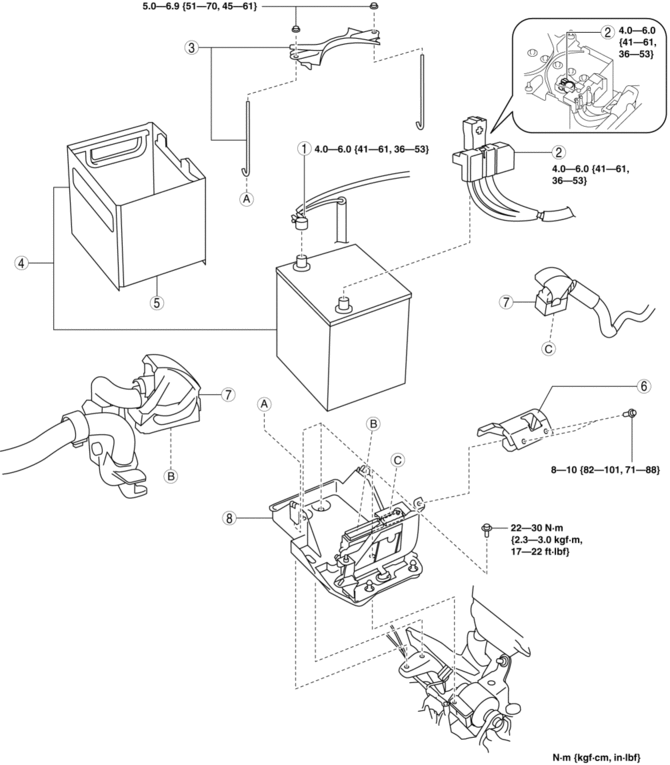
1. Remove in the order indicated in the table.
2. Install in the reverse order of removal.
|
1 |
Negative battery cable (See NEGATIVE BATTERY CABLE DISCONNECTION/CONNECTION [SKYACTIV-G 2.0].) |
|
2 |
Positive battery cable |
|
3 |
Battery clamp |
|
4 |
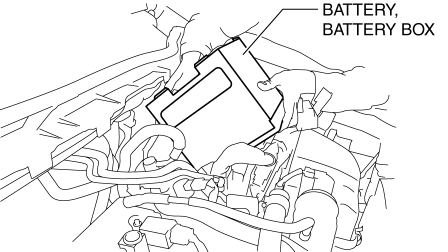
Battery, battery box (See Battery, Battery Box Removal Note.) |
|
5 |
Battery box (See Battery Box Installation Note.) |
|
6 |
PCM cover (See PCM REMOVAL/INSTALLATION [SKYACTIV-G 2.0]) |
|
7 |
PCM connector (See PCM REMOVAL/INSTALLATION [SKYACTIV-G 2.0]) |
|
8 |
Battery tray and PCM component (See Battery Tray and PCM Component Removal Note.) |
Battery, Battery Box Removal Note
CAUTION:
-
When removing the battery, do not place the battery on the PCM connector or hit it with the battery. Otherwise, the PCM or PCM connector could be damaged.
1. Remove the battery with the battery box while the battery is positioned at an angle as shown in the figure.
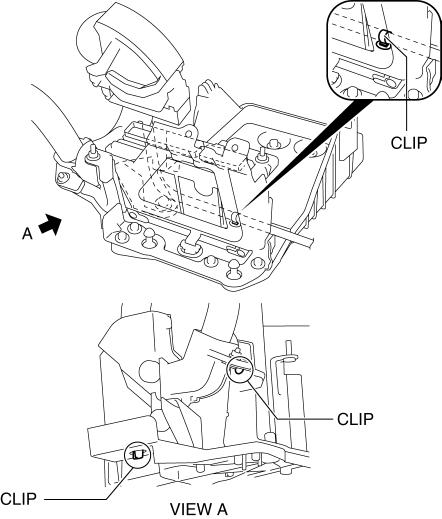
Battery Tray and PCM Component Removal Note
1. Remove the air cleaner, air hose and fresh air duct component..
2. Remove the bolt and nut securing the wiring harness protector to the battery tray.
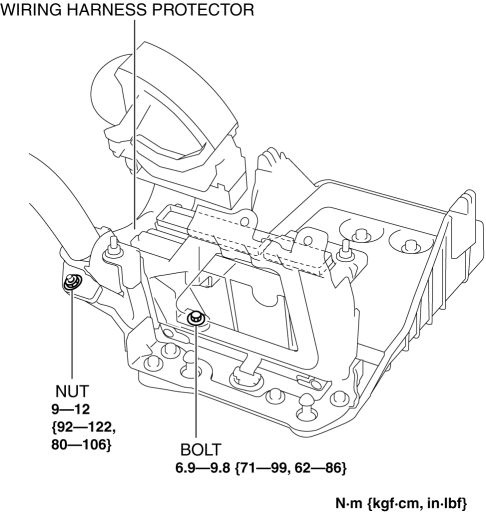
3. Remove three battery tray bolts so that the battery tray is free to move.
4. Release the wiring harness clips at the three locations shown in the figure and remove the battery tray and PCM component.
5. When replacing the battery tray with a new one, perform the following procedure:
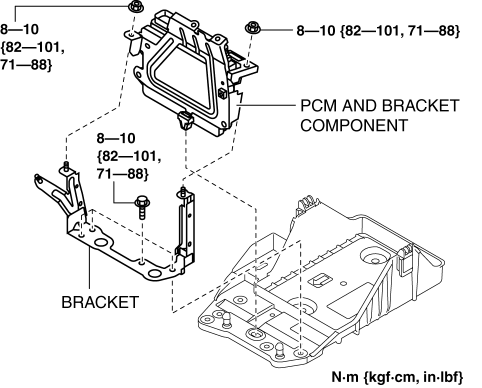
a. Remove the PCM and bracket component.
b. Remove the bracket.
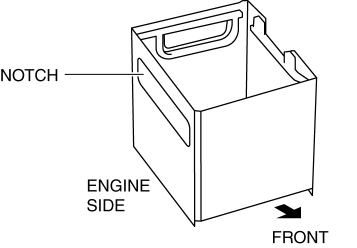
Battery Box Installation Note
1. Install the battery box so that the side with the larger notch faces toward the engine side.
 Battery Recharging [Skyactiv G 2.0]
Using GR8-1291:
(See GR8-1291 INSTANT TRAINING MODULE (VIDEO).)
WARNING:
Keep all flames away from the battery, otherwise evaporated gas from the
battery fluid may catch fire and cause se ...
 Battery [Skyactiv G 2.0]
Purpose, Function
The battery stores electricity generated by the generator. In addition, it
supplies power to electronic devices if necessary.
Construction
The battery is insta ...
Other materials:
Accelerator Pedal Removal/Installation
1. Disconnect the negative battery cable..
2. Remove in the order indicated in the table.
1
APP sensor connector
2
Accelerator pedal
3. Install in the reverse order of removal. ...
Identification Number Locations
Vehicle Identification Number (VIN)
If the VIN plate is adhered to the dashboard, it is located in the position
shown in the figure.
Engine Type/Number
SKYACTIV-G 2.0
SKYACTIV-G 2.5
...
Automatic Transaxle Warning Light [Fw6 A EL, Fw6 Ax EL]
Purpose/Function
The automatic transaxle warning light illuminates when the transaxle has
malfunction.
Construction
The automatic transaxle warning light is built into the instrument cluster.
Operation
If the transmission has a malfunction, the TCM sends an ...
