Mazda CX-5 Service & Repair Manual: B Pillar Lower Trim Removal/Installation
1. Remove the front scuff plate..
2. Remove the rear scuff plate..
3. Partially peel back the seaming welt.
4. Take the shaded area shown in the figure, and pull the B-pillar lower trim in the direction of the arrow in the order of (1), (2) while detaching hooks A, pins B.
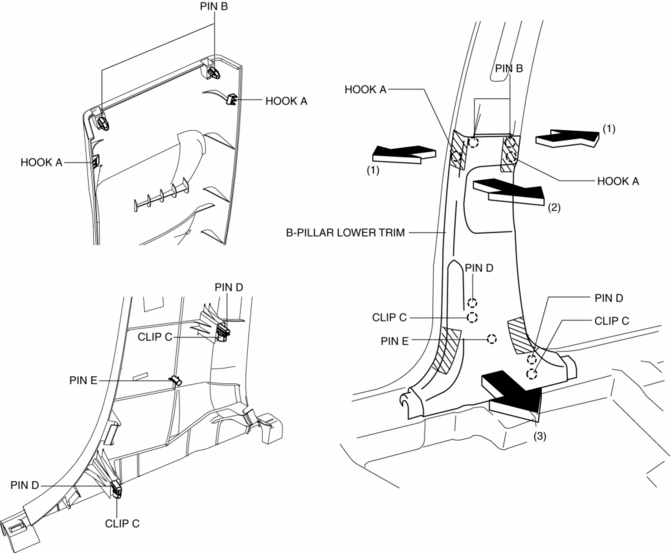
5. Take the shaded area shown in the figure, and pull the B-pillar lower trim in the direction of the arrow (3) while detaching the clips C, pin D, pin E.
6. Install in the reverse order of removal.
 Anticorrosion, Sound Insulation, And Vibration Insulation
Body Sealing
Apply body sealer where necessary.
For locations where application of body sealer is difficult after installation,
apply it before installation.
Application of ...
 B Pillar Upper Trim Removal/Installation
1. Remove the following parts:
a. Front scuff plate.
b. Rear scuff plate.
c. B-pillar lower trim.
d. Adjuster anchor cover.
e. Upper anchor installation bolts on the front seat belt.
2. Pa ...
Other materials:
Glass/Windows/Mirrors
Outline
The following glass has been adopted.
Windshield
Front door glass
Rear door glass
Rear door quarter glass
Quarter window glass
Rear window glass
Outer mirror glass
The following mirrors h ...
Air Fuel Ratio (A/F) Sensor Heater Control [Skyactiv G 2.0]
Outline
Based on the control of the A/F sensor heater, a stabilized oxygen concentration
is detected even at low exhaust temperatures, and feedback control of fuel injection
even at cold engine start is made possible for improved cold temperature exhaust
emission performance.
...
Engine Transaxle Integration Control [Fw6 A EL, Fw6 Ax EL]
Outline
The TCM controls engine output torque and reduces transaxle output shaft
torque fluctuation during auto shifting, and reduces shock occurring from the
vehicle during shifting.
Construction
Operation
During auto shifting, the TCM sends the torque reduction reque ...
