Mazda CX-5 Service & Repair Manual: Automatic Transaxle Outline [Fw6 A EL, Fw6 Ax EL]
Outline
|
Contribution to low fuel economy |
|
|
Realized direct feel and quick shifting |
|
|
Smooth and powerful start-up |
|
|
Smooth shifting |
|
Construction
Cross-sectional view
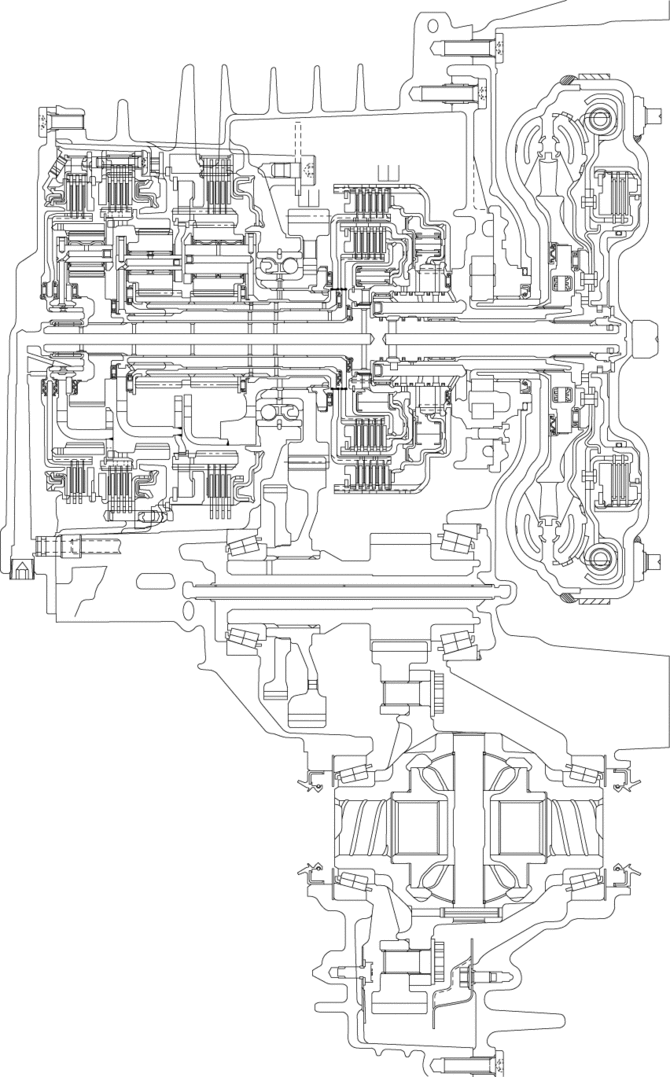
-
The electronic control automatic transaxle consists of three systems which are divided into the powertrain with a torque converter, the hydraulic control mechanism, and the electronic control mechanism.
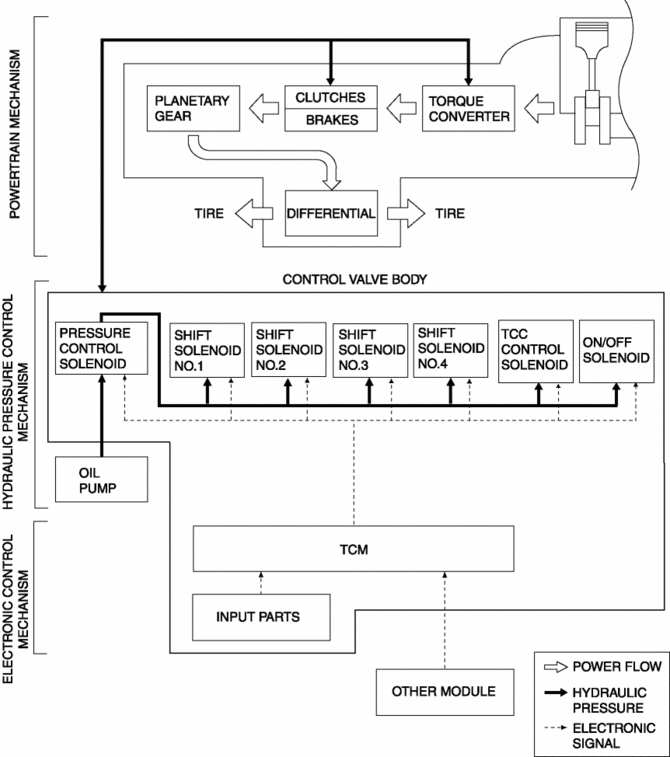
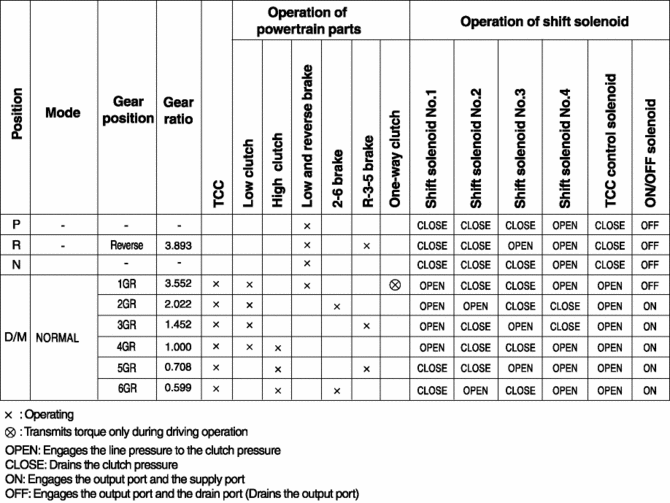
Operation
Automatic transaxle operation chart
 Automatic Transaxle Fluid (ATF) Replacement [Fw6 A EL, Fw6 Ax EL]
WARNING:
Do not perform the servicing while the ATF is hot. Otherwise, it could cause
severe burns or serious injury.
1. Remove the front under cover No.2..
2. Remove the dipstick s ...
 Automatic Transaxle Removal/Installation [Fw6 A EL]
CAUTION:
Performing the following procedures without first removing the front ABS
wheel-speed sensor may possibly cause an open circuit in the harness if it is
pulled by mistake. Before ...
Other materials:
Side Member Installation [Panel Replacement]
Symbol Mark
Installation Procedure
1. When installing new parts, measure and adjust the body as necessary to conform
with standard dimensions.
2. Drill holes for the plug welding before installing the new parts.
3. After temporarily installing new parts, make sure the related parts fit p ...
Evaporative Emission (Evap) Control System
Purpose, Outline
Prevents release of evaporative gas into the atmosphere.
The intake manifold vacuum introduces evaporative gas to the intake manifold
via the charcoal canister and the purge solenoid valve.
System Diagram
U.S.A. and CANADA
Except U.S.A. and CANADA
...
Center Pillar Removal [Panel Replacement]
Symbol Mark
Removal Procedure
CAUTION:
Remove the curtain air bag module to prevent damage before servicing.
Front-side
Rear-side
CAUTION:
Avoid cutting with a blowtorch or similar tools as the insulator (shaded
area) is flammable.
1. Rough cut the ...
