Mazda CX-5 Service & Repair Manual: Assist Handle Removal/Installation
Removal
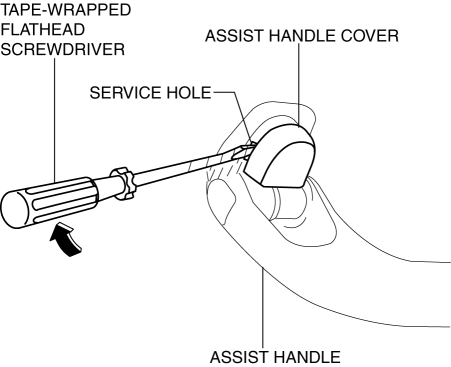
1. Insert a tape-wrapped flathead screwdriver into the service hole and remove the assist handle covers.
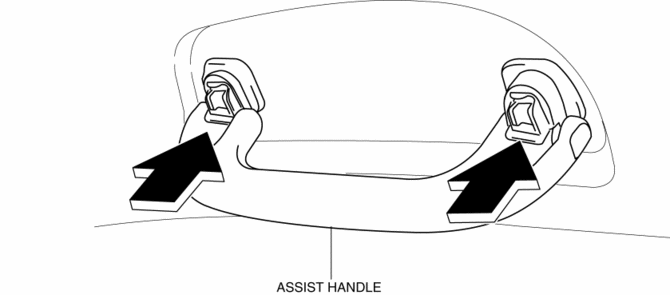
2. Remove the assist handle in the direction of the arrow (1) and (2), while detach clips.

NOTE:
-
Remove the assist handle by shaking it up and down.
Installation
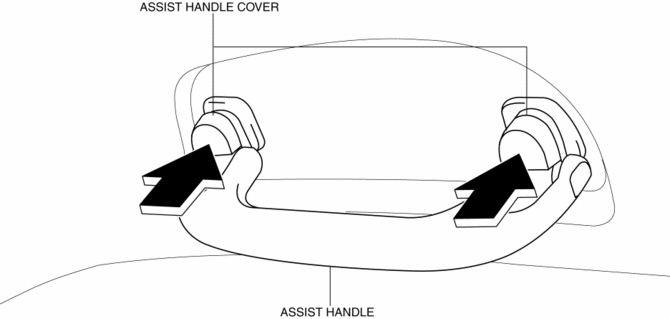
1. Push the assist handle in the direction of the arrow shown in the figure.
2. Push the assist handle cover assembled to install the assist handle.
 Amenities
...
 Front Console Box Removal/Installation
NOTE:
Affix protective tape to the position shown in the figure.
1. Insert a tape-wrapped flathead screwdriver in the position indicated by the
arrow in the figure and detach cl ...
Other materials:
Crankshaft Position (CKP) Sensor
Purpose/Function
Detects the crankshaft speed as basic information for mainly determining
the fuel injection timing and ignition timing.
Detects the crankshaft speed and inputs it to the PCM as a CKP signal.
Construction
Installed on the side of the cylinder block (ri ...
Rear Bumper Reinforcement Removal/Installation
1. Disconnect the negative battery cable..
2. Remove the following parts:
a. Rear splash shield.
b. Rear combination light.
c. Rear bumper.
3. Remove the hanger rubber in the direction of the arrow (1) shown in the figure.
4. Remove nuts.
CAUTION:
Removing the rear bumper ...
Engine Oil Level Inspection
1. Position the vehicle on level ground.
2. Warm up the engine.
3. Stop the engine and allow at least 5 min before continuing.
4. Remove the dipstick, wipe it cleanly, and reinstall it fully.
5. Remove the dipstick and verify that the oil level is between the F and L marks
on the dipstick. ...
