Mazda CX-5 Service & Repair Manual: Air Bag Module And Pre Tensioner Seat Belt Disposal Procedures [Two Step Deployment Control System]
WARNING:
-
A live (undeployed) air bag module, pre-tensioner seat belt or lap pre-tensioner seat belt may accidentally operate (deploy) when it is disposed of and cause serious injury. Always refer to the “AIR BAG MODULE AND PRE-TENSIONER SEAT BELT DEPLOYMENT PROCEDURES” and dispose of air bag modules, pre-tensioner seat belts and lap pre-tensioner seat belts in a deployed condition.
-
The air bag modules, pre-tensioner seat belts and lap pre-tensioner seat belts are very hot immediately after they are deployed. You can be burned. Do not touch an air bag module, pre-tensioner seat belt and lap pre-tensioner seat belt for at least 15 min after deployment.
-
Pouring water on the deployed air bag module, pre-tensioner seat belt and lap pre-tensioner seat belt is dangerous. The water will mix with the residual gases to form a gas that can make breathing difficult. Do not pour water on the deployed air bag module, pre-tensioner seat belt and lap pre-tensioner seat belt.
-
The deployed air bag module, pre-tensioner seat belt or lap pre-tensioner seat belt may contain deposits of sodium hydroxide, a caustic byproduct of the gas-generated combustion. If this substance gets into your eyes or on your hands, it can cause irritation and itching. When handling the deployed air bag module, pre-tensioner seat belt and lap pre-tensioner seat belt, wear gloves and safety glasses.
1. Remove the deployed air bag module, pre-tensioner seat belt or lap pre-tensioner seat belt.
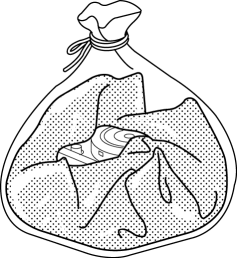
2. Put the air bag module, pre-tensioner seat belt or lap pre-tensioner seat belt in a plastic bag, seal the bag, and then dispose of it.

 Air Bag Module And Pre Tensioner Seat Belt Disposal Procedures [Standard Deployment
Control System]
WARNING:
A live (undeployed) air bag module or pre-tensioner seat belt may accidentally
operate (deploy) when it is disposed of and cause serious injury. Always refer
to the “AIR BAG M ...
 Air Bag System Service Cautions [Standard Deployment Control System]
Air Bag System Component Disassembly
Disassembling the air bag system components could cause it to not operate
(deploy) normally. Never disassemble any air bag system components.
...
Other materials:
Blower Motor [Full Auto Air Conditioner]
Purpose
The blower motor sends airflow into the cabin.
Function
The blower motor rotates the blower fan to create airflow and sends out the
airflow in the blower unit and A/C unit.
Construction
The blower motor is installed to the blower unit.
The blower m ...
Engine Oil Pressure Warning Light
Purpose
The engine oil pressure warning light warns the driver that the engine oil
level is insufficient.
Function
When the instrument cluster receives the engine oil pressure warning light
request signal sent from the PCM via the CAN signal, it illuminates the engine
oi ...
Catch Tank
Purpose, Function
Suppresses pulsation occurring before evaporative gas is inducted into the
intake manifold.
Construction
The catch tank is installed in the engine compartment.
Operation
When evaporative gas flows from the charcoal canister to the purge sol ...
