Mazda CX-5 Service & Repair Manual: Air Bag Module And Pre Tensioner Seat Belt Disposal Procedures [Standard Deployment Control System]
WARNING:
-
A live (undeployed) air bag module or pre-tensioner seat belt may accidentally operate (deploy) when it is disposed of and cause serious injury. Always refer to the “AIR BAG MODULE AND PRE-TENSIONER SEAT BELT DEPLOYMENT PROCEDURES” and dispose of air bag modules and pre-tensioner seat belts in a deployed condition.
-
The air bag modules and the pre-tensioner seat belts are very hot immediately after they are deployed. You can be burned. Do not touch an air bag module and pre-tensioner seat belt for at least 15 min after deployment.
-
Pouring water on the deployed air bag module and pre-tensioner seat belt is dangerous. The water will mix with the residual gases to form a gas that can make breathing difficult. Do not pour water on the deployed air bag module and pre-tensioner seat belt.
-
The deployed air bag module or pre-tensioner seat belt may contain deposits of sodium hydroxide, a caustic byproduct of the gas-generated combustion. If this substance gets into your eyes or on your hands, it can cause irritation and itching. When handling the deployed air bag module and pre-tensioner seat belt, wear gloves and safety glasses.
1. Remove the deployed air bag module or pre-tensioner seat belt.
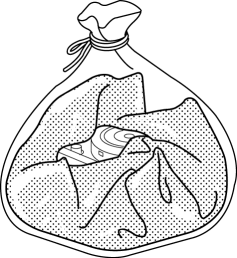
2. Put the air bag module or pre-tensioner seat belt in a plastic bag, seal the bag, and then dispose of it.

 Air Bag Module And Pre Tensioner Seat Belt Deployment Procedures [Two Step Deployment
Control System]
WARNING:
A live (undeployed) air bag module, pre-tensioner seat belt or lap pre-tensioner
seat belt may accidentally operate (deploy) when it is disposed of and cause
serious injury. Do ...
 Air Bag Module And Pre Tensioner Seat Belt Disposal Procedures [Two Step Deployment
Control System]
WARNING:
A live (undeployed) air bag module, pre-tensioner seat belt or lap pre-tensioner
seat belt may accidentally operate (deploy) when it is disposed of and cause
serious injury. Alw ...
Other materials:
Wheel Hub Component Inspection
Wheel Bearing Excessive Play Inspection
1. Install the magnetic base and dial gauge as shown in the figure and measure
the wheel bearing axial excessive play.
If it exceeds the maximum specification, replace the wheel hub component.
Rear wheel bearing maximum play
...
Tire Pressure Monitoring System Set Switch
Purpose
The tire pressure monitoring system set switch is used to initialize the
tire pressure monitoring system.
Construction, Operation
The tire pressure monitoring system set switch is installed to the instrument
panel.
The tire pressure monitoring sy ...
Pre Tensioner Seat Belt [Standard Deployment Control System]
Purpose
The pre-tensioner seat belt retracts and tightens the seat belt webbing to
protect the front passengers during a collision.
Function
The pre-tensioner seat belts operate (deploy) based on the operation signal
from the SAS control module to instantly retract and tigh ...
