Mazda CX-5 Service & Repair Manual: Vanity Mirror Illumination Bulb Removal/Installation
1. Disconnect the negative battery cable..
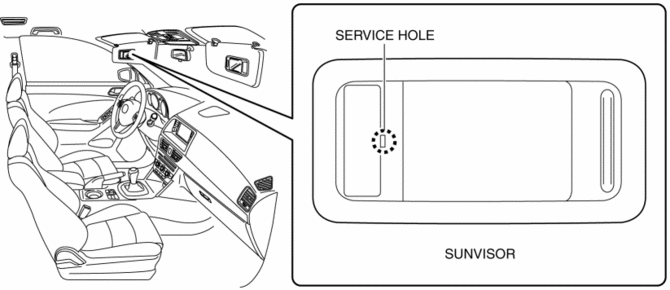
2. Insert a tape-wrapped flathead screwdriver into the service hole in the position shown in the figure.

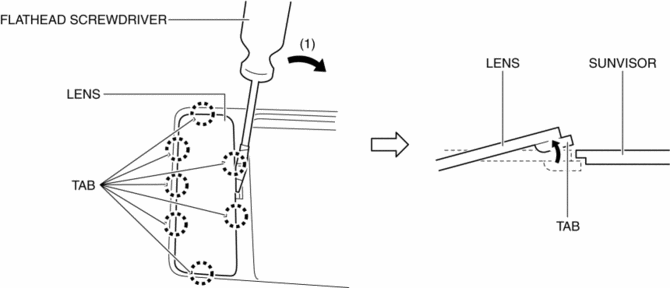
3. Move a flathead screwdriver in the direction of the arrow (1) shown in the figure and detach the lens tab and sunvisor.

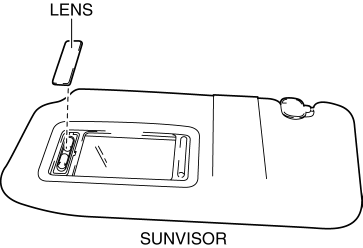
4. Detach all the lens tab and sunvisor and remove the lens from the sunvisor.

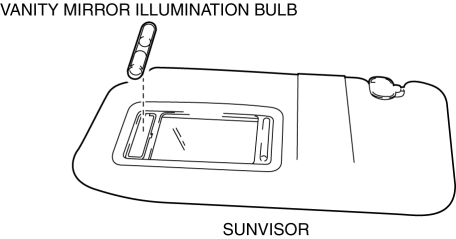
5. Remove the vanity mirror illumination bulb.

6. Install in the reverse order of removal.
 Rearview Mirror Removal/Installation
1. Remove the screw.
2. Pull the rearview mirror in the direction of the arrow (1) shown in the figure
3. Install in the reverse order of removal. ...
 Vanity Mirror Illumination Inspection
1. Disconnect the negative battery cable..
2. Remove the sunvisor..
3. Verify that the continuity between the vanity mirror illumination terminals
is as indicated in the table.
I ...
Other materials:
Keyless Antenna [Keyless Entry System]
Purpose
Outputs a request signal and specifies the remote transmitter location.
Function
The keyless antennas output request signals based on the signals from the
start stop unit.
Construction, Operation
Request signals are output by the keyless antenna installed ...
HomeLink Wireless Control System
NOTE
HomeLink and HomeLink house are registered trademarks of Johnson Controls.
The HomeLink system replaces up to 3 hand-held transmitters with a single builtin
component in the auto-dimming mirror.
Pressing the HomeLink button on the auto-dimming mirror activates garage doors,
gates and oth ...
Floor Side Panel Installation [Panel Replacement]
Symbol Mark
Installation Procedure
1. When installing new parts, measure and adjust the body as necessary to conform
with standard dimensions.
2. Drill holes for the plug welding before installing the new parts.
3. After temporarily installing new parts, make sure the related parts fit p ...
