Mazda CX-5 Service & Repair Manual: Taillight Bulb Removal/Installation
1. Disconnect the negative battery cable..
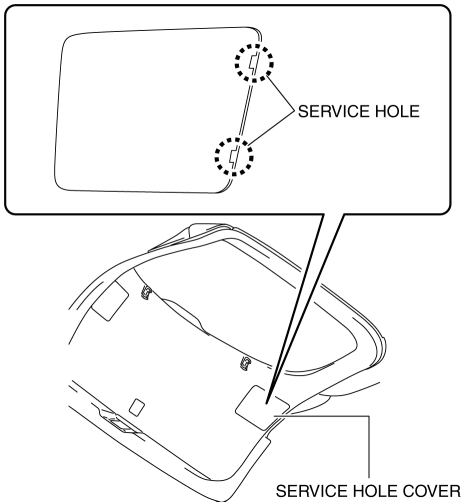
2. Insert a tape-wrapped flathead screwdriver into the service hole in the position shown in the figure.
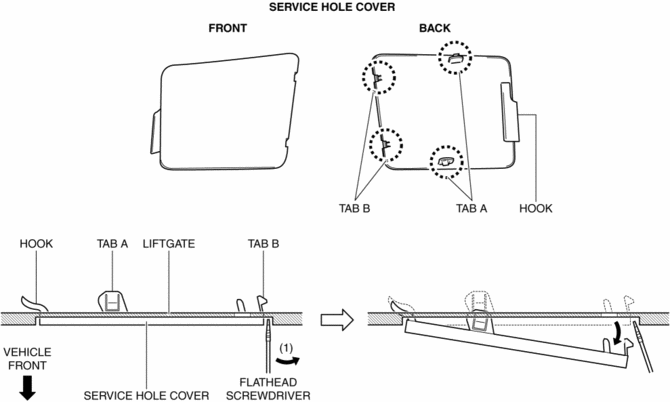
3. Move the flathead screwdriver in the direction of the arrow (1) shown in the figure, pull out the service hole cover from the liftgate, and detach the service hole cover tab and liftgate.
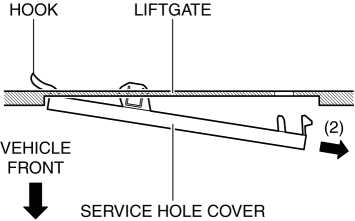
4. Pull out the service hole cover in the direction of the arrow (2) shown in the figure and pull out the service hole cover hook from the liftgate.
5. Remove the service hole cover.
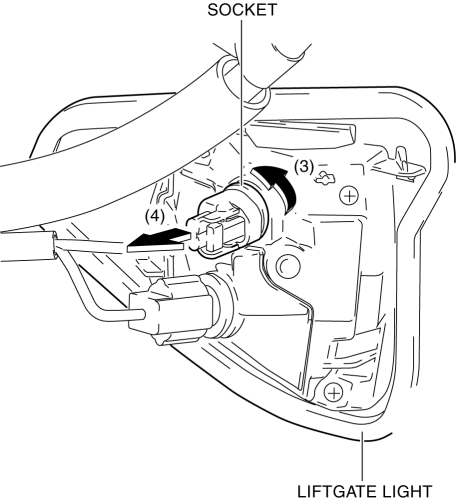
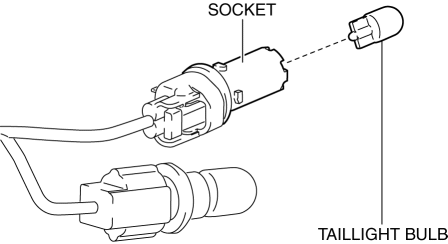
6. Rotate the socket in the direction of the arrow (3) shown in the figure and remove it from the liftgate light in the direction of the arrow (4) shown in the figure.
7. Remove the taillight bulb.
8. Install in the reverse order of removal.
 Rear Side Marker Light Bulb Removal/Installation
1. Disconnect the negative battery cable..
2. Insert a tape-wrapped flathead screwdriver into the service hole in the position
shown in the figure.
3. Move the flathead screwdriver in the di ...
 Turn And Hazard Indicator Alarm
Purpose
The turn and hazard indicator alarm notifies the driver that a turn light
or the hazard warning lights are flashing.
Function
When the instrument cluster receives the tu ...
Other materials:
Suspension Features
Improved rigidity and handling stability
A strut type front suspension adopted
E-type multi-link rear suspension adopted
For the front/rear crossmembers, the welded flange has been eliminated
(flange-less), the cross-section expa ...
Precaution
Intermittent Concern Troubleshooting
Vibration method
If a malfunction occurs or becomes worse while driving on a rough road or
when the engine is vibrating, perform the following steps.
NOTE:
There are several reasons why vehicle or engine vibration could cause an
electr ...
Rear Crossmember Removal/Installation [Awd]
WARNING:
Verify that the crossmember is securely supported by a jack. If the rear
crossmember falls off, it can cause serious injury or death, and damage to the
vehicle.
CAUTION:
Performing the following procedures without first removing the rear ABS wheel-speed
sensor ...
