Mazda CX-5 Service & Repair Manual: Splash Shield Removal/Installation
Front
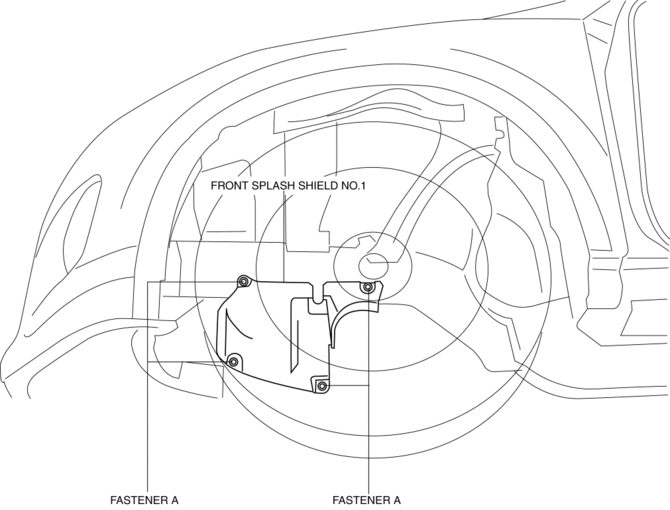
Front splash shield No.1
1. Set the mudguard aside..
2. Remove fasteners A.

3. Remove the front splash shield No.1.
4. Install in the reverse order of removal.
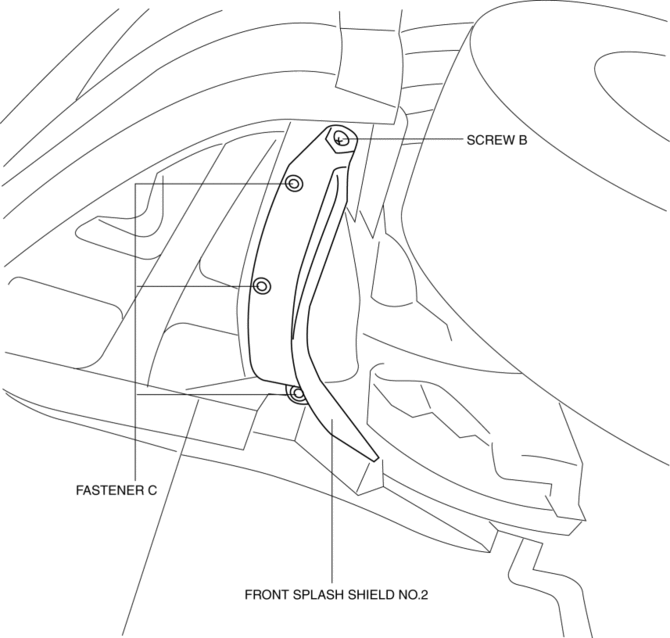
Front splash shield No.2
1. Remove screw B.

2. Remove fasteners C.
3. Remove the front splash shield No.2.
4. Install in the reverse order of removal.
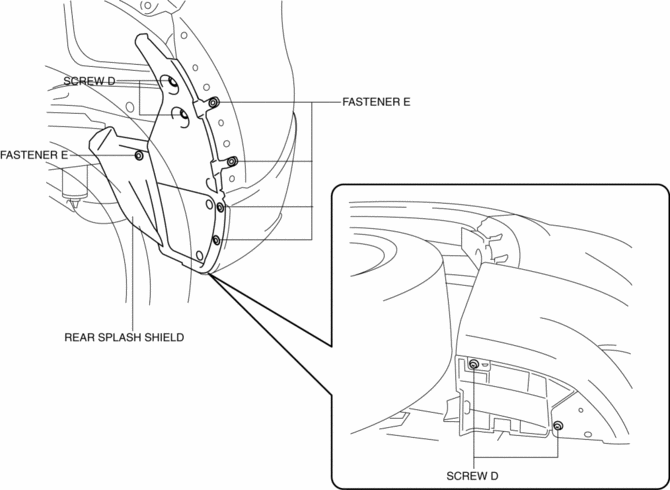
Rear splash shield
1. Set the rear over fender aside..
2. Remove screws D.

3. Remove fasteners E.
4. Remove the rear splash shield.
5. Install in the reverse order of removal.
 Speaker Grille Removal/Installation
Center Speaker Grille
1. Insert a tape-wrapped flathead screwdriver into shown in the figure and remove
hooks A in the direction of arrow (1).
2. Take the shaded area shown in the figure, and ...
 Underbody Dimensions [Dimensions]
NOTE:
The following figure is a bottom view.
Point symbol
Designation
Hole diameter or bolt or nut size mm {in}
A
...
Other materials:
Differential Oil Temperature Sensor Removal/Installation
WARNING:
Hot differential oil may cause severe burns. Do not perform maintenance while
differential oil is hot.
1. Disconnect the negative battery cable.
2. Disconnect the differential oil temperature sensor connector.
3. Remove the differential oil temperature sensor.
4. ...
Front Seat Back Component Removal/Installation
WARNING:
Handling a side air bag improperly can accidentally operate (deploy) the
air bag, which may seriously injure you. Read the service warnings/cautions
in the Workshop Manual before handling the front seat (side air bag integrated)..
If the sliding mechanisms on both side ...
When Liftgate Cannot be Opened
When Liftgate Cannot be Opened
If the vehicle battery is dead or there is a malfunction in the electrical system
and the liftgate can not be opened, perform the following procedure as an emergency
measure to Open it: 1. Remove the cap on the interior surface of the liftgate with
a flathead sc ...
