Mazda CX-5 Service & Repair Manual: Speaker Grille Removal/Installation
Center Speaker Grille
1. Insert a tape-wrapped flathead screwdriver into shown in the figure and remove hooks A in the direction of arrow (1).
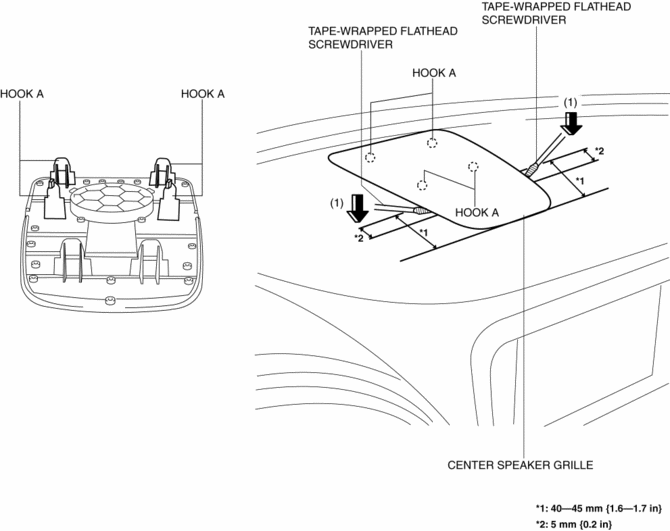
2. Take the shaded area shown in the figure, and remove the center speaker grille in the direction of arrow (2) while detaching hooks B.
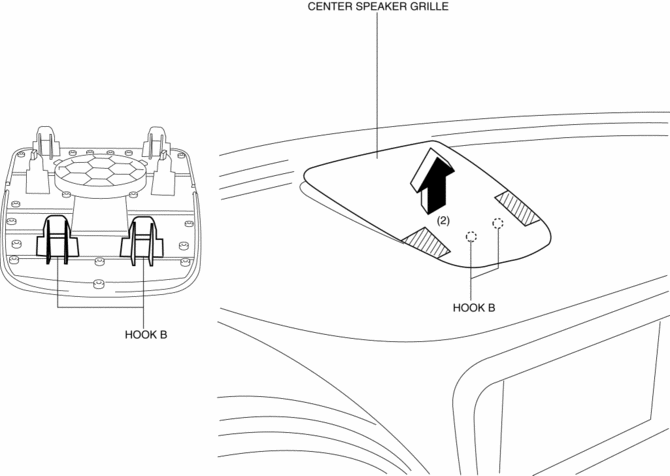
3. Install in the reverse order of removal.
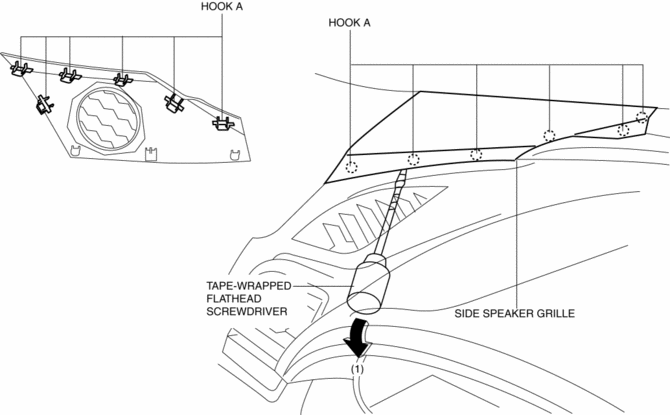
Side Speaker Grille
1. Insert a tape-wrapped flathead screwdriver into the service hole and remove hooks A in the direction of arrow (1).
2. Pull the side speaker grille in the direction of the arrow (2), and remove the side speaker grille while detaching hooks B.
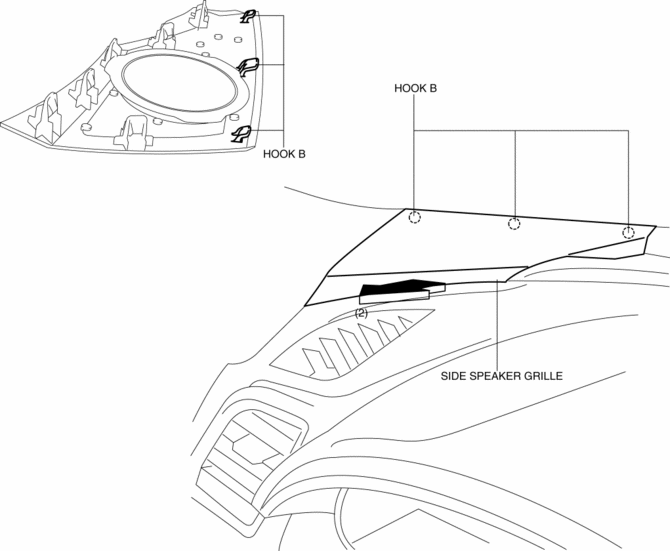
3. Install in the reverse order of removal.
 Side Step Molding Removal/Installation
1. Set the rear over fender aside..
2. Insert a tape-wrapped flathead screwdriver shown in the figure and remove
the clip A in the direction of arrow (1).
3. Slide the side step molding in t ...
 Splash Shield Removal/Installation
Front
Front splash shield No.1
1. Set the mudguard aside..
2. Remove fasteners A.
3. Remove the front splash shield No.1.
4. Install in the reverse order of removal.
Front splash shield ...
Other materials:
Interior Equipment (View B)
1 Audio control switches
2 SRS air bags
3 Cruise control switches
4 Navigation system (if equipped)
5 Audio system
6 Hazard warning flasher switch
7 Climate control system
8 Glove compartment
9 Rear window defroster switch
10 Accessory socket
11 MT shift lever
12 AT shift lever ...
Head Restraints
Your vehicle is equipped with head restraints on all outboard seats and the rear
center seat. The head restraints are intended to help protect you and the passengers
from neck injury.
WARNING
Always drive with the head restraints installed when seats are being used
and make sure they are pro ...
Side Sill Panel Installation [Panel Replacement]
Symbol Mark
Installation Procedure
Side sill (front side)
1. When installing new parts, measure and adjust the body as necessary to conform
with standard dimensions.
2. Drill holes for the plug welding before installing the new parts.
3. After temporarily installing new parts, make sure ...
