Mazda CX-5 Service & Repair Manual: Vanity Mirror Illumination Bulb Removal/Installation
1. Disconnect the negative battery cable..
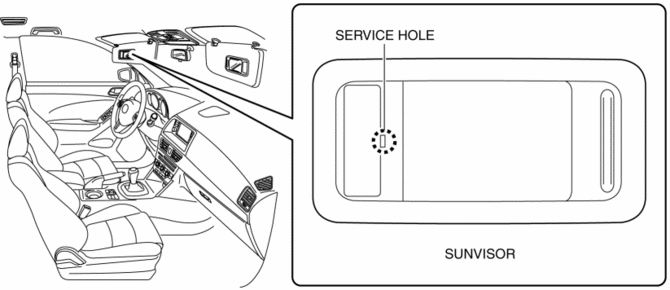
2. Insert a tape-wrapped flathead screwdriver into the service hole in the position shown in the figure.
3. Move a flathead screwdriver in the direction of the arrow (1) shown in the figure and detach the lens tab and sunvisor.
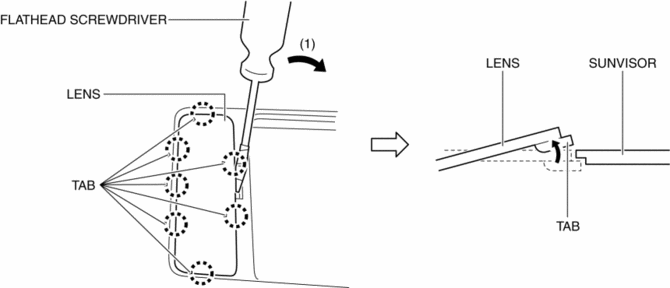
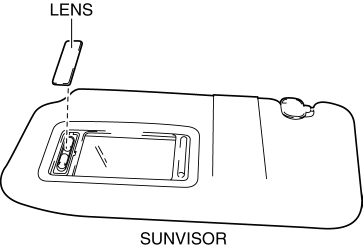
4. Detach all the lens tab and sunvisor and remove the lens from the sunvisor.
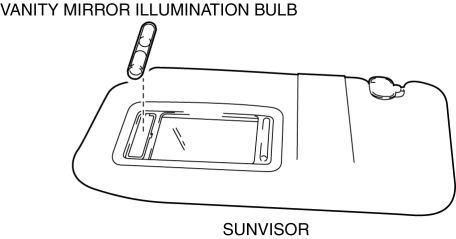
5. Remove the vanity mirror illumination bulb.
6. Install in the reverse order of removal.
 Room Light Control System
Outline
The room light control system changes the illumination condition and illumination
level of the interior lights (door position) according to whether the doors
are opened/closed and ...
 Mirrors
...
Other materials:
Canister Vent (Cv) Solenoid Valve
U.S.A. And CANADA
Purpose, function
Seals the atmosphere side of the charcoal canister during EVAP leak check
monitoring.
Construction
Included in the charcoal canister.
The CV solenoid valve is consists of O-rings.
Operation
According to the ...
Awd Control Module Inspection
NOTE:
AWD CM terminal voltage can vary depending on measuring conditions and vehicle
aging, resulting in misdiagnosis. Therefore, it is necessary to perform an overall
inspection of the input/output systems and AWD CM to determine which part is
malfunctioning.
With the AWD C ...
Glass Antenna
Purpose, Function
The RDS (Radio Data System) converts radio broadcast waves to electric signals
and sends the signals to the audio unit.
Construction
An antenna with excellent noise resistance has been adopted to the rear window
glass.
Fail-safe
Function n ...
