Mazda CX-5 Service & Repair Manual: Passenger Compartment Temperature Sensor Removal/Installation [Full Auto Air Conditioner]
1. Disconnect the negative battery cable..
2. Remove the following parts:
a. Front scuff plate (driver-side).
b. Front side trim (driver-side).
c. Switch panel.
d. Decoration panel.
e. Shift lever knob (MTX).
f. Front console box.
g. Shift panel.
h. Upper panel.
i. Rear console.
j. Side wall.
k. Front console.
l. Hood release lever from the lower panel.
m. Lower panel (driver-side).
3. Remove the aspirator..
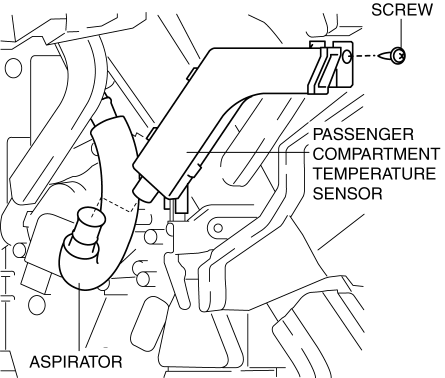
4. Remove the screw.
5. Disconnect the connector.
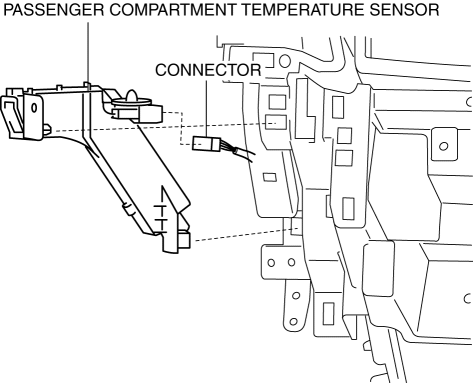
6. Remove the passenger compartment temperature sensor.
7. Install in the reverse order of removal.
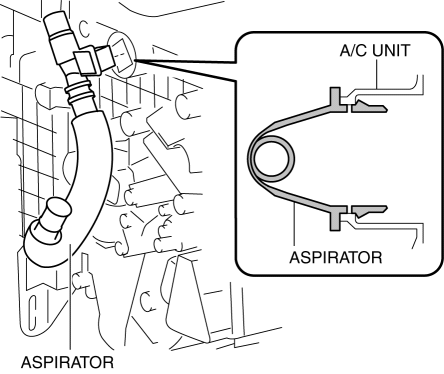
Aspirator Removal Note
1. Remove the aspirator as shown in the figure.
 Passenger Compartment Temperature Sensor Inspection [Full Auto Air Conditioner]
1. Measure the temperature around the passenger compartment temperature sensor
and measure the resistance between passenger compartment temperature sensor terminals
A and B.
If the charact ...
 Passenger Compartment Temperature Sensor [Full Auto Air Conditioner]
Purpose
The passenger compartment temperature sensor detects the cabin temperature.
Function
The passenger compartment temperature sensor converts the detected temperature
to an ...
Other materials:
Car Navigation System
Outline
The car-navigation system displays point-of-origin and road guidance maps
via the audio unit display and provides guidance and information to the desired
point of destination.
NOTE:
For the car-navigation system operation, refer to the owner's manual.
...
How To Use This Manual
Range of Topics
This manual contains procedures for performing all required service operations.
The procedures are divided into the following five basic operations:
Removal/Installation
Disassembly/Assembly
Replacement
Inspection
Adj ...
Power Outer Mirror
Outline
The power outer mirror adjusts the outer mirror glass position up/down and
left/right using the up/down adjustment motor and, left/right adjustment motor.
The up/down adjustment motor and, left/right adjustment motor turns clockwise
(down/right direction) or counterclock ...
