Mazda CX-5 Service & Repair Manual: Interior Trim
Outline
-
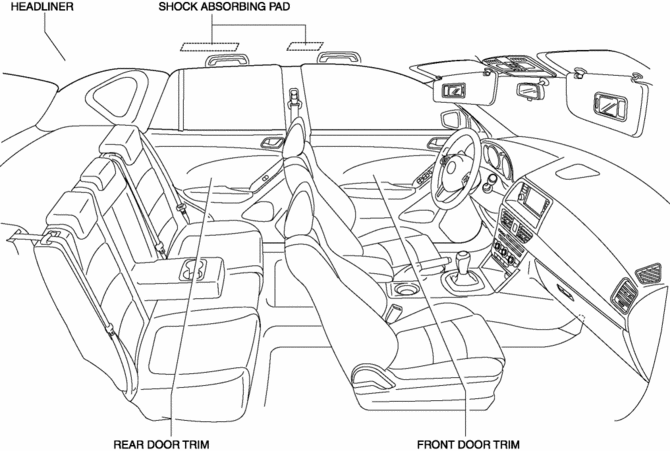
A headliner equipped with a shock absorbing pad has been adopted.
-
The front and rear door trims are also equipped with shock absorbing pads.
Construction
 Inner Garnish Removal/Installation
1. Take the shaded area shown in the figure, and pull the inner garnish in the
direction of the arrow (1) while detaching clips A.
2. Take the shaded area shown in the figure, and remove the i ...
 Lower Panel Removal/Installation
Driver-side
1. Disconnect the negative battery cable..
2. Remove the following parts:
a. Driver-side front scuff plate.
b. Driver-side front side trim.
c. Switch panel.
d. Decoration panel. ...
Other materials:
Front Fog Light Removal/Installation
1. Disconnect the negative battery cable..
2. Remove the screws and bolt.
3. Pull up the front under cover No.1 and remove the mudguard screw shown in
the figure.
4. Disconnect the connector.
5. While pressing the clip tab in the direction of the arrow (1) shown in the
figure ...
Torque Converter [Fw6 A EL, Fw6 Ax EL]
Purpose/Function
By use of an optimized torus shape (wing) matching the output characteristics
of the engine, the torque converter achieves efficient force transmission and
reduced fuel consumption.
Construction/Operation
A three-member, single-stage two-phase type torque c ...
Steering Gear And Linkage Removal/Installation
CAUTION:
Performing the following procedures without first removing the ABS wheel-speed
sensor may possibly cause an open circuit in the wiring harness if it is pulled
by mistake. Before performing the following procedures, disconnect the ABS wheel-speed
sensor (axle side) and fix t ...
