Mazda CX-5 Service & Repair Manual: Front Fog Light Removal/Installation
1. Disconnect the negative battery cable..
2. Remove the screws and bolt.

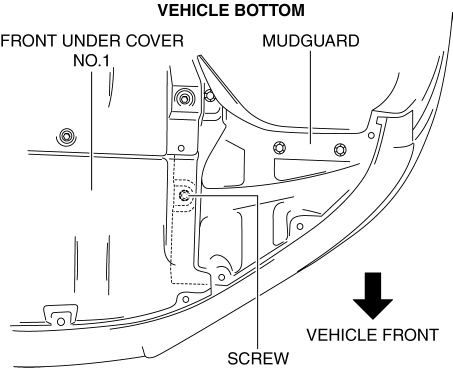
3. Pull up the front under cover No.1 and remove the mudguard screw shown in the figure.
4. Disconnect the connector.
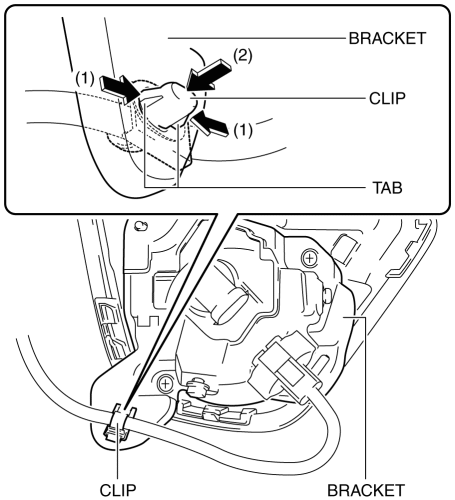
5. While pressing the clip tab in the direction of the arrow (1) shown in the figure, press the clip in the direction of the arrow (2) shown in the figure to detach the clip tab and bracket.
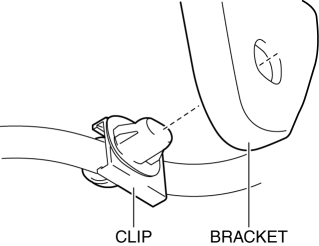
6. Remove the clip.
7. Remove the screws.
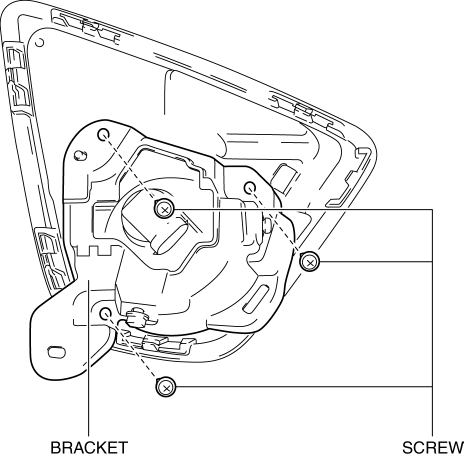
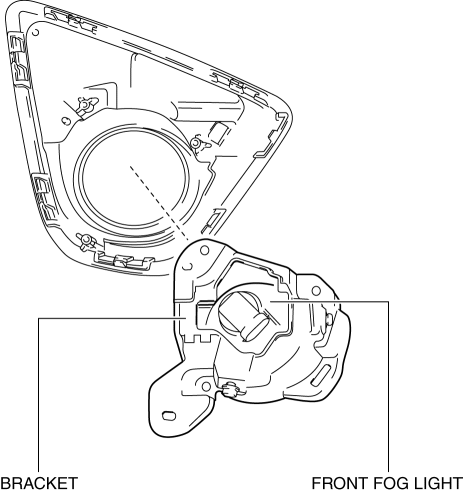
8. Remove the front fog light and bracket.
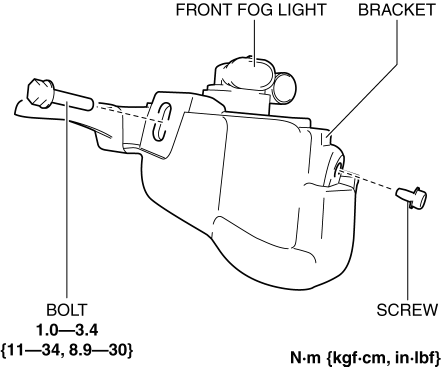
9. Remove the bolt and screw.
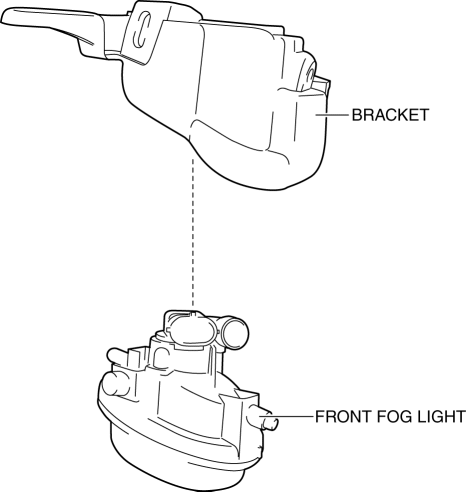
10. Remove the front fog light.
11. Install in the reverse order of removal.
12. Adjust the front fog light aiming..
 Front Fog Light Bulb Removal/Installation
1. Disconnect the negative battery cable..
2. Remove the mudguard screws.
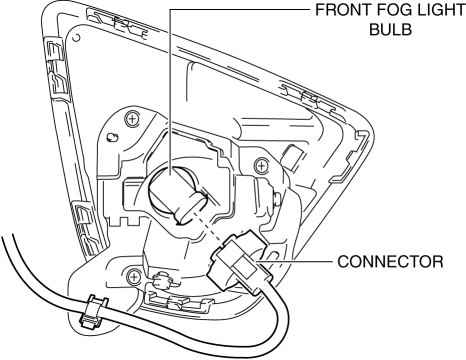
3. Disconnect the connector.
4. Rotate the front fog light bulb in the direction of the arrow (1) shown in
the ...
 Front Fog Lights Indicator Light
Purpose
Notifies the user that the front fog lights are illuminated.
Function
Illuminates when the front fog light illumination conditions are met.
Construction
Displa ...
Other materials:
Front Seat
Purpose, Function
The front seats are structured to reduce impact force applied to the head
of the occupant in a vehicle collision.
8WAY or 6WAY power seats have been adopted on the driver's seat. (with power
seat system).
A seat warmer system has been adopted on the ...
Turn Signal/Hazard Warning Indicator Lights
Purpose
Notifies the driver that a turn light, the hazard warning lights are flashing.
Function
Flashes according to the turn switch and hazard warning switch operations.
Construction
Displayed in the instrument cluster.
Operation
Turn system
1. When th ...
Power Window Motor Inspection
Front driver side
1. Disconnect the negative battery cable..
2. Remove the inner garnish..
3. Remove the front door trim..
4. Disconnect the power window motor connector.
5. Apply battery positive voltage and connect the ground to power window motor
terminals E and F, and then inspect the ...
