Mazda CX-5 Service & Repair Manual: Fuel Filler Lid Opener Cable Removal/Installation
1. Disconnect the negative battery cable..
2. Remove the following parts:
a. Front scuff plate (LH).
b. Front seat (LH).
c. Rear scuff plate.
d. B-pillar lower trim (LH).
e. Rear seat (4:2:4 split type).
f. Rear seat cushion (6:4 split type).
g. Rear seat back (6:4 split type).
h. D-pillar trim (LH).
i. C-pillar trim (LH).
j. Trunk end trim.
k. Trunk side trim (LH).
l. Fuel-filler lid opener.
m. Fuel-filler lid opener lever.
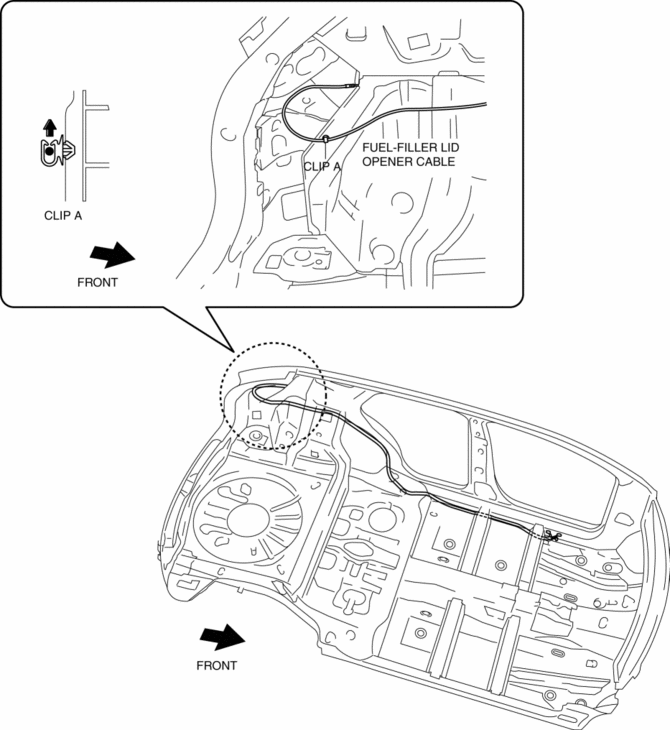
3. Remove the fuel-filler lid opener cable from clip A.

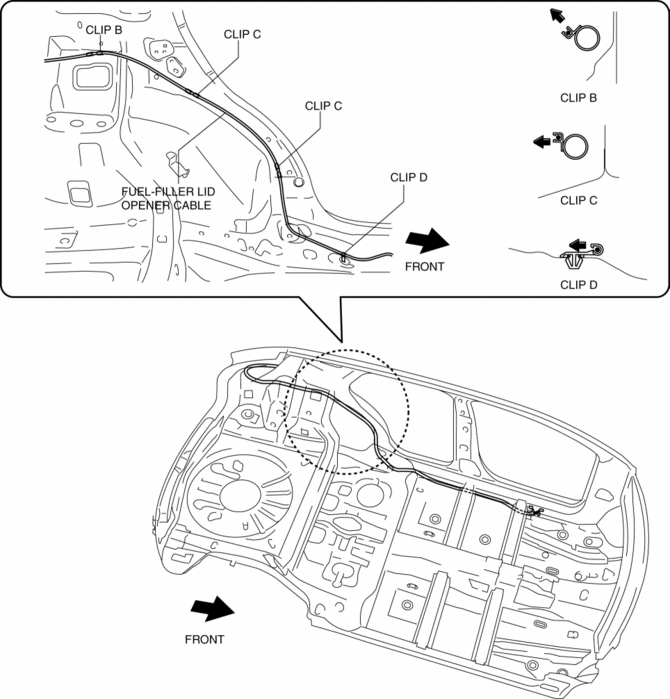
4. Remove the fuel-filler lid opener cable from clips B, C, and D.

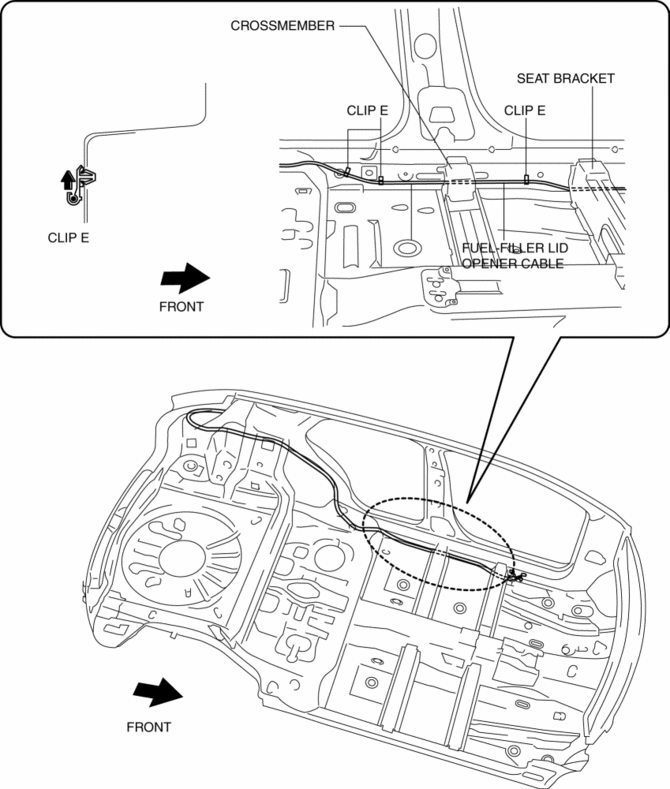
5. Remove the fuel-filler lid opener cable from clips E.

6. Pull the fuel-filler lid opener cable from the crossmember and the seat bracket.
7. Install in the reverse order of removal.
 Fuel Filler Lid Opener And Lever Removal/Installation
Fuel-filler Lid Opener
1. Open the fuel-filler lid.
2. Remove the nut.
3. Remove the service hole cover on the trunk side trim.
4. While pressing the tabs of the stopper bracket in the ...
 Fuel Filler Lid Removal/Installation
1. Remove bolts.
2. Remove the fuel-filler lid.
3. Install in the reverse order of removal.
4. Adjust the fuel-filler lid.. ...
Other materials:
Adjuster Anchor Removal/Installation
WARNING:
The side air bag sensor is attached to the lower part of the B-pillar. When
working around the B-pillar, disconnect the negative battery cable or work carefully,
avoiding excessive impact to the lower part of the B-pillar (with side air bag
sensor No.1).
1. Switch the ...
Engine Disassembly/Assembly
CAUTION:
When the transaxle is installed, do not suspend the engine. Otherwise, the
SST installation area of the cylinder head may be damaged due to excess weight.
Only suspend the engine after separating the engine and transaxle.
Applying excessive force (force of 100 N {10.2 ...
Starter Interlock Switch Inspection [Skyactiv G 2.0]
CAUTION:
Do not reuse the starter interlock switch if it is removed from the vehicle
even once. Replace with a new starter interlock switch when installing.
1. Disconnect the negative battery cable..
2. Disconnect the starter interlock switch connector.
3. Verify that the contin ...
