Mazda CX-5 Service & Repair Manual: Meter Hood Removal/Installation
1. Disconnect the negative battery cable..
2. Remove the upper column cover.
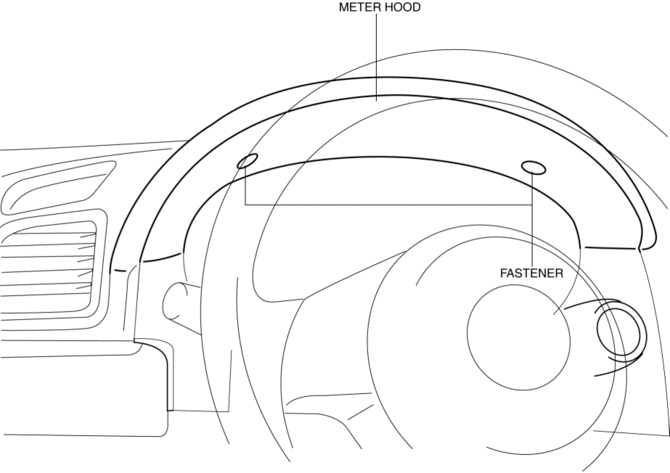
3. Using a phillips screwdriver, remove fasteners.
NOTE:
-
When pulling up the shaft of fasteners using a phillips screwdriver, the shaft will not be pulled up if it is rotated by pressing the driver. To pull up the shaft of fastener, use the phillips screwdriver to lightly contact fasteners.

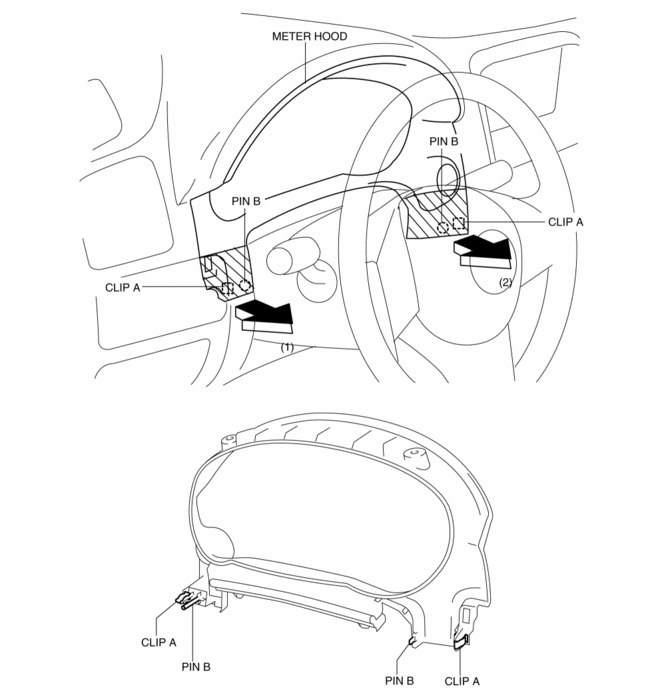
4. Take the shaded area shown in the figure, and remove the meter hood in the direction of the arrow in the order of (1), (2) while detaching the clips A, pins B.

5. Disconnect the start switch connector
6. Install in the reverse order of removal.
 Liftgate Upper Trim Removal/Installation
1. Take the shaded area shown in the figure, detach tab A while pulling the liftgate
upper trim in the direction of the arrow (1) shown in the figure, then detach clips
B, clip C and pin D while p ...
 Rear Door Checker Removal/Installation
1. Fully close the rear door glass.
2. Disconnect the negative battery cable..
3. Remove the rear door trim..
4. Remove the rear door speaker..
5. Remove bolt.
6. Remove nuts.
7. P ...
Other materials:
Brake Fluid Air Bleeding
CAUTION:
Brake fluid will damage painted surfaces. Be careful not to spill any on
painted surfaces. If it is spilled, wipe it off immediately.
NOTE:
Keep the fluid level in the brake fluid reserve tank at 3/4 full or more
during the air bleeding.
Begin air bleedin ...
Front Oil Seal Replacement
WARNING:
A hot engine can cause severe burns. Turn off the engine and wait until it
is cool before servicing.
1. Remove the front under cover No.2..
2. Remove the splash shield..
3. Remove the drive belt..
4. Remove in the order indicated in the table.
5. Install in the reve ...
Electronic Control Coupling
Purpose, Function
An electromagnetic clutch, which operates smoothly due to the lack influence
from the front and rear wheel traction force, has been adopted for the electronic
control coupling system.
Construction
The construction of the coupling enables the torque formed ...
