Mazda CX-5 Service & Repair Manual: Front Fog Lights Indicator Light
Purpose
-
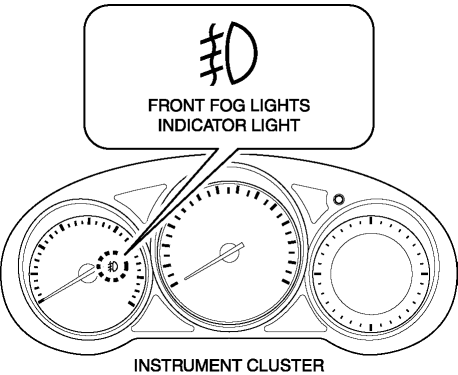
Notifies the user that the front fog lights are illuminated.
Function
-
Illuminates when the front fog light illumination conditions are met.
Construction
-
Displayed in the instrument cluster.

Operation
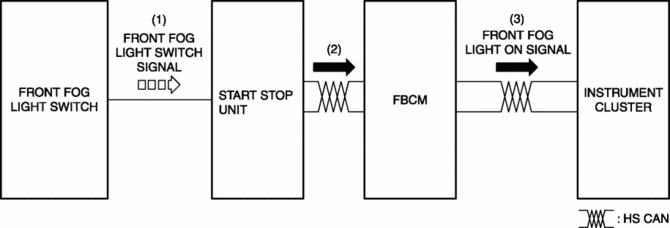
1. With the light switch in the TNS, HEAD, or HI position, a front fog light switch signal is input to the start stop unit when the front fog light switch is operated to the on position.
2. The start stop unit sends the front fog light switch signal to the front body control module (FBCM).
3. The front body control module (FBCM) sends the front fog light switch signal to the instrument cluster as a front fog light illumination signal.
4. The instrument cluster illuminates the front fog light indicator light when it receives the front fog light illumination signal.

Fail-safe
-
Function not equipped.
 Front Fog Light Removal/Installation
1. Disconnect the negative battery cable..
2. Remove the screws and bolt.
3. Pull up the front under cover No.1 and remove the mudguard screw shown in
the figure.
4. Disconnect the con ...
 Headlight Aiming
NOTE:
Perform headlight aiming if any of the following work is performed.
Front combination light replacement
Work that can affect vehicle height such as suspension rep ...
Other materials:
Evaporative Emission (Evap) Control System
Purpose, Outline
Prevents release of evaporative gas into the atmosphere.
The intake manifold vacuum introduces evaporative gas to the intake manifold
via the charcoal canister and the purge solenoid valve.
System Diagram
U.S.A. and CANADA
Except U.S.A. and CANADA
...
Fuse Block
Purpose
Fuses used by each system are grouped and housed together for smooth inspection
and replacement servicing.
Function
Fuses used by each system are grouped and housed together.
Construction
Installed inside the front side trim (LH).
Operation
Fu ...
Water Pump Removal/Installation
WARNING:
Never remove the cooling system cap or loosen the radiator drain plug while
the engine is running, or when the engine and radiator are hot. Scalding engine
coolant and steam may shoot out and cause serious injury. It may also damage
the engine and cooling system.
Tu ...
