Mazda CX-5 Service & Repair Manual: Liftgate Lower Trim Removal/Installation
1. Remove the following parts:
a. Liftgate upper trim.
b. Liftgate side trim.
c. Liftgate recess.
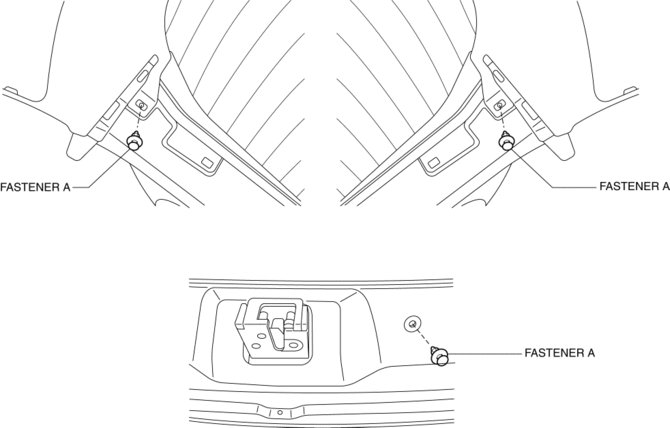
2. Remove fasteners A.

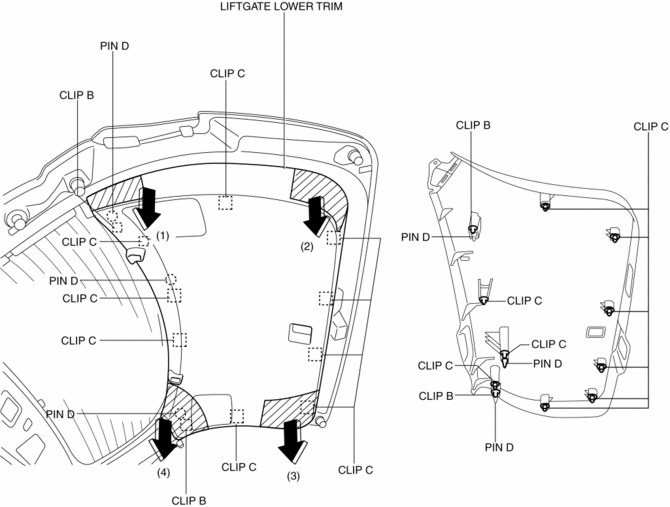
3. Take the shaded area shown in the figure, and pull the liftgate lower trim in the direction of the arrow in the order of (1), (2), (3), (4) and remove it while detaching clips B, clips C and pins D.

4. Install in the reverse order of removal.
 Liftgate Lock Striker Removal/Installation
1. Remove the trunk end trim..
2. Remove the bolts, then remove the liftgate lock striker.
3. Install in the reverse order of removal.
4. Adjust the liftgate.. ...
 Liftgate Opener Switch Inspection
1. Disconnect the negative battery cable..
2. Remove the following parts:
a. Liftgate upper trim.
b. Liftgate side trim.
c. Liftgate lower trim.
d. Liftgate garnish.
e. Liftgate opener swi ...
Other materials:
Front Fender Junction Installation [Panel Replacement]
Symbol Mark
Installation Procedure
1. When installing new parts, measure and adjust the body as necessary to conform
with standard dimensions.
2. Drill holes for the plug welding before installing the new parts.
3. After temporarily installing new parts, make sure the related parts fit p ...
Body And Accessories SST
49 L067 001
Reflector
49 L067 002
Tripod
49 L067 003
Plum-bob
49 L067 006
Plum-bob
—
—
...
Discharge Headlight Control Module Removal/Installation
WARNING:
Incorrect servicing of the discharge headlights could result in electrical
shock. Before servicing the discharge headlights, always refer to the service
warnings..
1. Disconnect the negative battery cable..
2. Remove the front bumper..
3. Disconnect the connector.
...
