Mazda CX-5 Service & Repair Manual: Floor Under Cover Removal/Installation
1. Lift up the vehicle.
2. Remove bolts A.
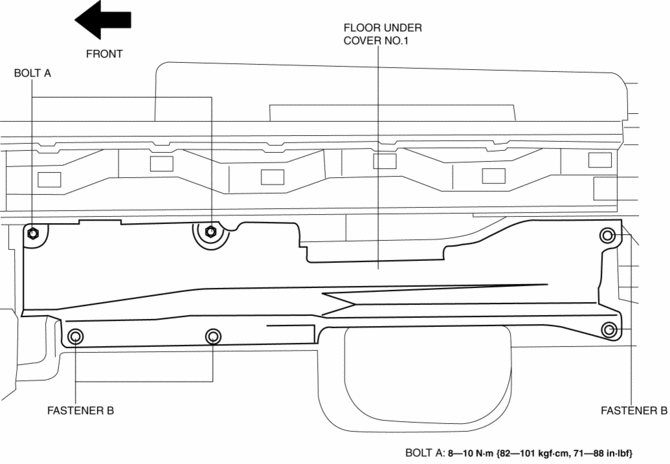
3. Remove fasteners B.
4. Remove the floor under cover No.1.
5. Remove nuts C.
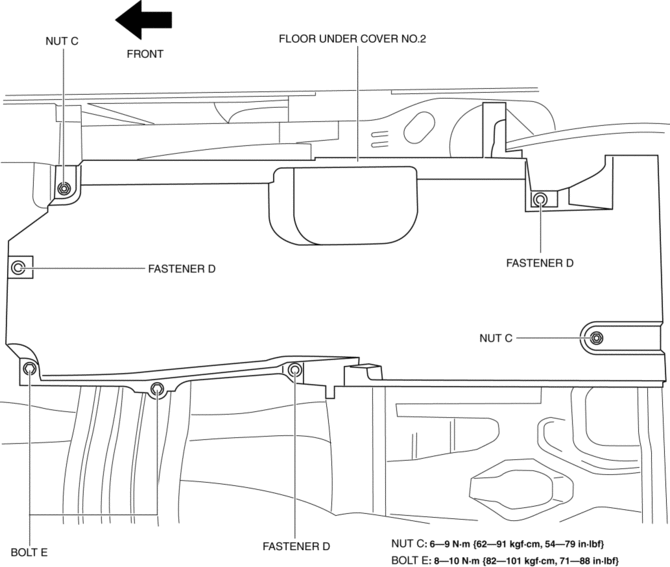
6. Remove fasteners D.
7. Remove bolts E.
8. Remove the floor under cover No.2.
9. Remove bolts F.
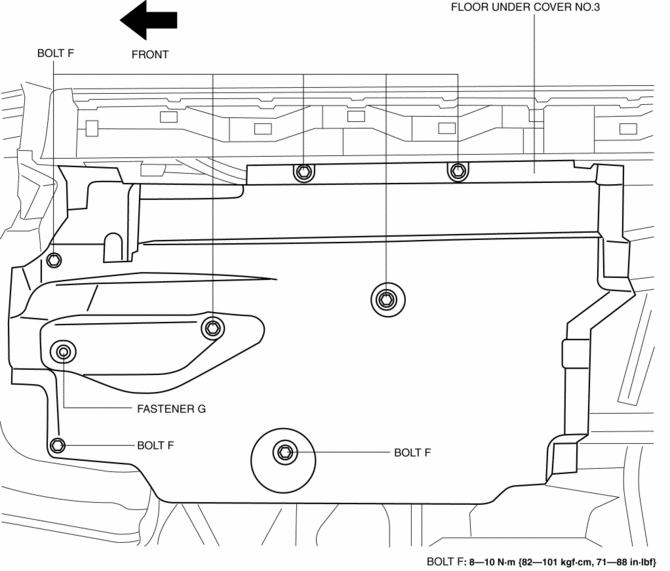
10. Remove the fastener G.
11. Remove the floor under cover No.3.
12. Install in the reverse order of removal.
 Floor Side Panel Removal [Panel Replacement]
Symbol Mark
Removal Procedure
1. Drill the 35 locations indicated by (A) shown in the figure, then remove the
floor side panel No.1.
2. Drill the 5 locations indicated by (B) shown in th ...
 Front Beltline Molding Removal/Installation
CAUTION:
Affix protective tape to the position shown in the figure.
1. Fully open the front door glass.
2. Insert a tape-wrapped flathead screwdriver and then detach clips A in the ...
Other materials:
Shroud Upper Reinforcement Installation [Panel Replacement]
Symbol Mark
Installation Procedure
1. When installing new parts, measure and adjust the body as necessary to conform
with standard dimensions.
2. Drill holes for the plug welding before installing the new parts.
3. After temporarily installing new parts, make sure the related parts fit p ...
Rear Differential Disassembly
WARNING:
The engine stand is equipped with a self-lock mechanism, however, if the
rear differential is in a tilted condition, the self-lock mechanism could become
inoperative. If the rear differential unexpectedly rotates it could cause injury,
therefore do not maintain the rear dif ...
Clutch Cover Inspection [C66 M R]
1. Remove the clutch cover..
2. Perform the following procedures to inspect the clutch cover.
If it exceeds the maximum specification, replace the clutch cover..
a. Measure the wear of the diaphragm spring fingers.
Clutch cover diaphragm spring fingers maximum depth
0.6 ...
