Mazda CX-5 Service & Repair Manual: Front Beltline Molding Removal/Installation
CAUTION:
-
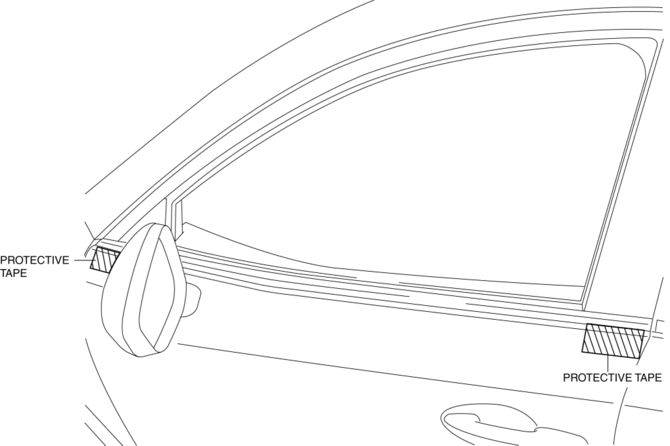
Affix protective tape to the position shown in the figure.
1. Fully open the front door glass.
2. Insert a tape-wrapped flathead screwdriver and then detach clips A in the direction of arrow (1) shown in the figure.
3. Pull up the front side of front beltline molding in the direction of arrow (2) shown in the figure.
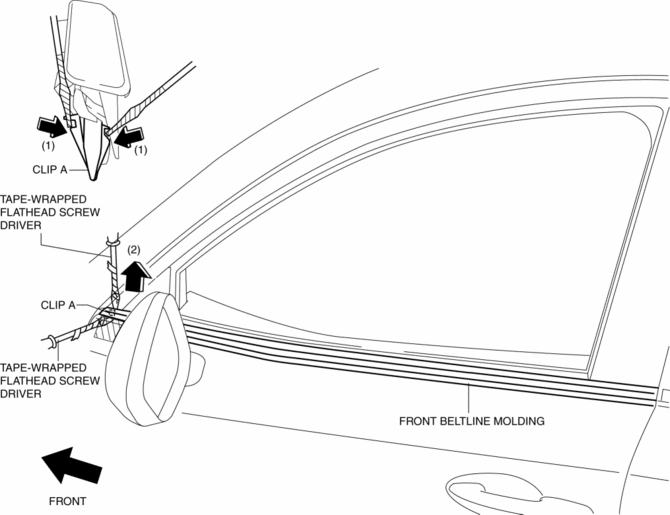
4. Insert a tape-wrapped flathead screwdriver and then detach clips A in the direction of arrow (3) shown in the figure.
5. Pull up the rear side of front beltline molding in the direction of arrow (4) shown in the figure.
6. Rotate the front beltline molding in the direction of the arrow (5) shown in the figure and remove it while detaching tabs B.

7. Install in the reverse order of removal.
 Floor Under Cover Removal/Installation
1. Lift up the vehicle.
2. Remove bolts A.
3. Remove fasteners B.
4. Remove the floor under cover No.1.
5. Remove nuts C.
6. Remove fasteners D.
7. Remove bolts E.
8. Remove the ...
 Front Bumper Disassembly/Assembly
1. Disassemble in the order indicated in the table.
1
Rivet
2
Grille bracket
3
Front bumper retainer
...
Other materials:
Rear Fender Lower Panel Installation [Panel Replacement]
Symbol Mark
Installation Procedure
1. When installing new parts, measure and adjust the body as necessary to conform
with standard dimensions.
2. After temporarily installing new parts, make sure the related parts fit properly.
3. Spot weld the 26 locations shown in the figure, then ins ...
Seat Track Position Sensor [Two Step Deployment Control System]
Purpose
The seat track position sensor detects the front and back positions of the
driver seat.
Function
The seat track position sensor converts the seat position into an electrical
signal and sends it to the SAS control module.
Construction
The seat track posi ...
Air Bag Module And Pre Tensioner Seat Belt Deployment Procedures [Two Step Deployment
Control System]
WARNING:
A live (undeployed) air bag module, pre-tensioner seat belt or lap pre-tensioner
seat belt may accidentally operate (deploy) when it is disposed of and cause
serious injury. Do not dispose of a live (undeployed) air bag module, pre-tensioner
seat belt or lap pre-tensioner s ...
