
Mazda CX-5 Service & Repair Manual: Engine Coolant Temperature (ECT) Sensor Removal/Installation
WARNING:
-
When the engine is hot, it can badly burn. Turn off the engine and wait until it is cool before removing the ECT sensor.
ECT Sensor No.1
1. Disconnect the negative battery cable..
2. Remove the plug hole plate..
3. Drain the engine coolant..
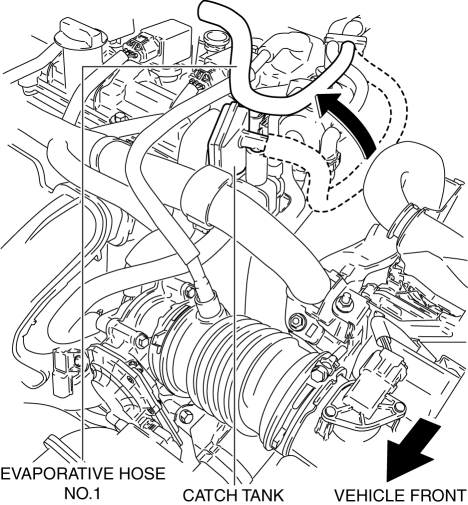
4. Pull out the evaporative hose No.1 from the catch tank and set it aside.
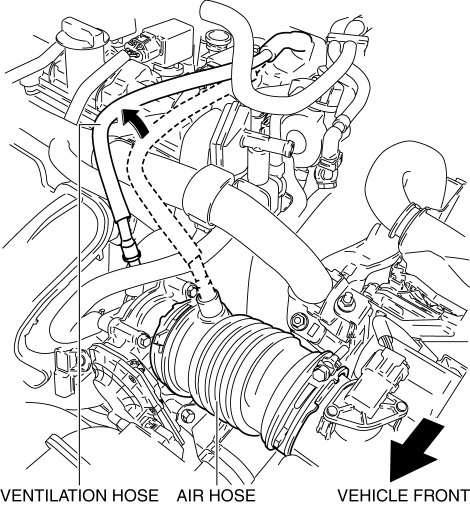
5. Pull out the ventilation hose from the air hose and set it aside.
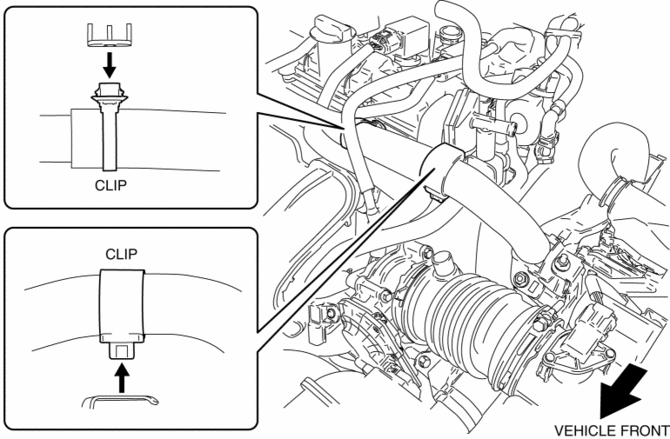
6. Remove the clip and loosen the wiring harness.
7. Disconnect the ECT sensor No.1 connector.
8. Remove the ECT sensor No.1 using the SST
.
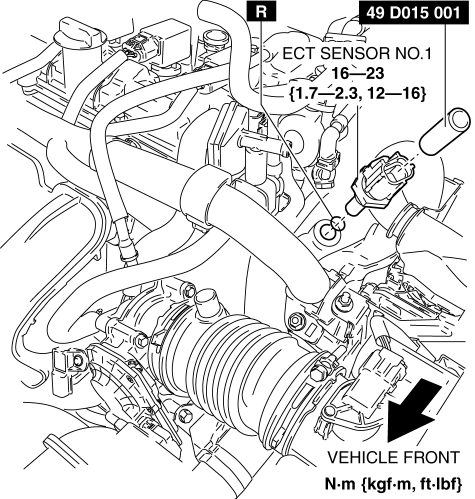
9. Install in the reverse order of removal.
10. Refill the engine coolant..
ECT Sensor No.2
1. Disconnect the negative battery cable..
2. Drain the engine coolant..
3. Lift up the bracket.
4. Disconnect the ECT sensor No.2 connector.
5. Remove the ECT sensor No.2 from the water pipe.
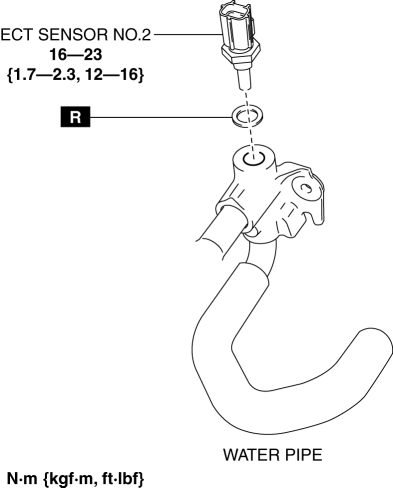
6. Install in the reverse order of removal.
7. Refill the engine coolant..
 Engine Coolant Temperature (ECT) Sensor Inspection
Resistance Inspection
WARNING:
When the engine is hot, it can badly burn. Turn off the engine and wait until
it is cool before removing the ECT sensor.
ECT Sensor No.1
1. Remove the ...
 Engine Coolant Temperature (ECT) Sensor
Purpose/Function
Detects the ECT as basic information for mainly determining the fuel injection
amount.
Detects the ECT and inputs it to the PCM as an ECT signal.
The ECT sen ...
Other materials:
Security Indicator Light
Purpose
Notifies the driver that the immobilizer system is operating.
Function
If a malfunction is detected in the immobilizer system, the DTC can be verified
by the flashing pattern of the security indicator light.
Construction
The security indicator light is bui ...
Positive Crankcase Ventilation (PCV) Valve Removal/Installation
1. Disconnect the negative battery cable..
2. Remove the intake manifold..
3. Remove in the order indicated in the table.
4. Install in the reverse order of removal.
1
PCV hose
2
Oil separator
3
Retainer
( ...
Rear Drive Shaft Inspection
1. Inspect each connecting part for looseness.
Tighten or replace parts if necessary.
2. Inspect the dust boot on the drive shaft for cracks, damage, leaking grease,
and looseness in the boot band.
3. Inspect the drive shaft for bends, cracks, and wear in the joints or splines. ...
