Mazda CX-5 Service & Repair Manual: Audio Amplifier Removal/Installation
1. Disconnect the negative battery cable..
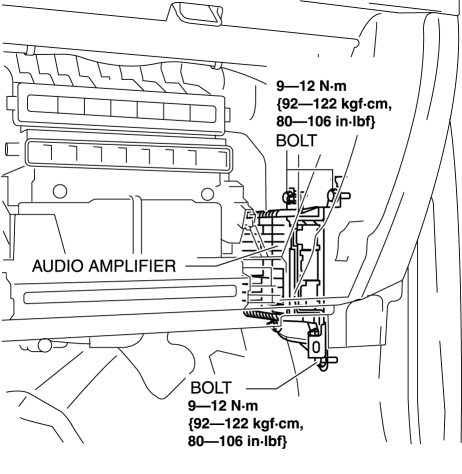
2. Remove the following parts:
a. Front scuff plate (RH).
b. Front side trim (RH).
3. Remove the bolts.
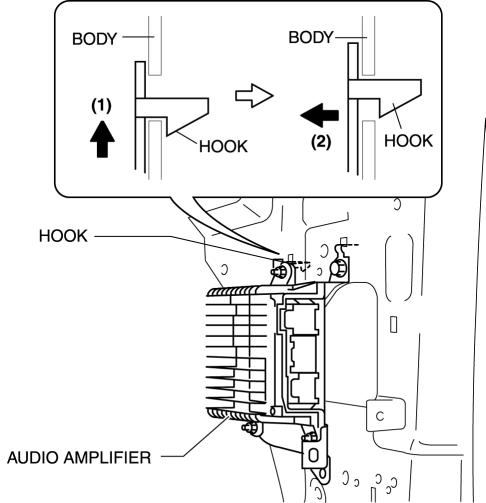
4. Lift up the audio amplifier in the direction of the arrow (1) shown in the figure, pull it in the direction of the arrow (2) shown in the figure, and pull out the audio amplifier hook from the body.
5. Disconnect the connectors.
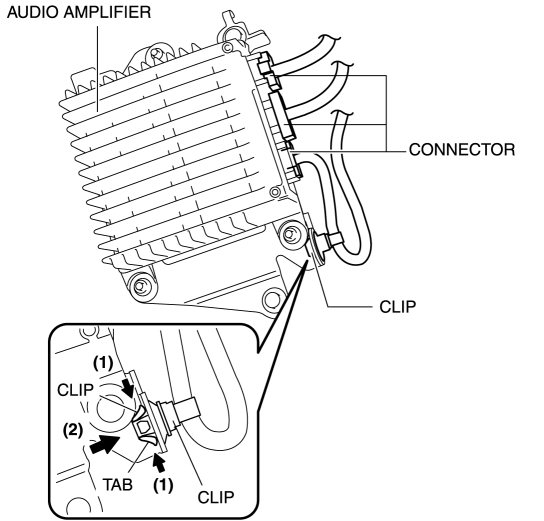
6. While pressing the clip tabs in the direction of the arrows (1) shown in the figure, press the clip in the direction of the arrow (2) to detach the clip tabs from the audio amplifier.
7. Detach the clip.
8. Remove the audio amplifier.
9. Install in the reverse order of removal.
 Audio Amplifier
Purpose, Function
The audio signal (analog voltage waveform) output from the unit equipped
on the vehicle is converted into a digital pulse. The converted digital pulse
signal is amplifie ...
 Audio Pilot®2 Microphone Removal/Installation
NOTE:
AudioPilot®2 is a registered trademark of Bose® Corporation.
1. Disconnect the negative battery cable..
2. Remove the following parts:
a. Driver-side front scuff plate.
b. ...
Other materials:
Seat Warmer Unit Inspection
WARNING:
Handling a side air bag improperly can accidentally operate (deploy) the
air bag, which may seriously injure you. Read the service warnings/cautions
in the Workshop Manual before handling the front seat (side air bag integrated)..
CAUTION:
If the slide bar is ope ...
Blind Spot Monitoring (Bsm) Control Module
Purpose
Controls the blind spot monitoring (BSM) system.
Function
The BSM control module emits microwaves to detect an oncoming vehicle's position
and speed information via the reflected microwaves.
The BSM system is controlled based on the detected vehicle positio ...
Cooling System
Outline
Passing water resistance is reduced by improvement of the engine coolant
passage shape.
Pump efficiency is improved by changing the water pump impeller to the closed
impeller.
Structural View
Flow Chart
Structure
Consists of the followi ...
