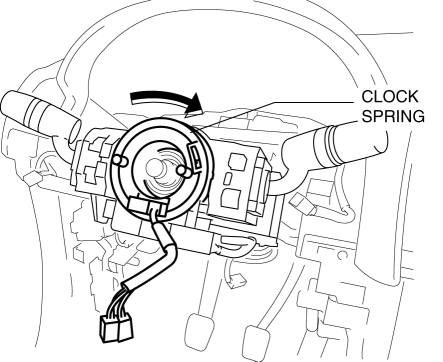
Mazda CX-5 Service & Repair Manual: Clock Spring Adjustment [Two Step Deployment Control System]
1. Set the front wheels straight ahead.
CAUTION:
-
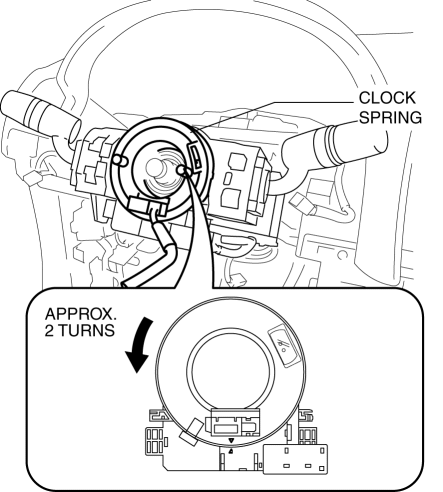
The clock spring will break if over?wound. Do not forcibly turn the clock spring.
2. Turn the clock spring clockwise until it stops.
3. Turn the clock spring counterclockwise approx. 2 turns
.
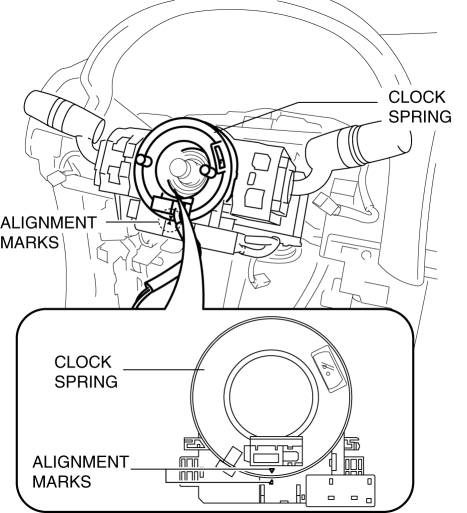
4. Align the mark on the clock spring with the mark on the outer housing.
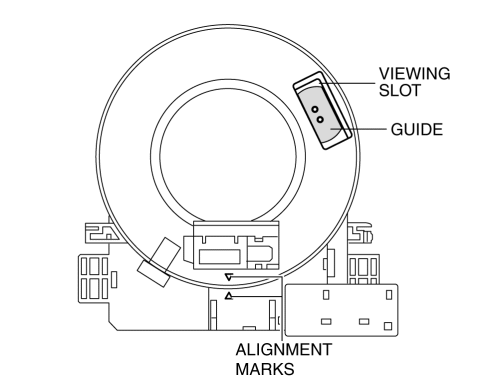
NOTE:
-
After adjusting the alignment marks, the guides can be verified in the viewing slots shown in the figure.
 Clock Spring Adjustment [Standard Deployment Control System]
1. Set the front wheels straight ahead.
CAUTION:
The clock spring will break if over?wound. Do not forcibly turn the clock
spring.
2. Turn the clock spring clockwise until it stops. ...
 Clock Spring Inspection [Standard Deployment Control System]
1. Disconnect the negative battery cable and wait for 1 min or more..
2. Remove the driver?side air bag module..
3. Remove the steering wheel..
4. Remove the column cover..
5. Remove the cloc ...
Other materials:
Front Seat Cushion Frame Removal/Installation
WARNING:
Handling a side air bag improperly can accidentally operate (deploy) the
air bag, which may seriously injure you. Read the service warnings/cautions
in the Workshop Manual before handling the front seat (side air bag integrated)..
If the sliding mechanisms on both side ...
Headlight High Beam Indicator Light
Purpose
Notifies the user that the headlights (HI) are illuminated.
Function
Illuminates when the headlight (HI) or parking illumination conditions are
met.
Construction
Displayed in the instrument cluster.
Operation
1. When the light switch is operat ...
Engine Coolant Temperature (ECT) Sensor Inspection
Resistance Inspection
WARNING:
When the engine is hot, it can badly burn. Turn off the engine and wait until
it is cool before removing the ECT sensor.
ECT Sensor No.1
1. Remove the ECT sensor No.1..
2. Place the ECT sensor No.1 in water with a thermometer, and heat the water
...
