Mazda CX-5 Service & Repair Manual: Speaker Grille Removal/Installation
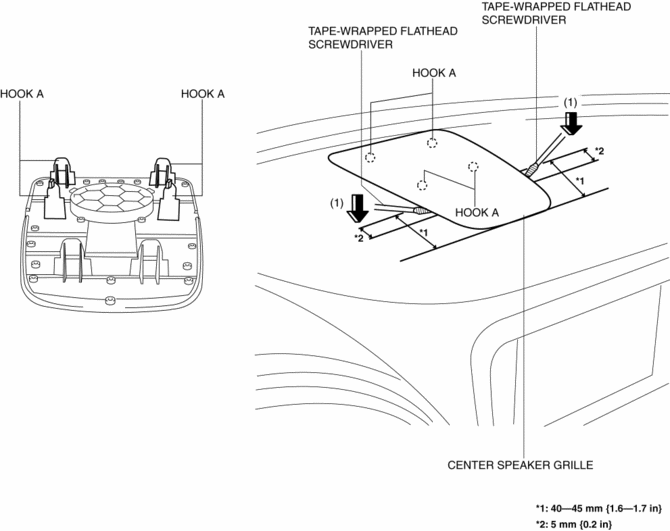
Center Speaker Grille
1. Insert a tape-wrapped flathead screwdriver into shown in the figure and remove hooks A in the direction of arrow (1).
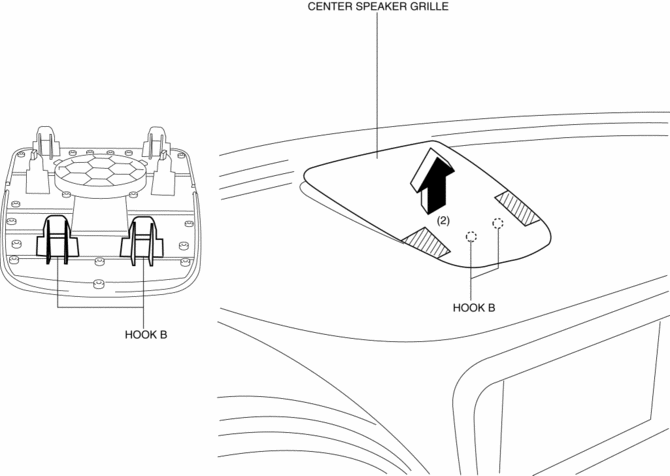
2. Take the shaded area shown in the figure, and remove the center speaker grille in the direction of arrow (2) while detaching hooks B.
3. Install in the reverse order of removal.
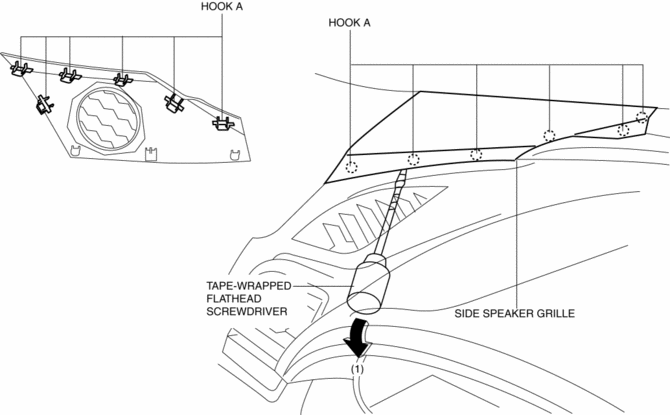
Side Speaker Grille
1. Insert a tape-wrapped flathead screwdriver into the service hole and remove hooks A in the direction of arrow (1).
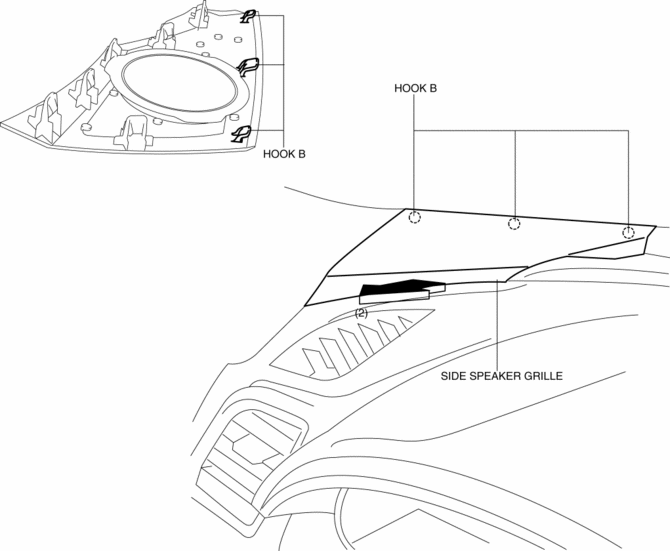
2. Pull the side speaker grille in the direction of the arrow (2), and remove the side speaker grille while detaching hooks B.
3. Install in the reverse order of removal.
 Side Step Molding Removal/Installation
1. Set the rear over fender aside..
2. Insert a tape-wrapped flathead screwdriver shown in the figure and remove
the clip A in the direction of arrow (1).
3. Slide the side step molding in t ...
 Splash Shield Removal/Installation
Front
Front splash shield No.1
1. Set the mudguard aside..
2. Remove fasteners A.
3. Remove the front splash shield No.1.
4. Install in the reverse order of removal.
Front splash shield ...
Other materials:
High Pressure Fuel Pump
Purpose, Function
Applies pressure to fuel sent from the fuel pump equipped on the fuel tank,
and then pumps it to the fuel delivery pipe.
Fuel is sectioned and pumped by the up and down movement of the piston caused
by the rotation of the cam installed to the rear end of the ex ...
Airflow Temperature Control [Full Auto Air Conditioner]
Purpose
The airflow temperature control changes the airflow temperature according
to the vehicle conditions.
Function
The air mix actuator is driven and the air mix door position is changed according
to the set temperature and the vehicle environment.
The climate co ...
Neutral Switch Removal/Installation [C66 M R]
1. Disconnect the negative battery cable..
2. Remove the air cleaner component. (ex: air cleaner, air hose).
3. Remove in the order indicated in the table.
4. Install in the reverse order of removal.
1
Neutral switch connector
2
Neutral ...
