Mazda CX-5 Service & Repair Manual: Set Plate Removal/Installation
1. Disconnect the negative battery cable..
2. Remove the seal board upper..
3. Remove the front bumper..
4. Remove fasteners A.
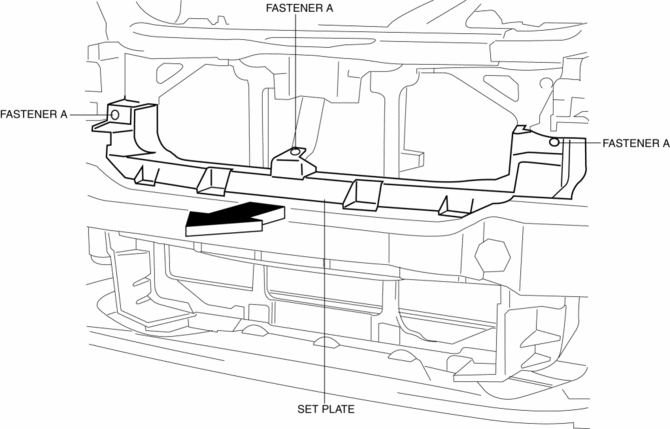
5. Remove the set plate in the direction of the arrow shown in the figure.
6. Install in the reverse order of removal.
 Seal Plate Removal/Installation
1. Disconnect the negative battery cable..
2. Remove the seal board upper..
3. Remove the front bumper..
4. Remove fasteners A.
5. Remove the seal plate in the direction of the arrow shown ...
 Side Garnish Installation
1. Install clip A.
Front
Rear
2. Install clip B to the vehicle from the front side. ...
Other materials:
Power Window Motor Inspection
Front driver side
1. Disconnect the negative battery cable..
2. Remove the inner garnish..
3. Remove the front door trim..
4. Disconnect the power window motor connector.
5. Apply battery positive voltage and connect the ground to power window motor
terminals E and F, and then inspect the ...
Engine Coolant Temperature (ECT) Sensor Inspection
Resistance Inspection
WARNING:
When the engine is hot, it can badly burn. Turn off the engine and wait until
it is cool before removing the ECT sensor.
ECT Sensor No.1
1. Remove the ECT sensor No.1..
2. Place the ECT sensor No.1 in water with a thermometer, and heat the water
...
Air Cleaner
Purpose, Function
Prevents engine internal damage caused by penetration of dust or foreign
material.
Construction
The air cleaner is installed in front of the battery.
The air cleaner consists of the air cleaner case, air cleaner cover, and
air cleaner element ...
