Mazda CX-5 Service & Repair Manual: Rear Wiper Arm And Blade Removal/Installation
Rear Wiper Arm
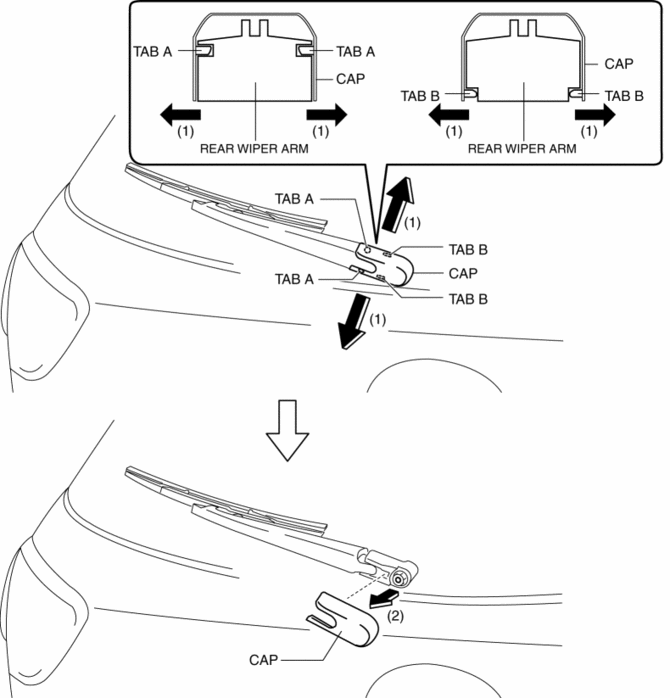
1. Pull the cap in the direction of the arrows (1) shown in the figure and remove it in the direction of the arrow (2) with tabs A, B released.
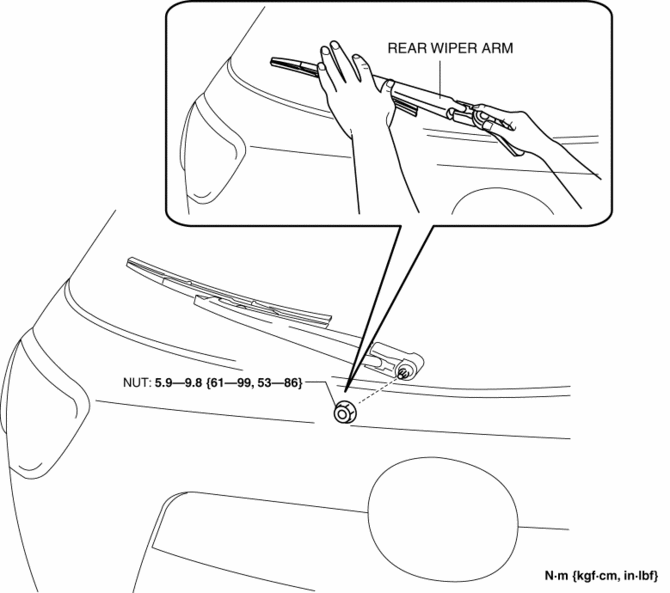
2. Remove the nut with the rear wiper arm and blade pressed.
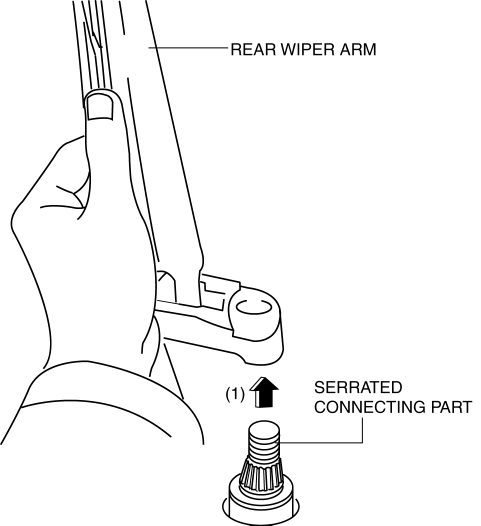
3. Raise the rear wiper arm and detach it from the serrated connecting part in the direction of the arrow (1) shown in the figure.
4. Install in the reverse order of removal..
5. Adjust the rear wiper arm and blade..
Rear Wiper Blade
1. Move the rear wiper blade in the direction of the arrow (1) shown in the figure to detach the rear wiper blade from the rear wiper arm.
2. Move the rear wiper blade in the direction of the arrow (2) and remove it from the rear wiper arm in the direction of the arrow (3).
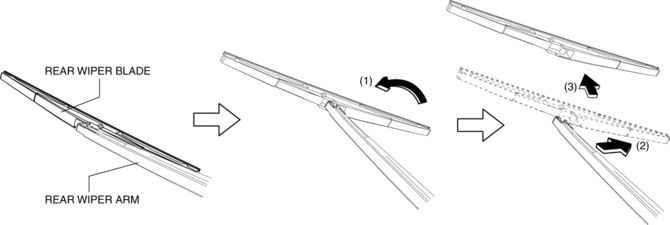
3. Install in the reverse order of removal.
Rear Wiper Arm Installation Note
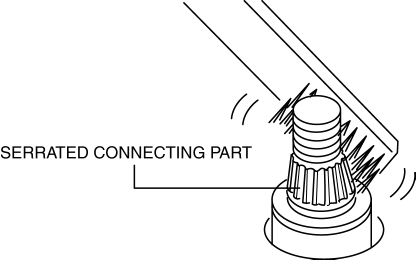
1. Clean the serrated connecting part with a wire brush before installing the rear wiper arm.
 Rear Wiper Arm And Blade Adjustment
1. Switch the ignition ON (engine off or on).
2. Operate the rear wiper.
3. Verify that the rear wiper is operating and stop the rear wiper.
4. Verify that the rear wiper is stopped at the auto- ...
 Rear Wiper Motor Inspection
1. Disconnect the negative battery cable..
2. Open the liftgate.
3. Remove the following parts:
a. Rear wiper arm and blade.
b. Liftgate upper trim.
c. Liftgate side trim.
d. Liftgate rece ...
Other materials:
Keyless Antenna [Advanced Keyless Entry System]
Purpose
Outputs a request signal and specifies the remote transmitter location.
Function
The keyless antenna outputs request signals to the inside and outside of
the vehicle based on the signals from the LF control unit.
Construction, Operation
The antennas for re ...
Air Bag System Service Warnings [Two Step Deployment Control System]
Air Bag Module Inspection
Inspecting an air bag module using a tester can operate (deploy) the air
bag module, which may cause serious injury. Do not use a tester to inspect an
air bag module. Always use the on-board diagnostic function to diagnose the
air bag module for malfunctions ...
Rear Heat Duct Removal/Installation
1. Disconnect the negative battery cable..
2. Remove the following parts:
a. Decoration panel.
b. Shift lever knob (MTX).
c. Front console box.
d. Shift panel.
e. Upper panel.
f. Rear console.
g. Side wall.
h. Front console.
i. Front scuff plate.
j. Front side trim.
k. Joint ...
