Mazda CX-5 Service & Repair Manual: Rear Power Window Regulator Removal/Installation
1. Fully lower the rear door glass.
2. Disconnect the negative battery cable..
3. Remove the following parts:
a. Rear door trim.
b. Rear door quarter glass.
c. Rear door speaker.
d. Rear power window motor.
e. Rear door glass.
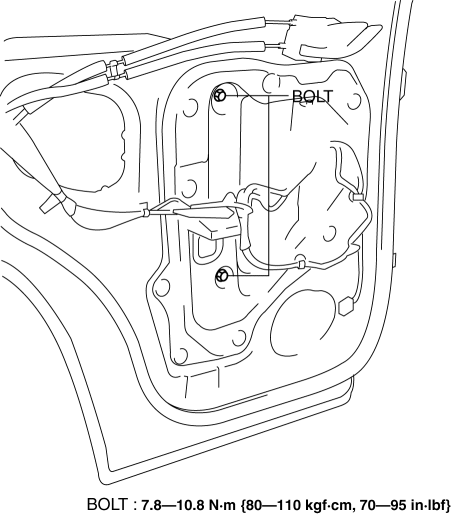
4. Remove bolts.
5. Insert a hand through the speaker installation hole, rotate the drum housing in the direction shown in the figure to detach tabs from the rear door module panel.
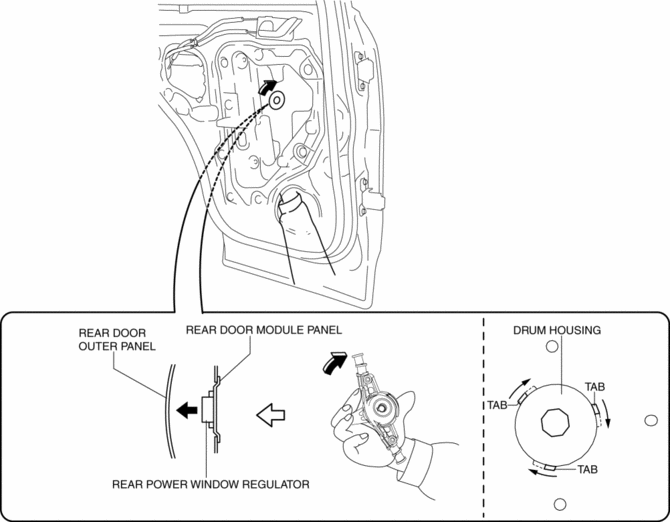
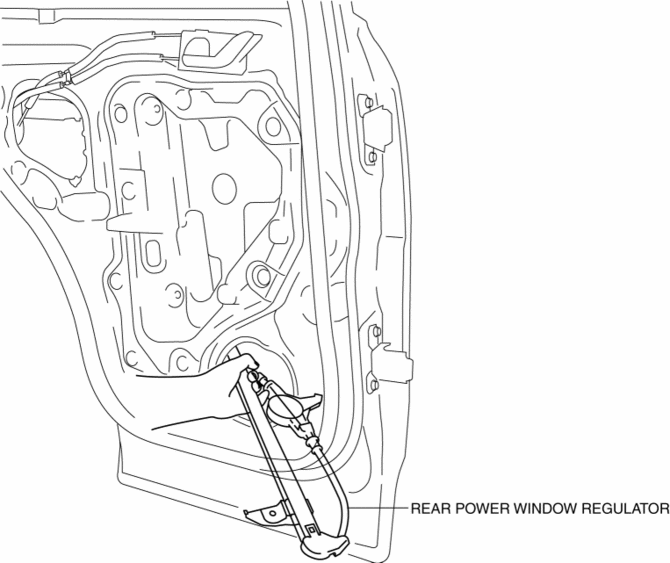
6. Remove the rear power window regulator through the speaker installation hole.
CAUTION:
-
When removing the rear power window regulator, the rear power window regulator may contact the rear door speaker installation hole, and the coating film of the rear door inner panel and the rear power window regulator could be damaged. Remove the rear power window regulator while verifying that the rear power window regulator and the rear door speaker installation hole do not contact each other.
7. Install in the reverse order of removal.
 Rear Door Quarter Glass Removal/Installation
1. Fully lower the rear door glass.
2. Disconnect the negative battery cable..
3. Remove the rear door trim..
4. Remove the rear door weather strip arrow (1) shown in the figure.
5. Remove ...
 Rear Window Defroster/Outer Mirror Heater
Outline
Fogging is cleared from the rear window and outer mirror glass by heating
of the filament.
Structural view
System wiring diagram
Vehicles with full-auto air conditioner s ...
Other materials:
Passenger Compartment Temperature Sensor Inspection [Full Auto Air Conditioner]
1. Measure the temperature around the passenger compartment temperature sensor
and measure the resistance between passenger compartment temperature sensor terminals
A and B.
If the characteristics of the passenger compartment temperature sensor are
not as shown in the graph, replace t ...
Main Silencer
Purpose, Function
Reduces the exhaust noise.
Construction
The main silencer is installed to the vehicle rear, under the trunk compartment.
2WD
AWD
The main silencer consists of the filters, holder, set plates and stiffener.
...
D Pillar Reinforcement (Lower) Installation [Panel Replacement]
Symbol Mark
Installation Procedure
1. When installing new parts, measure and adjust the body as necessary to conform
with standard dimensions.
2. Drill holes for the plug welding before installing the new parts.
3. After temporarily installing new parts, make sure the related parts fit p ...
