Mazda CX-5 Service & Repair Manual: Rear Console Removal/Installation
1. Disconnect the negative battery cable..
2. Remove the following parts:
a. Front console box.
b. Shift lever knob (MTX).
c. Shift panel.
d. Upper panel.
3. Remove screws A.
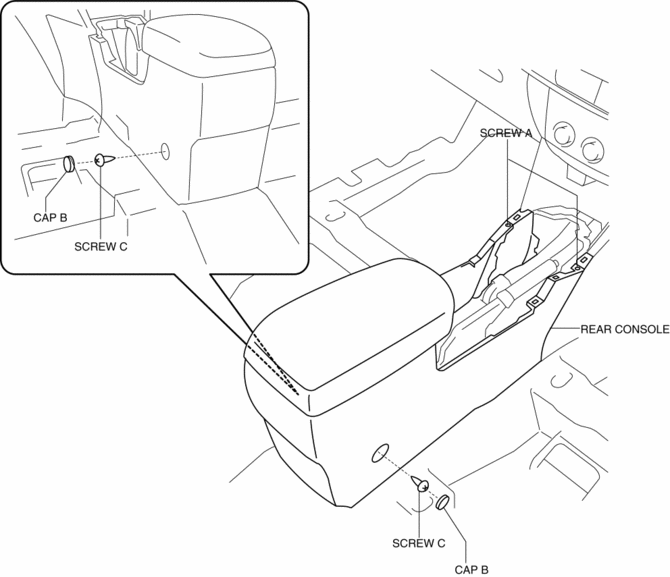
4. Remove caps B, then remove screws C.
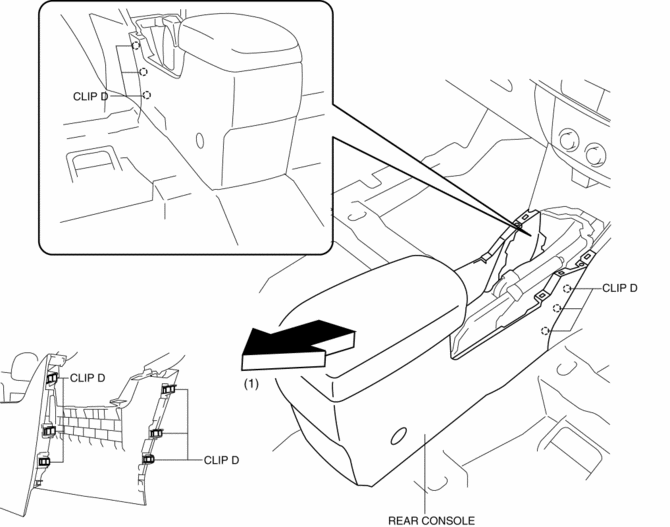
5. Pull the rear console in the direction of the arrow (1) while detaching clips D.
6. Disconnect the center accessory socket connector and auxiliary jack / USB port connector.
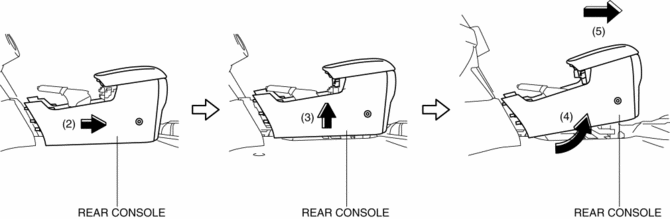
7. Remove the rear console in the direction of the arrow in the order of (2), (3), (4), (5) shown in the figure.
8. Install in the reverse order of removal.
 Rear Console Disassembly/Assembly
1. Disassemble in the order indicated in the table.
1
Screw A
2
Rear console bracket
3
Screw B
4
...
 Rear Seat Center Armrest Removal/Installation
1. Operate the push knob (RH) and lower the rear seat back (RH).
2. Remove screw A.
3. Remove the rear seat center armrest hinge cover (RH) in the direction of the
arrow (1) shown in the fig ...
Other materials:
Fuel Gauge Sender Unit Removal/Installation [Awd]
WARNING:
Always keep sparks and flames away from fuel when servicing the fuel system.
Fuel can be easily ignited which could cause serious injury or death, and damage
to equipment.
Fuel line spills and leakage from the pressurized fuel system are dangerous.
Fuel can ignite a ...
Door Ajar Warning Light
Purpose
The door-ajar warning light notifies the driver that any door or the liftgate
is open.
Function
When the instrument cluster receives any of the following signals sent from
the rear body control module (RBCM) via the CAN signal, the door-ajar warning
light illumin ...
Main Relay [Skyactiv G 2.0]
Purpose/Function
Supplies power to each part.
Supplies battery voltage to each part based on the signals from the PCM even
though the ignition is switched on or off.
Construction
Installed to the relay and fuse block.
Operation
After the contact poin ...
