Mazda CX-5 Service & Repair Manual: Push Button Start Removal/Installation
1. Disconnect the negative battery cable..
2. Remove the meter hood..
3. While pressing the push button start tab in the direction of the arrow (1) shown in the figure, push out the push button start in the direction of the arrow (2) shown in the figure to detach the push button start tab from the meter hood.
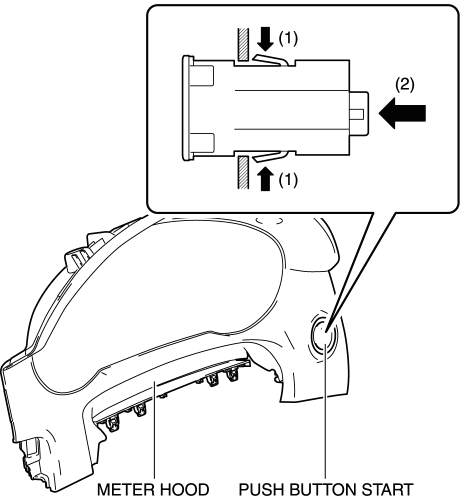
4. Remove the push button start.
5. Install in the reverse order of removal.
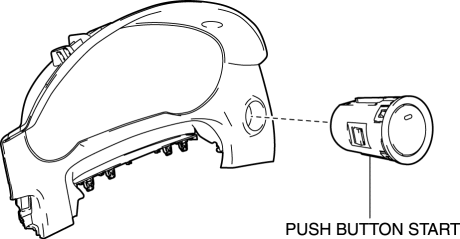
 Push Button Start Inspection
1. Remove the push button start..
2. Verify that the continuity between the push button start terminals is as indicated
in the table.
If the continuity can be verified as indicated ...
 Sae Standards
In accordance with new regulations, SAE (Society of Automotive Engineers)
standard names and abbreviations are now used in this manual. The table below
lists the names and abbreviations th ...
Other materials:
Bluetooth®
Bluetooth® Hands-Free
When a Bluetooth® device (mobile phone) is connected to the vehicle's Hands-Free
unit via radio wave transmission, a call can be made or received by pressing the
talk button, pick-up button, hang-up button, or voice command on the steering wheel,
or by operating t ...
Front Door Latch And Lock Actuator Removal/Installation
1. Perform the front door glass preparation..
2. Disconnect the negative battery cable..
3. Remove the following parts:
a. Inner garnish.
b. Front door trim.
c. Inner handle.
d. Front door glass.
e. Front door module panel.
f. Front door key cylinder.
4. Remove the door lock knob c ...
Neutral Switch Inspection
Continuity Inspection
1. Disconnect the negative battery cable..
2. Remove the neutral switch..
3. Inspect for continuity between neutral switch No.1 terminal A and B.
If not as specified, replace the neutral switch No.1..
Specification
Measured conditio ...
