Mazda CX-5 Service & Repair Manual: One Way Clutch [Fw6 A EL, Fw6 Ax EL]
Purpose/Function
-
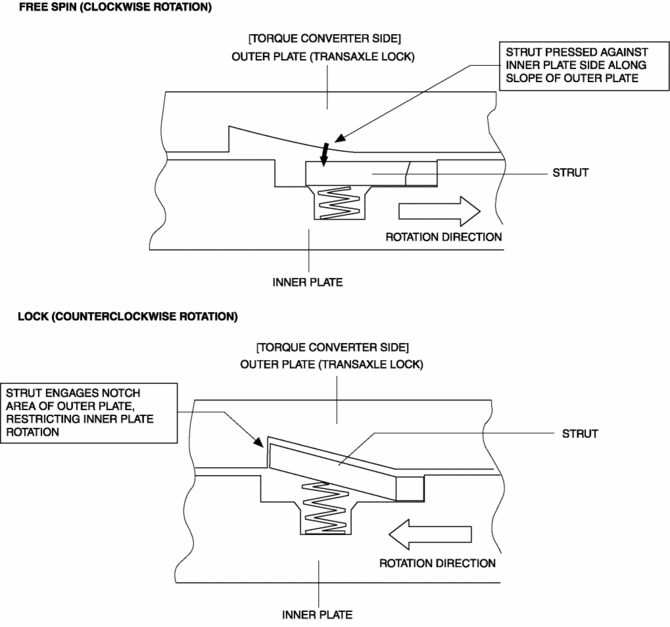
The one-way clutch operates in 1GR and suppresses the counterclockwise rotation of the front internal gear (as viewed from torque converter side).
Construction
-
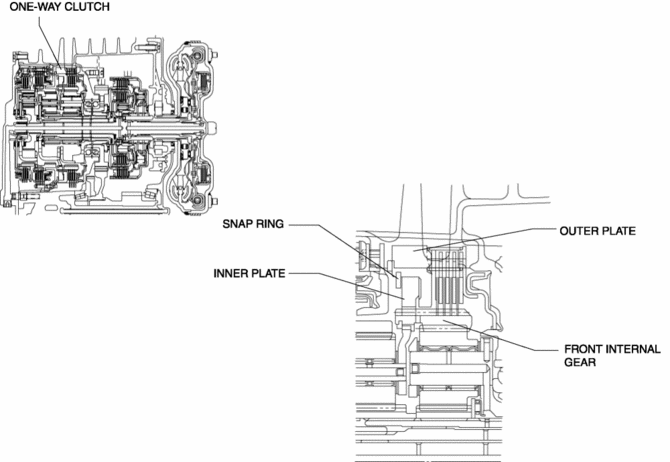
The one-way clutch consists of a mechanical diode-type one-way clutch, inner plate, and outer plate.
-
The inner plate for the one-way clutch is connected to the front internal gear and the outer plate is connected to the transaxle.
Operation
-
The connected inner plate also rotates clockwise during the clockwise rotation of the front internal gear. Therefore, the rotation is not regulated and the inner plate spins because the strut installed to the inner plate is pressed toward the inner plate along the slope of the outer plate.
-
The strut engages the notch of the outer plate by the rotation of the inner plate which also rotates counterclockwise during the counterclockwise rotation of the front internal gear. Due to this, the rotation of the inner plate is regulated and the rotation of the front internal gear is suppressed.
-
As a result, the front internal gear suppresses the counterclockwise rotation of the rear pinion gear via the rear planetary carrier.
 On/Off Solenoid [Fw6 A EL, Fw6 Ax EL]
Purpose/Function
The on/off solenoid performs switching of the shift valve in the control
valve body according to the vehicle conditions.
Construction
The on/off solenoid is ins ...
 Parking Mechanism [Fw6 A EL, Fw6 Ax EL]
Purpose/Function
The parking mechanism locks the output gear when the selector lever is shifted
to the P position which locks the driving wheels against rotation to prevent
coasting when ...
Other materials:
Air Intake Actuator [Full Auto Air Conditioner]
Purpose
The air intake actuator moves the air intake door in the blower unit to switch
the air intake port.
Function
The air intake actuator drives the motor based on the signal from the climate
control unit and moves the air intake door to the FRESH or REC position.
...
Fuel Injection Control System
Outline
Performs optimum fuel injection according to engine operation conditions.
The PCM determines the engine operation conditions based on the signals from
each input device and drives the fuel injectors at the optimal fuel injection
time (fuel injection amount) and the fuel ...
Air Intake Actuator [Full Auto Air Conditioner]
Purpose
The air intake actuator moves the air intake door in the blower unit to switch
the air intake port.
Function
The air intake actuator drives the motor based on the signal from the climate
control unit and moves the air intake door to the FRESH or REC position.
...
