Mazda CX-5 Service & Repair Manual: Hood Removal/Installation
WARNING:
-
Removing the hood without supporting it could cause the hood to fall and cause serious injury. Always perform the procedure with at least another person to prevent the hood from falling.
1. Disconnect the negative battery cable..
2. Remove the following parts:
a. Front over fender.
b. Front bumper.
c. Front combination light.
d. Front fender panel.
3. Loosen bolts A.
4. Remove bolts B.
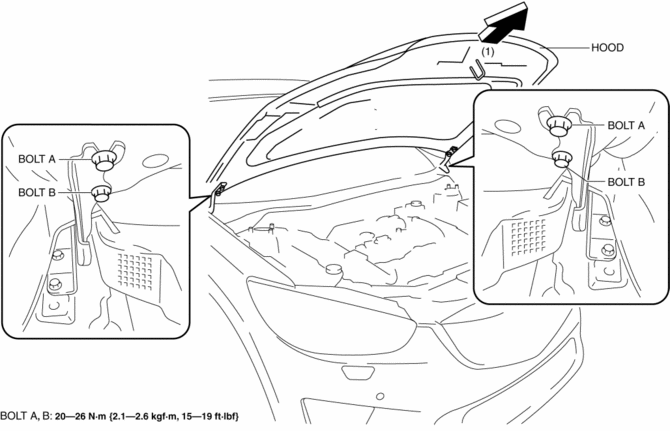
5. Remove the hood in the direction of the arrow(1) shown in the figure.
6. Remove bolts C.
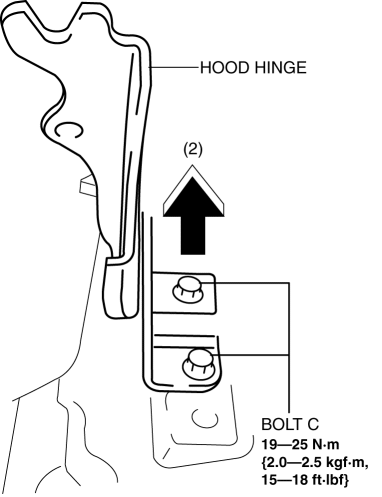
7. Remove the hood hinge in the direction of the arrow (2) shown in the figure.
8. Install in the reverse order of removal.
9. Perform the hood adjustment..
 Hood Release Cable Removal/Installation
1. Disconnect the negative battery cable..
2. Remove the following parts:
a. Front bumper.
b. Front combination light (LH).
c. Front mudguard (LH).
d. Hood release lever.
3. Disconnect the ...
 Liftgate Adjustment
1. Measure the gap and height difference between the liftgate and the body.
2. Loosen the liftgate hinge installation bolts and adjust the liftgate.
Standard clearance
a: 5.2?7.2 mm { ...
Other materials:
Rear Seat Back Trim Removal/Installation
6:4 Split Type
1. Remove the trunk board..
2. Remove the rear seat back..
3. Remove the headrest.
4. Remove the rear seat back frame..
5. Remove the C rings in the order of (1), (2), (3), and (4) shown in the figure,
and remove the rear seat back trim from the rear seat back pad.
CA ...
Instrument Cluster Configuration (Using As Built Data)
NOTE:
If the configuration is performed using As-Built data, the set value of the
personalization function is reset to the initial value (condition when shipped
from factory). Verify the set value with the customer and perform the personalization
function setting after performing th ...
Power Outer Mirror
Outline
The power outer mirror adjusts the outer mirror glass position up/down and
left/right using the up/down adjustment motor and, left/right adjustment motor.
The up/down adjustment motor and, left/right adjustment motor turns clockwise
(down/right direction) or counterclock ...
