Mazda CX-5 Service & Repair Manual: Front Power Window Regulator Removal/Installation
1. Perform the front door glass preparation..
2. Disconnect the negative battery cable..
3. Remove the following parts:
a. Inner garnish.
b. Front door trim.
c. Front door glass.
d. Front door speaker.
e. Front power window motor.
4. Remove bolt A.
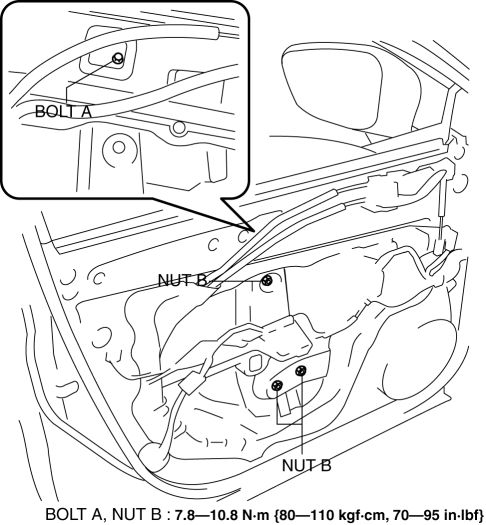
5. Remove nuts B.
6. Insert a hand through the speaker installation hole, rotate the drum housing in the direction shown in the figure to detach tabs from the front door module panel.
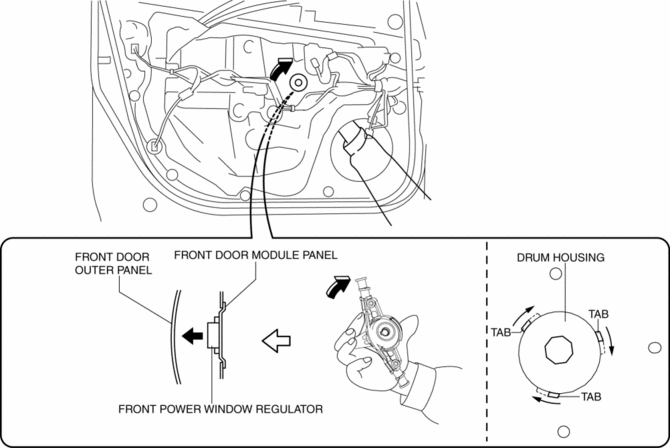
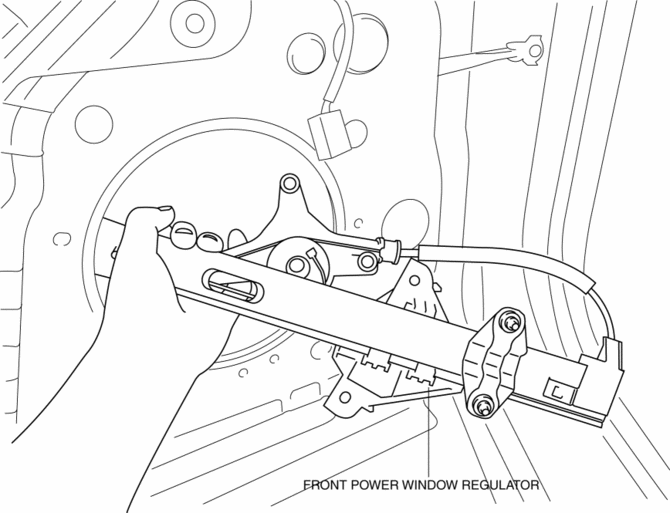
7. Remove the front power window regulator through the speaker installation hole.
CAUTION:
-
When removing the front power window regulator, the front power window regulator may contact the front door speaker installation hole, and the coating film of the front door inner panel and the front power window regulator could be damaged. Remove the front power window regulator while verifying that the front power window regulator and the front door speaker installation hole do not contact each other.
8. Install in the reverse order of removal.
 Front Door Glass Removal/Installation
1. Perform the front door glass preparation..
NOTE:
Before removing the front door glass, the removal procedure for the front
door glass installation bolt can be facilitated by adjusting ...
 Glass Antenna
Purpose, Function
The RDS (Radio Data System) converts radio broadcast waves to electric signals
and sends the signals to the audio unit.
Construction
An antenna with excellent ...
Other materials:
Wiper Blades
CAUTION
●Hot waxes applied by automatic car washers
have been known to affect the wiper's ability to clean windows.
● To prevent damage to the wiper blades,
do not use gasoline, kerosene, paint thinner, or other solvents on or near them.
● When the wiper lever is in the ...
Odometer/Tripmeter
Purpose
The odometer/tripmeter notifies the user of the total travel distance or
the traveled distance over a specific interval.
Function
The instrument cluster calculates the traveled distance based on the traveled
distance signal from the PCM and displays it.
The ...
Front Drive Shaft
Purpose, Function
A bell joint has been adopted for the wheel-side constant velocity joint,
reducing vibration and noise.
A tripod joint have been adopted for the differential side constant velocity
joint to reduce booming noise during high-speed driving and vibration when idlin ...
