Mazda CX-5 Service & Repair Manual: Front Map Light
Purpose
-
The front map lights shine light at the front of the vehicle interior.
Function
-
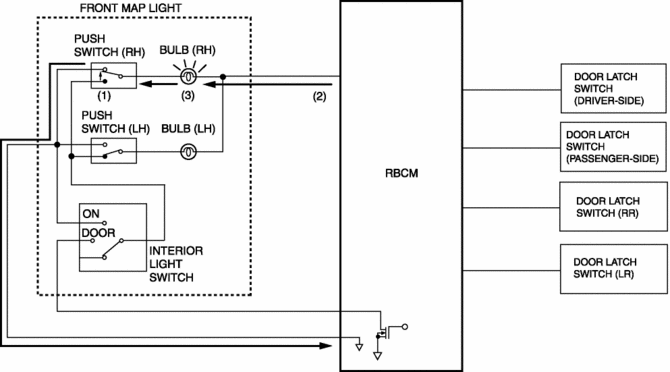
The front map lights illuminate when the map light switch is turned on.
-
Illuminates according to the lock condition of the driver's door and open/close conditions of the doors under the rear body control module (RBCM) control when the interior light switch is in the DOOR position.
Construction
-
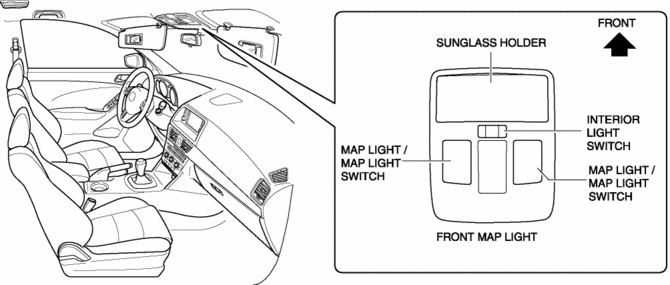
Map lights which are integrated with the sunglass holder have been adopted.
Operation
Map light switch operation
1. Turn the map light switch on.
2. The battery current flows to the map light bulb from the rear body control module (RBCM).
3. The map light illuminates.
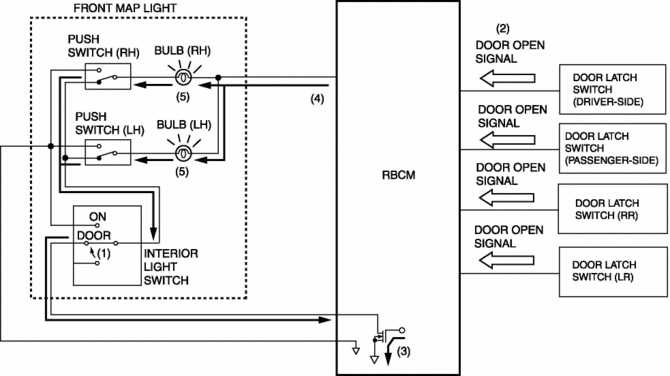
Interior light switch operation
1. Interior light switch is in DOOR position.
2. When any door is opened, the door open signal is input to the rear body control module (RBCM).
3. When the rear body control module (RBCM) receives the door-open signal, it turns on the transistor.
4. When the transistor turns on, the battery current flows to the map light bulb from the rear body control module (RBCM).
5. The map light illuminates.
NOTE:
-
When the interior light switch is in the DOOR position, the map light illumination on/off timing is controlled by the interior light control system. For details, refer to the interior light control system..
Fail-safe
-
Function not equipped.
 Interior
...
 Interior Lighting System
Outline
A room light control system has been adopted in which illumination time and
illumination level of the interior lights change.
The rear body control module (RBCM) performs roo ...
Other materials:
Transmission/Transaxle SST
1: Mazda SST number
2: Global SST number
Example
1:49 UN30 3009
2:303-009
Crankshaft damper remover
Clutch [C66M-R]
1:49 E011 1A0
2: –
Ring gear brake set
1:49 SE01 310A
2: –
Clutch disc center ...
Non Return Valve Inspection
WARNING:
Fuel is very flammable liquid. If fuel spills or leaks from the pressurized
fuel system, it will cause serious injury or death and facility breakage. Fuel
can also irritate skin and eyes. To prevent this, always complete the “Fuel
Line Safety Procedure”, while referring ...
Cruise Control
Cruise Control
With cruise control, you can set and automatically maintain any speed of more
than about 25 km/h (16 mph).
WARNING
Do not use the cruise control under the following conditions: Using the cruise
control under the following conditions is dangerous and could result in loss of
ve ...
