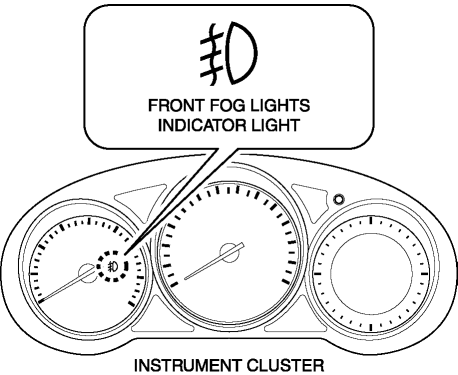
Mazda CX-5 Service & Repair Manual: Front Fog Lights Indicator Light
Purpose
-
Notifies the user that the front fog lights are illuminated.
Function
-
Illuminates when the front fog light illumination conditions are met.
Construction
-
Displayed in the instrument cluster.
Operation
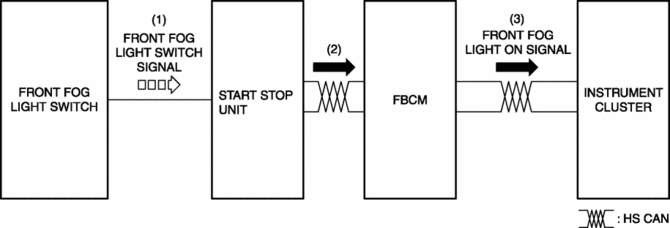
1. With the light switch in the TNS, HEAD, or HI position, a front fog light switch signal is input to the start stop unit when the front fog light switch is operated to the on position.
2. The start stop unit sends the front fog light switch signal to the front body control module (FBCM).
3. The front body control module (FBCM) sends the front fog light switch signal to the instrument cluster as a front fog light illumination signal.
4. The instrument cluster illuminates the front fog light indicator light when it receives the front fog light illumination signal.
Fail-safe
-
Function not equipped.
 Engine Oil Pressure Warning Light
Purpose
The engine oil pressure warning light warns the driver that the engine oil
level is insufficient.
Function
When the instrument cluster receives the engine oil pressure w ...
 Gear Position Indicator [Fw6 A EL, Fw6 Ax EL]
Purpose/Function
The gear position indicator illuminates while under manual shift control
and displays the gear number while driving.
Construction
The gear position indicator is ...
Other materials:
Rear Center Seat Belt Removal/Installation
CAUTION:
The ELR (emergency locking retractor) has a spring that will unwind if the
retractor cover is removed. The spring cannot be rewound by hand. If this occurs,
the ELR will not work properly. Therefore, do not disassemble the retractor.
1. Press the release switch, then dis ...
Front Side Frame (Partial Cutting) Installation [Panel Replacement]
Symbol Mark
Installation Procedure
CAUTION:
The cut and joint area indicates the maximum size range of the installation
position.
1. Drill holes for the plug welding before installing the new parts.
2. When installing the new parts, trial-fit new and existing parts, and then ...
Starter Cut Off Control [Skyactiv G 2.0]
Outline
The PCM controls energization to the starter relay according to an immobilizer
system request to improve security.
While not in P or N position, the starter relay energization by the ignition
key is inhibited. (ATX)
While not in neutral, the starter relay energiz ...
