Mazda CX-5 Service & Repair Manual: Engine SST
1: Mazda SST number
2: Global SST number
Example
|
1:49 UN20 5072 2:205–072 Holder |
|
|
1:– 2:AKS042808 Adapter |
|
1: 49 UN20 5072 2: 205–072 Holder |
|
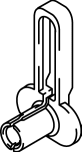
1: 49 B011 105 2: – Adapter |
|
|
1: 49 E033 101 2: – Dust cover installer |
|
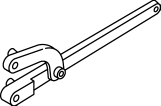
1: 49 UN30 3050 2: 303–050 Engine lifting bracket |
|
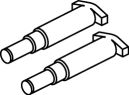
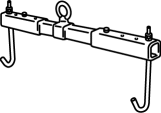
1: 49 C017 5A0 2: – Engine support set |
|
|
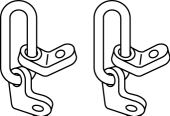
1: 49 L017 5A0 2: – Support hanger |
|
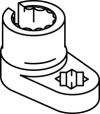
1: 49 G028 205 2: – Oil seal installer |
|
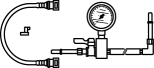
1: 49 D019 908 2: – Gauge (Part of 49 D019 9A2) |
|
|
1: 49 D019 909 2: – Hose (Part of 49 D019 9A2) |
|
1: 49 D019 910 2: – Adapter (Part of 49 D019 9A2) |
|
1: 49 D019 911 2: – Adapter (Part of 49 D019 9A2) |
|
|
1: 49 N013 103A 2: – Remover (Part of 49 N013 1A0D) |
|
1: 49 N013 1A0D 2: – Fuel pressure gauge set |
|
1: 49 D013 1A0 2: – Injector seal installer set |
|
|
1:49 D015 001 2:– Box wrench |
|
1:49 L018 001 2:– O2 sensor wrench |
|
— |
|


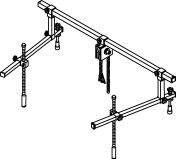


 Engine Removal/Installation
WARNING:
A hot engine can cause severe burns. Turn off the engine and wait until it
is cool before servicing.
Fuel vapor is hazardous. It can very easily ignite, causing serious inj ...
 Engine Transaxle Integration Control [Fw6 A EL, Fw6 Ax EL]
Outline
The TCM controls engine output torque and reduces transaxle output shaft
torque fluctuation during auto shifting, and reduces shock occurring from the
vehicle during shifting.
...
Other materials:
Automatic Transaxle Controls
Various Lockouts:
NOTE
The Sport AT has an option that is not included in the traditional automatic
transaxle giving the driver the option of selecting each gear instead of leaving
it to the transaxle to shift gears. Even if you intend to use the automatic transaxle
functions as a tradit ...
Front Seat Removal/Installation
WARNING:
Handling a side air bag improperly can accidentally operate (deploy) the
air bag, which may seriously injure you. Read the service warnings/cautions
in the Workshop Manual before handling the front seat (side air bag integrated)..
If the sliding mechanisms on both side ...
Differential Oil Temperature Sensor
Purpose, Function
The differential oil temperature sensor detects the rear differential oil
temperature based on the resistance of the thermistor, and inputs it to the
AWD CM.
Construction
The differential oil temperature sensor is installed in the rear differential
carr ...
