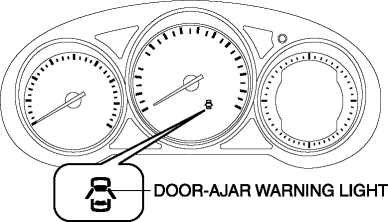
Mazda CX-5 Service & Repair Manual: Door Ajar Warning Light
Purpose
-
The door-ajar warning light notifies the driver that any door or the liftgate is open.
Function
-
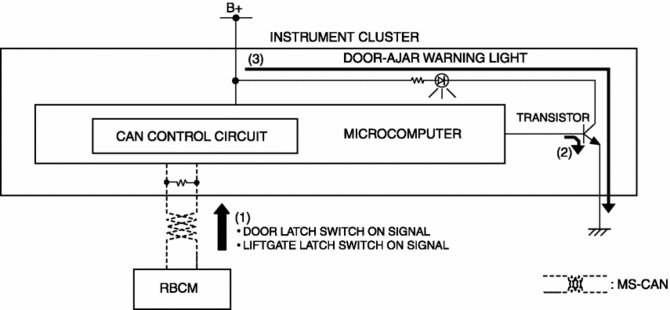
When the instrument cluster receives any of the following signals sent from the rear body control module (RBCM) via the CAN signal, the door-ajar warning light illuminates.
-
Door latch switch ON signal (door open)
-
Liftgate latch switch ON signal (liftgate open)
Construction
-
The instrument cluster controls illumination on/off of the door-ajar warning light using the instrument cluster microcomputer based on the door latch or liftgate latch position signal from the rear body control module (RBCM).
-
The door-ajar warning light is set in the instrument cluster.
Operation
1. The instrument cluster receives (1) the door latch switch ON signal or liftgate latch switch ON signal from the rear body control module (RBCM).
2. The instrument cluster microcomputer turns the transistor on (2) based on each signal.
3. When the transistor turns on, a ground circuit with the door-ajar warning light is established and the door-ajar warning light illuminates (3).
Fail-safe
-
Function not equipped.
 Cruise Set Indicator Light (Green)
Purpose/Function
Illuminates during the cruise control system operation to inform the driver
that the cruise control system is operating.
Construction
Built into the instrument ...
 Engine Oil Pressure Warning Light
Purpose
The engine oil pressure warning light warns the driver that the engine oil
level is insufficient.
Function
When the instrument cluster receives the engine oil pressure w ...
Other materials:
Side Sill Panel Installation [Panel Replacement]
Symbol Mark
Installation Procedure
Side sill (front side)
1. When installing new parts, measure and adjust the body as necessary to conform
with standard dimensions.
2. Drill holes for the plug welding before installing the new parts.
3. After temporarily installing new parts, make sure ...
Rear Drive Shaft Disassembly/Assembly
1. Disassemble in the order indicated in the table.
2. Assemble in the reverse order of disassembly.
1
Boot band (differential side)
(See Boot Band (Differential Side) Disassembly Note.)
(See Boot Band (Differential Side) Assembly Note.)
2
...
Front Brake (Disc) Inspection
Brake Judder Repair Hints
Description
1. Brake judder concern has the following 3 characteristics:
Steering wheel vibration
1. The steering wheel vibrates in the rotation direction. This characteristic
is most noticeable when applying brakes at a vehicle speed of 100—140 km/h {62.2—86.9
...
