Mazda CX-5 Service & Repair Manual: Decoration Panel Removal/Installation
CAUTION:
-
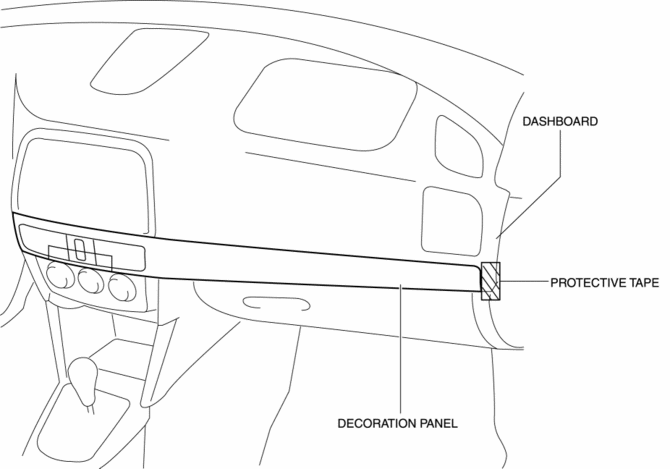
Affix protective tape to the position shown in the figure.
1. Disconnect the negative battery cable..
2. Open the glove compartment.
3. Insert a tape-wrapped flathead screwdriver in the position indicated by the arrow (1) in the figure and detach clip A.
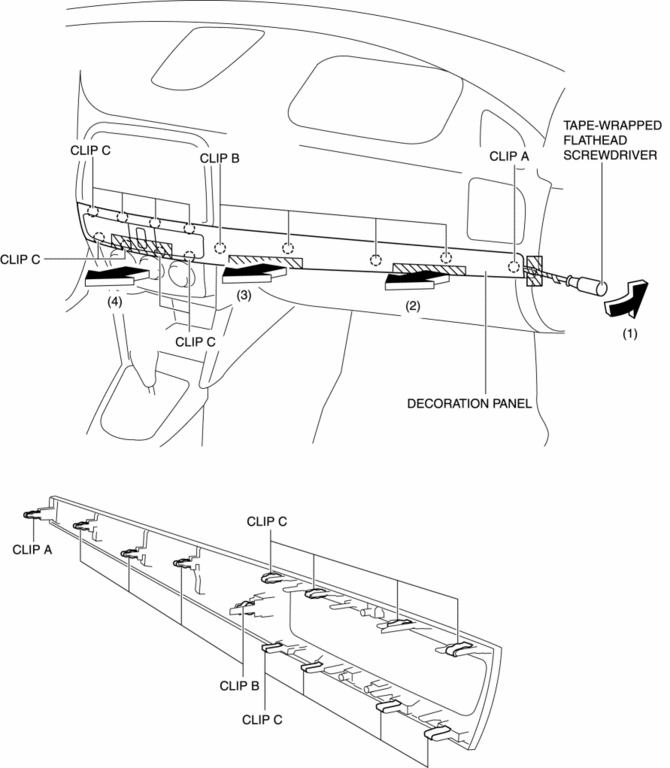
4. Take the shaded area shown in the figure, and remove the decoration panel in the direction of the arrow in the order of (2), (3), (4) while detaching clips B, clips C.
5. Disconnect the hazard switch connector.
6. Install in the reverse order of removal.
 Dashboard Under Cover Removal/Installation
1. Detach hooks A in the direction of arrow (1) shown in the figure.
2. Pull the dashboard under cover in the direction of arrow (2) while detaching
pins B.
3. Remove the dashboard under cov ...
 Floor Covering Removal/Installation
1. Disconnect the negative battery cable..
2. Remove the following parts:
a. Front scuff plate.
b. Front side trim.
c. Rear scuff plate.
d. B-pillar lower trim.
e. Rear seat cushion.
f. ...
Other materials:
Differential Oil Temperature Sensor
Purpose, Function
The differential oil temperature sensor detects the rear differential oil
temperature based on the resistance of the thermistor, and inputs it to the
AWD CM.
Construction
The differential oil temperature sensor is installed in the rear differential
carr ...
Throttle Position (TP) Sensor Inspection
Voltage Inspection
CAUTION:
The inspection cannot be performed with this method correctly if there is
a malfunction of the APP sensor or throttle valve actuator. Verify that no DTCs
related to the APP sensor or throttle valve actuator are stored before the inspection.
NOTE:
...
Rear Drive Shaft Inspection
1. Inspect each connecting part for looseness.
Tighten or replace parts if necessary.
2. Inspect the dust boot on the drive shaft for cracks, damage, leaking grease,
and looseness in the boot band.
3. Inspect the drive shaft for bends, cracks, and wear in the joints or splines. ...
